By: CS2103T-F12-03 Since: Oct 2019 Licence: MIT
1. Introduction
TagLine is for those who prefer to use a desktop app for managing notes. More importantly, TagLine is optimized for those who prefer to work with a Command Line Interface (CLI) while still having the benefits of a Graphical User Interface (GUI). If you can type fast, TagLine can streamline your note management much faster than traditional GUI apps. Interested? This User Guide will provide all you need to know to use TagLine, jump to the Quick Start to get started. Enjoy!
2. Quick Start
-
Ensure that you have Java 11 or above installed.
-
Download the latest TagLine.jar here.
-
Move the file to the folder you want to use as the home folder for TagLine. You are recommended to create a new folder for TagLine as it will create files to store your data.
-
Double-click the file to start the app. The GUI should appear in a few seconds.

-
The panel on the left is the Chatbot Interface. Type a command in the message box and press Enter to execute it.
-
Some commands you can try:
-
contact list: Lists all contacts -
note list: Lists all notes
-
-
Your output will be displayed on the panel on the right. For more features on each command, refer to the Command List.
-
Refer to Section 4, “Command List” for details of each command.
3. Learning TagLine
Are you new to TagLine? Or are you prone to making typos? In either case, TagLine has some nifty features to help you out.
3.1. Autocomplete
When you enter a command, TagLine will display autocomplete suggestions as you type.
To illustrate, let’s suppose you are trying to create a new contact. However, you only remember that the first keyword is contact! With the autocomplete feature, it is easy to find the correct command. Try following the following steps:
-
Type
contactinto the command box. A list of suggestions will pop up under the command bar.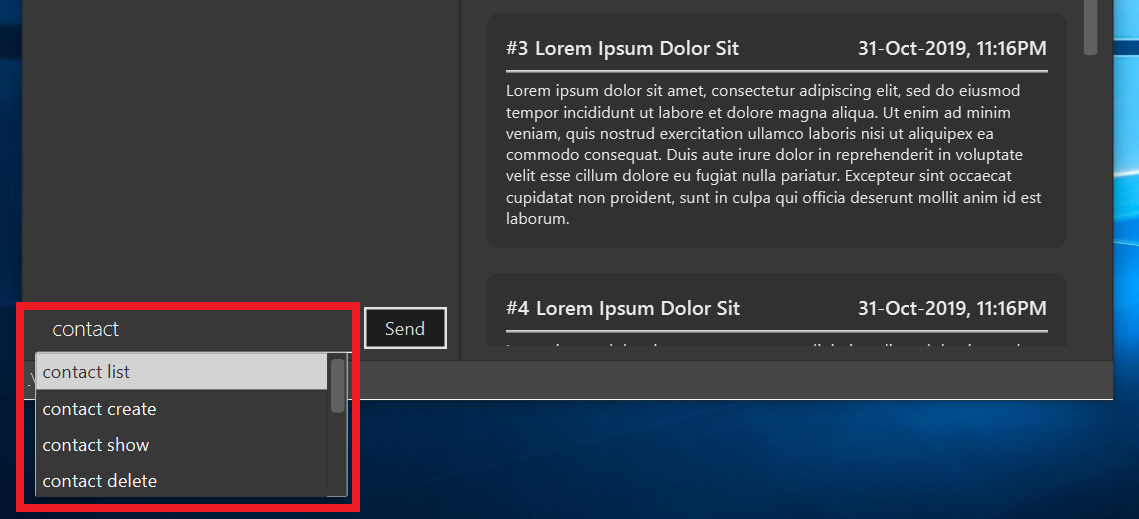
-
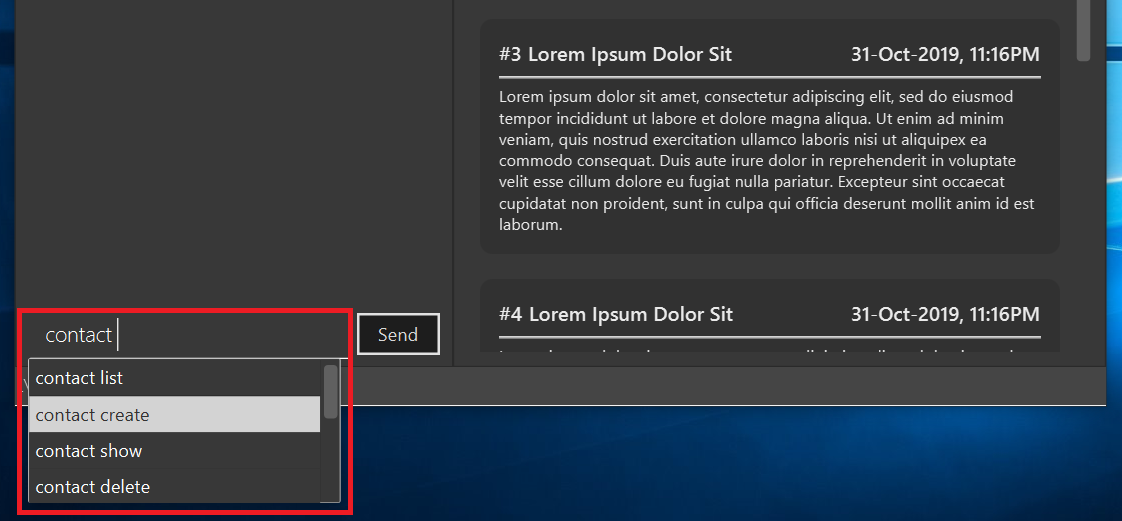
Use the arrow keys to navigate to the correct command (optional if using mouse).
-
Press the Enter key or click on the command in the menu. Your command box will now display
contact create.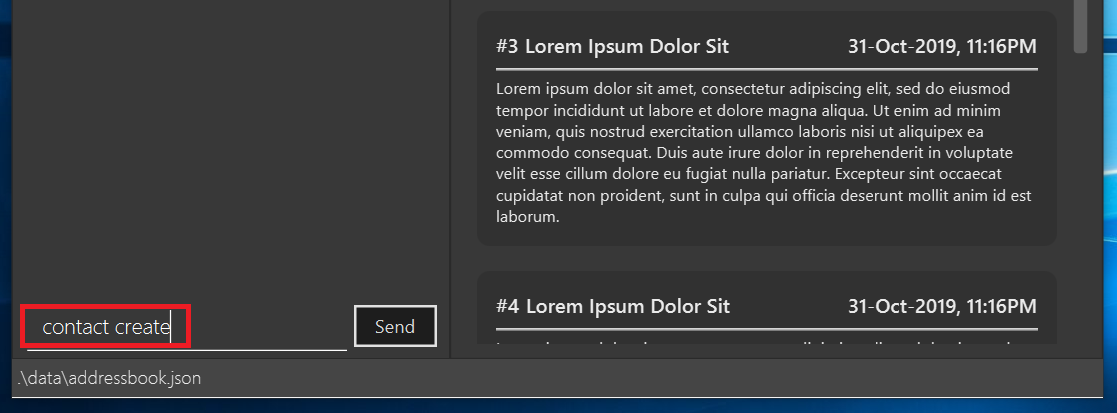
Note
After typing a command, if the autocomplete menu is still showing, please wait a moment for it to disappear, or click elsewhere on the screen. If you press Enter too quickly, this will cause your command to be overwritten.
3.2. Prompts
For some commands, TagLine can prompt you when there is missing important information. Instead of having to type the whole command again, you will only need to fill in the couple of fields you missed.
Let’s take the same example of creating a new contact.
-
Suppose you accidentally pressed Enter too early, and sent the command
contact createas is.
-
Maybe you have intended to call this new contact
Bob. Then typeBobinto the command box and press Enter (or Send). Then TagLine would appear like this: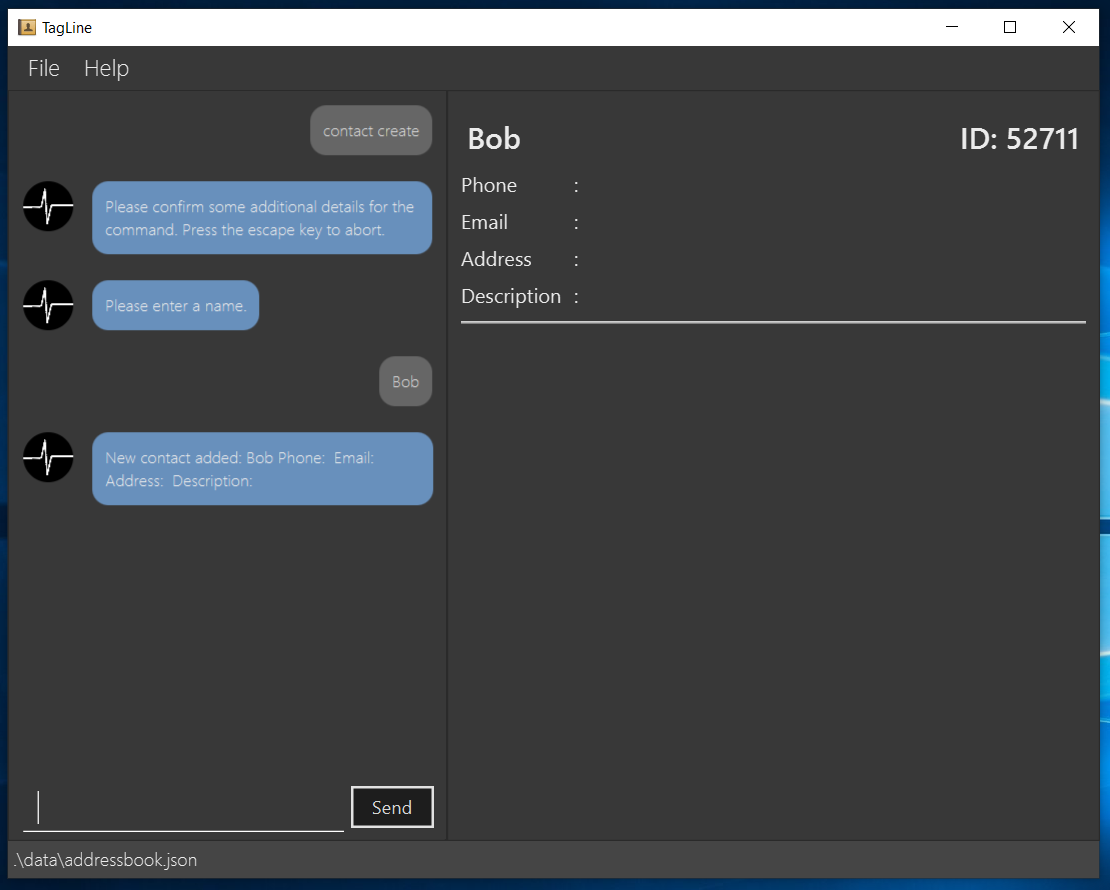
-
As can be seen above, TagLine has successfully created a new contact named
Bob.
3.2.1. Aborting an incomplete command
But what if we don’t want to proceed with the command? You can abort the command by pressing the Escape key.
-
After step 1 of the above example, let’s say you no longer want to create a new contact. Press the Escape key.
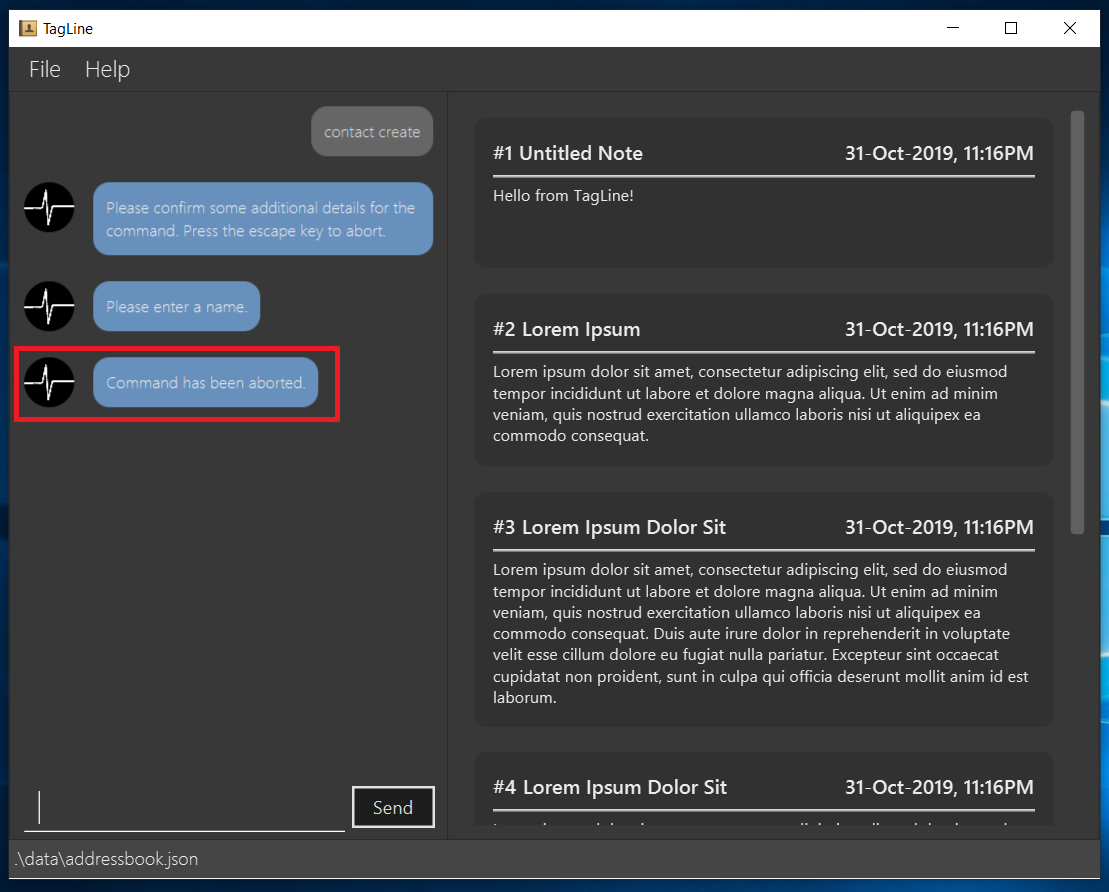
-
The incomplete command will not be executed. Now you can continue to enter other commands into the command box.
Note
When given prompts, to minimize inconvenience to you, the autocomplete menu is temporarily disabled. Once prompting is complete or aborted, autocomplete will be re-enabled.
4. Command List
Command Format
-
Words in
UPPER_CASEare the parameters to be supplied by the user e.g. incontact create --n NAME,NAMEis a parameter which can be used ascontact create --n John Doe. -
Items in square brackets are optional e.g
[--n NAME]and[--e EMAIL]can be used as--n John Doe --e j.doe@gmail.comor only--n John Doe. -
Items with
*after them can be used multiple times including zero times e.g.[--t TAG]* can be used as<empty>(i.e. 0 times),--t #friend,--t #friend --t #family, etc. -
Items with
+ after them can be used one or multiple times e.g.[--t TAG]+ can be used as--t #friendand--t #friend --t #familybut cannot be used as<empty>(i.e. 0 times), -
Parameters can be in any order e.g.
--n NAME --p PHONE_NUMBERand--p PHONE_NUMBER --n NAMEare considered the same. -
For parameters that cannot be used multiple times (i.e. without
*or+after them), if there are multiple values provided (e.g.--p 12345 --p 67890), only the last value will be considered as part of the user input.
4.2. Manage contacts: contact
Tagline can help people to manage their contacts easily. When you use contact commands, a view that displays a list of contacts will appear in the right pane. The left pane still displays a chat bot for user interaction.
4.2.1. Create a contact: create
Creates a new contact.
Format:
contact create --n NAME [--p PHONE_NUMBER] [--e EMAIL] [--a ADDRESS] [--d DESCRIPTION]
Example:
-
Suppose you just have a new friend -
Dwayne Johnson- and you want to save his contact along with some information that you know about him.
You can just enter the following command:contact create --n Dwayne Johnson --p 81234567 --e johnson@gmail.com --d Friend from CS2100.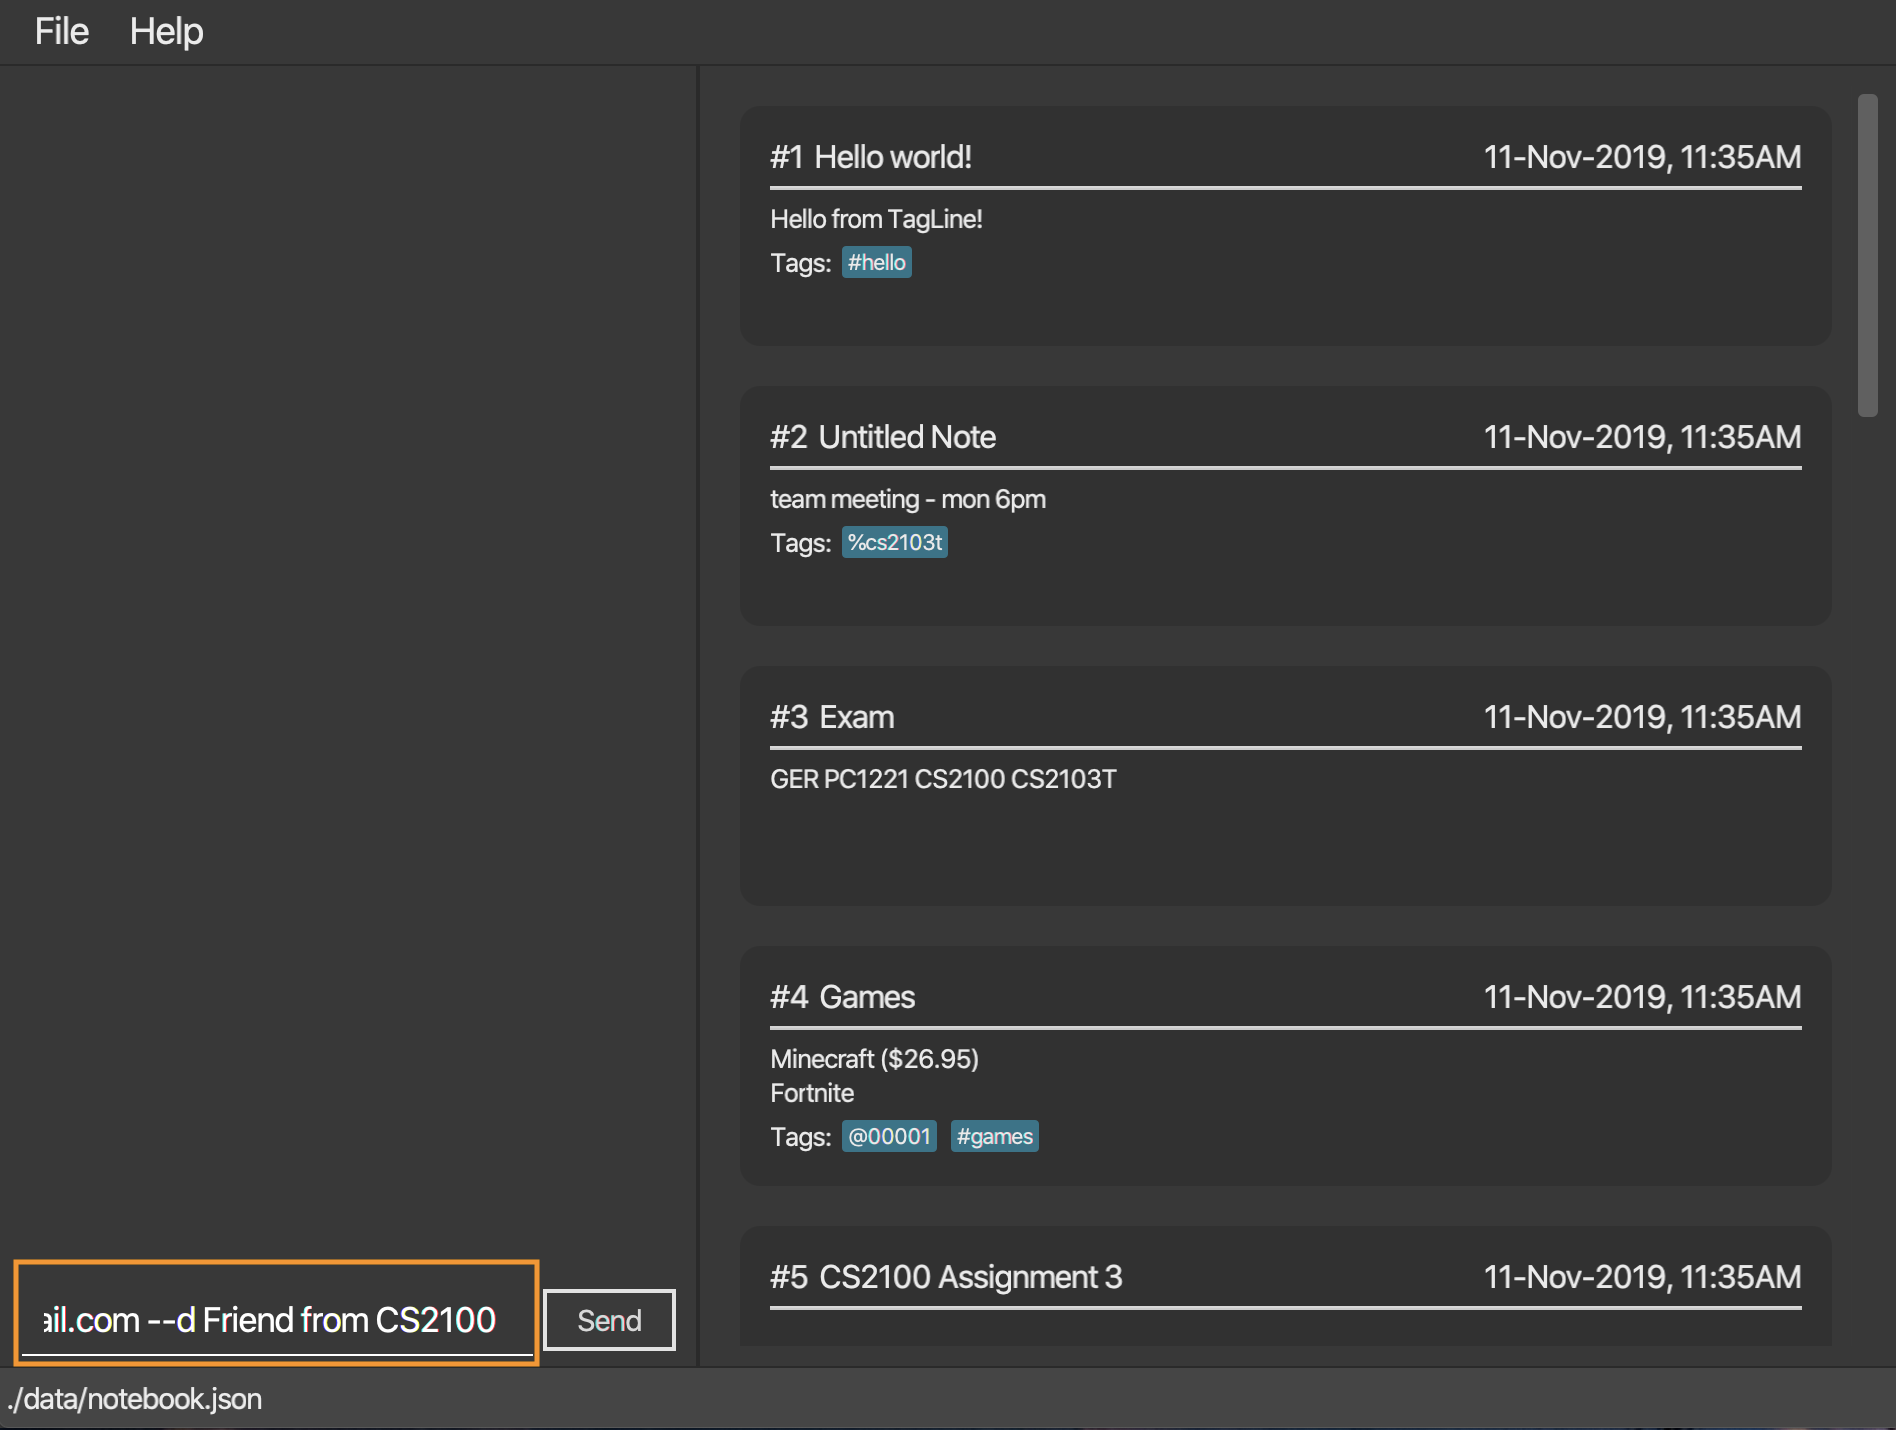 Figure 2. Entering the command
 -
This creates a new contact with name and other attribute values that you entered.
The display will show the profile of the contact that you just created.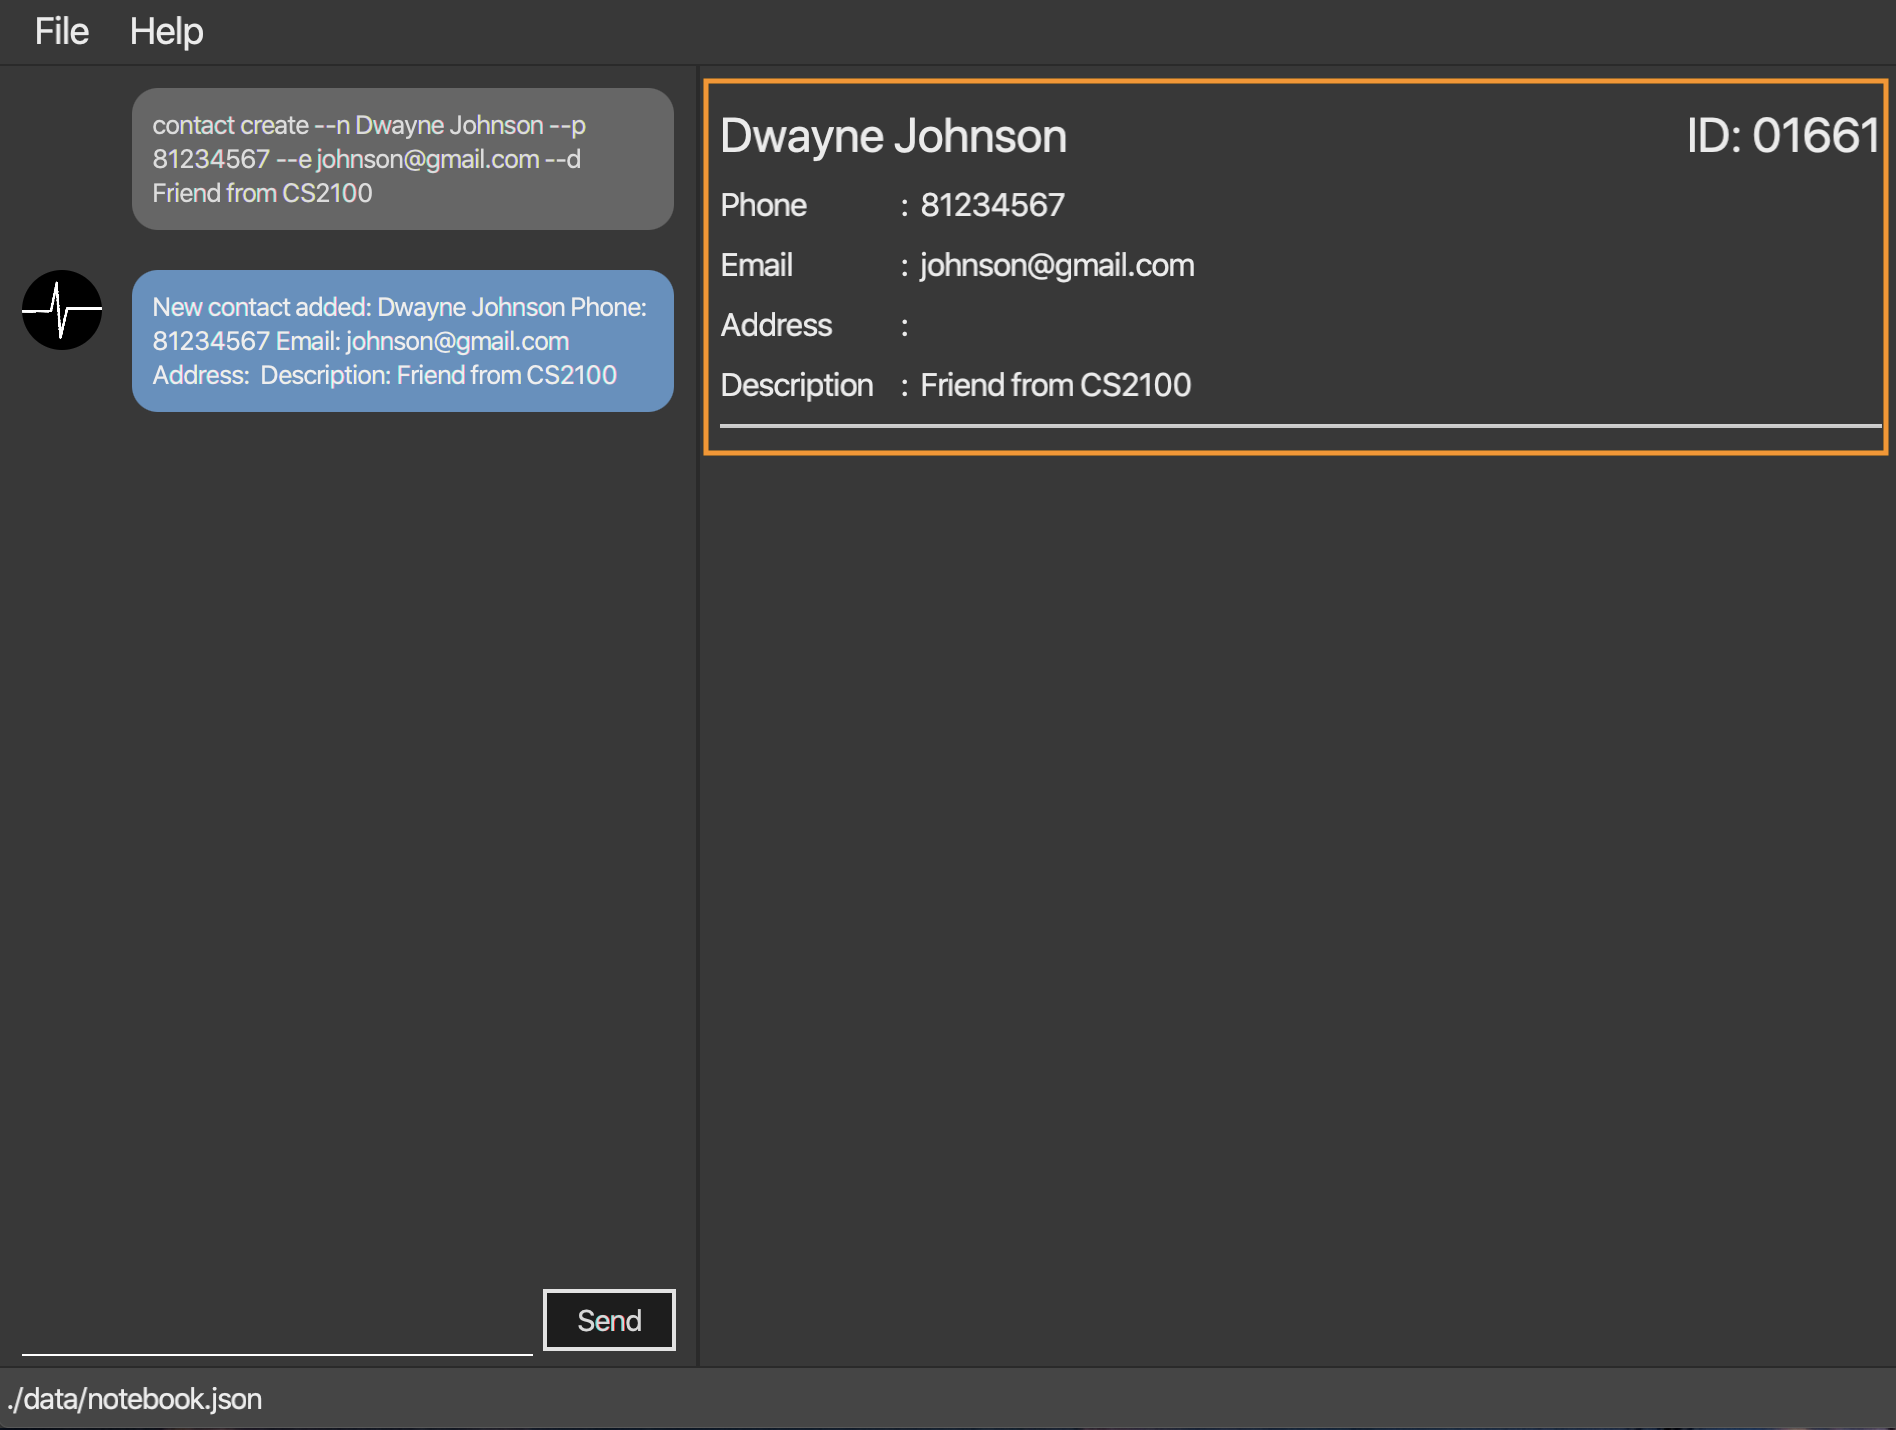 Figure 3. Command executed, a new contact created
| Contact id is generated randomly. As a result, you may see a different value with the example provided. |
4.2.2. Edit a contact: edit
Edits an existing contact.
Format:
contact edit CONTACT_ID [--n NAME] [--p PHONE_NUMBER] [--e EMAIL] [--a ADDRESS] [--d DESCRIPTION]
Example:
-
After creating a contact, suppose you get a new information about that person and want to edit the data.
You can just enter the following command:contact edit 99022 --a NUS School of Computing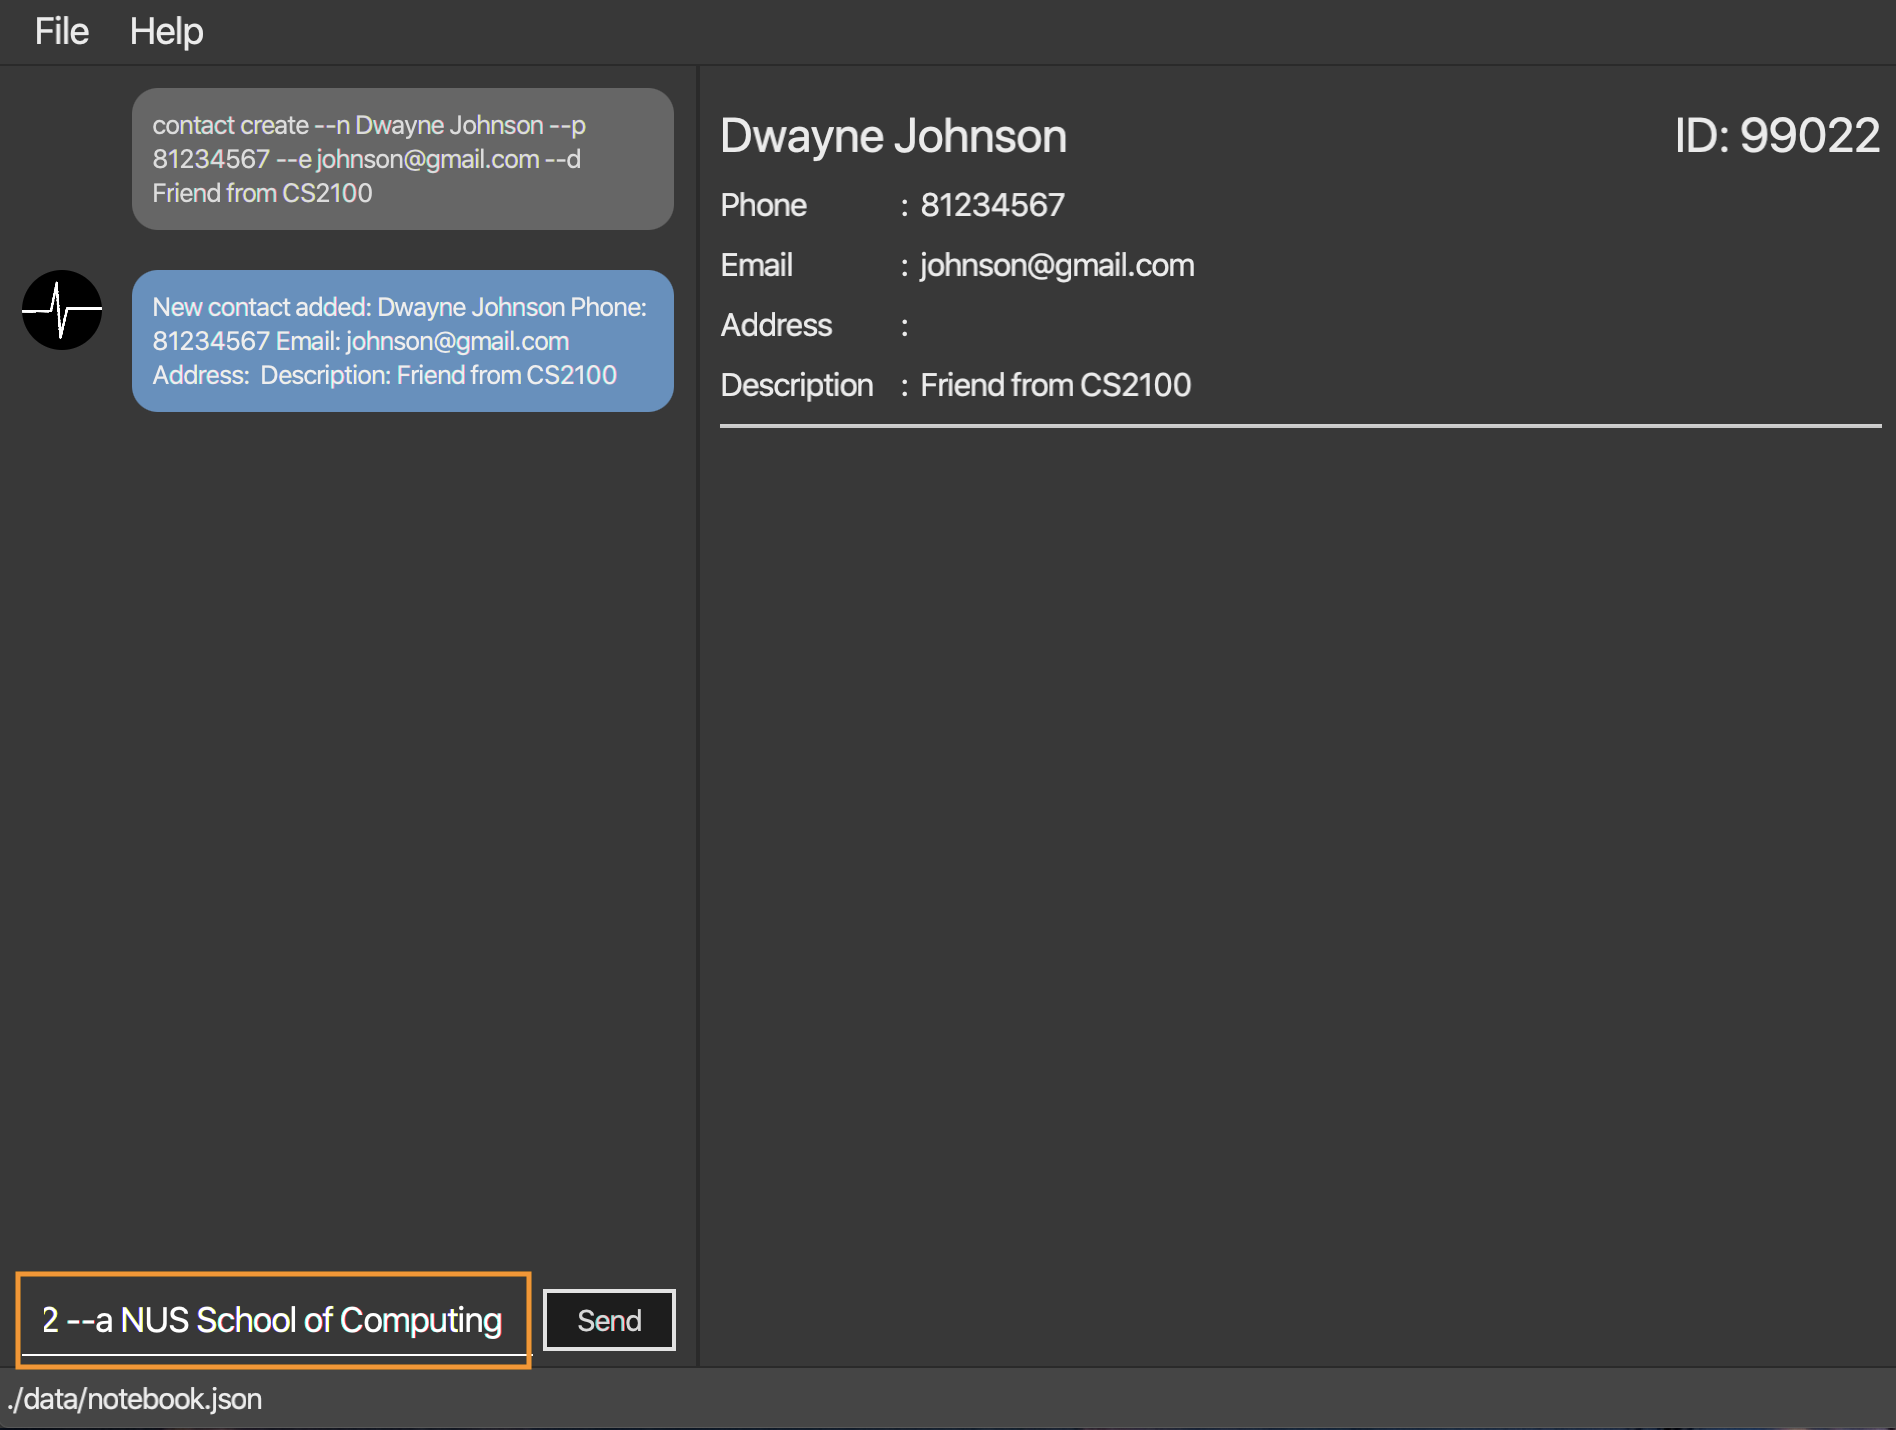 Figure 4. Entering the command
 -
This edits an existing contact with the id that you entered.
The display will show the profile of the contact that you just edited.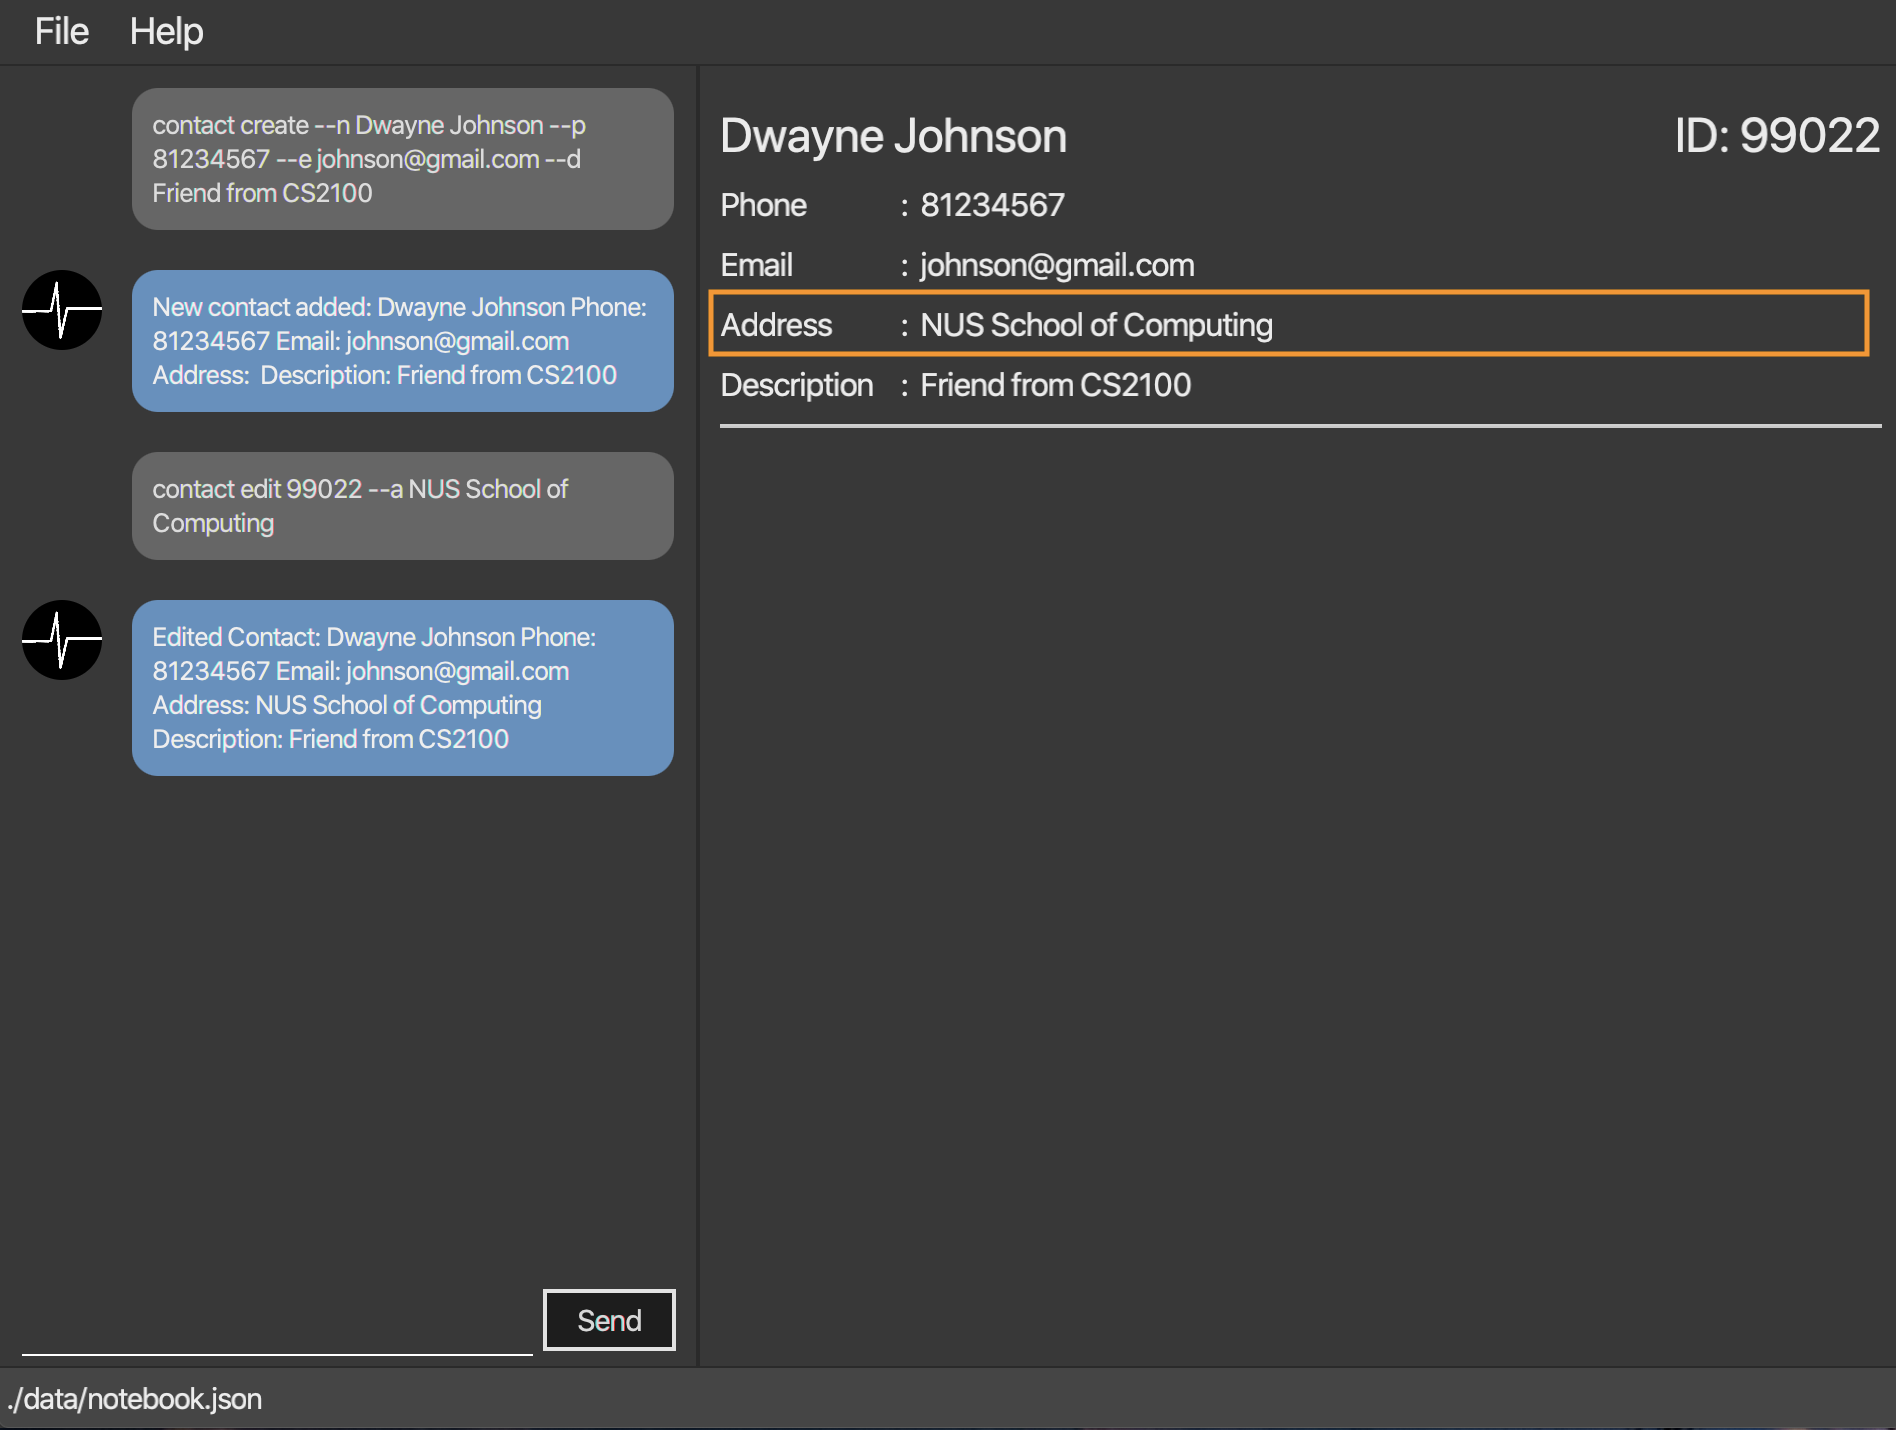 Figure 5. Command executed, the new contact data displayed
| Partial edit will be supported in v2.0 |
4.2.3. Delete a contact: delete
Deletes a contact with the given id.
Format:
contact delete CONTACT_ID
Example:
-
Suppose you feel that it is no longer necessary to store data for one of your contacts
You can just enter the following command:contact delete 2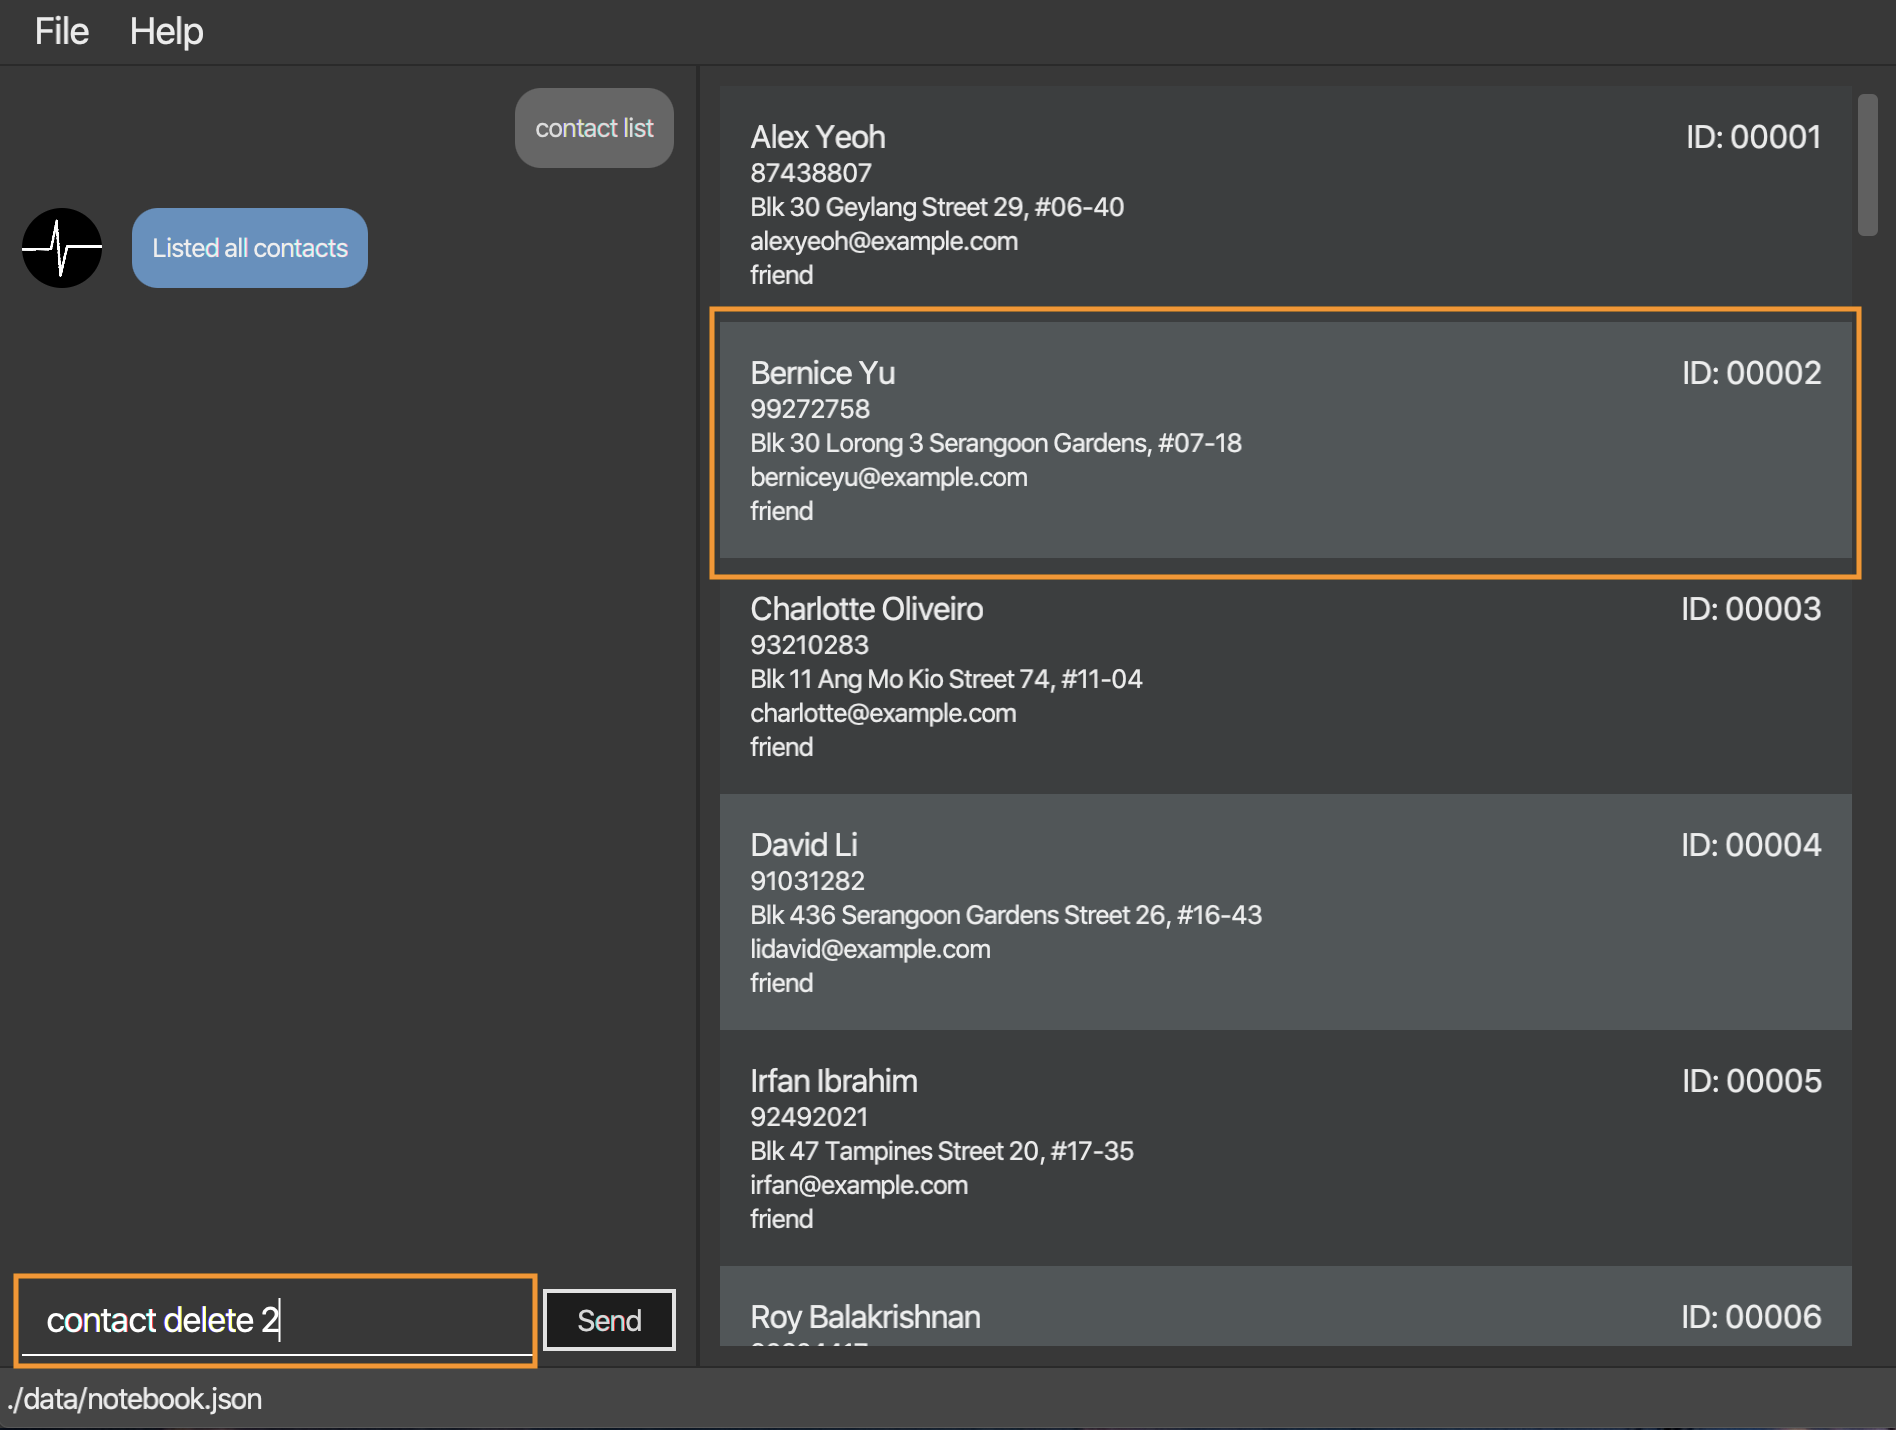 Figure 6. Entering the command
 -
This deletes an existing contact with the contact id that you entered.
The display will show the refreshed contact list.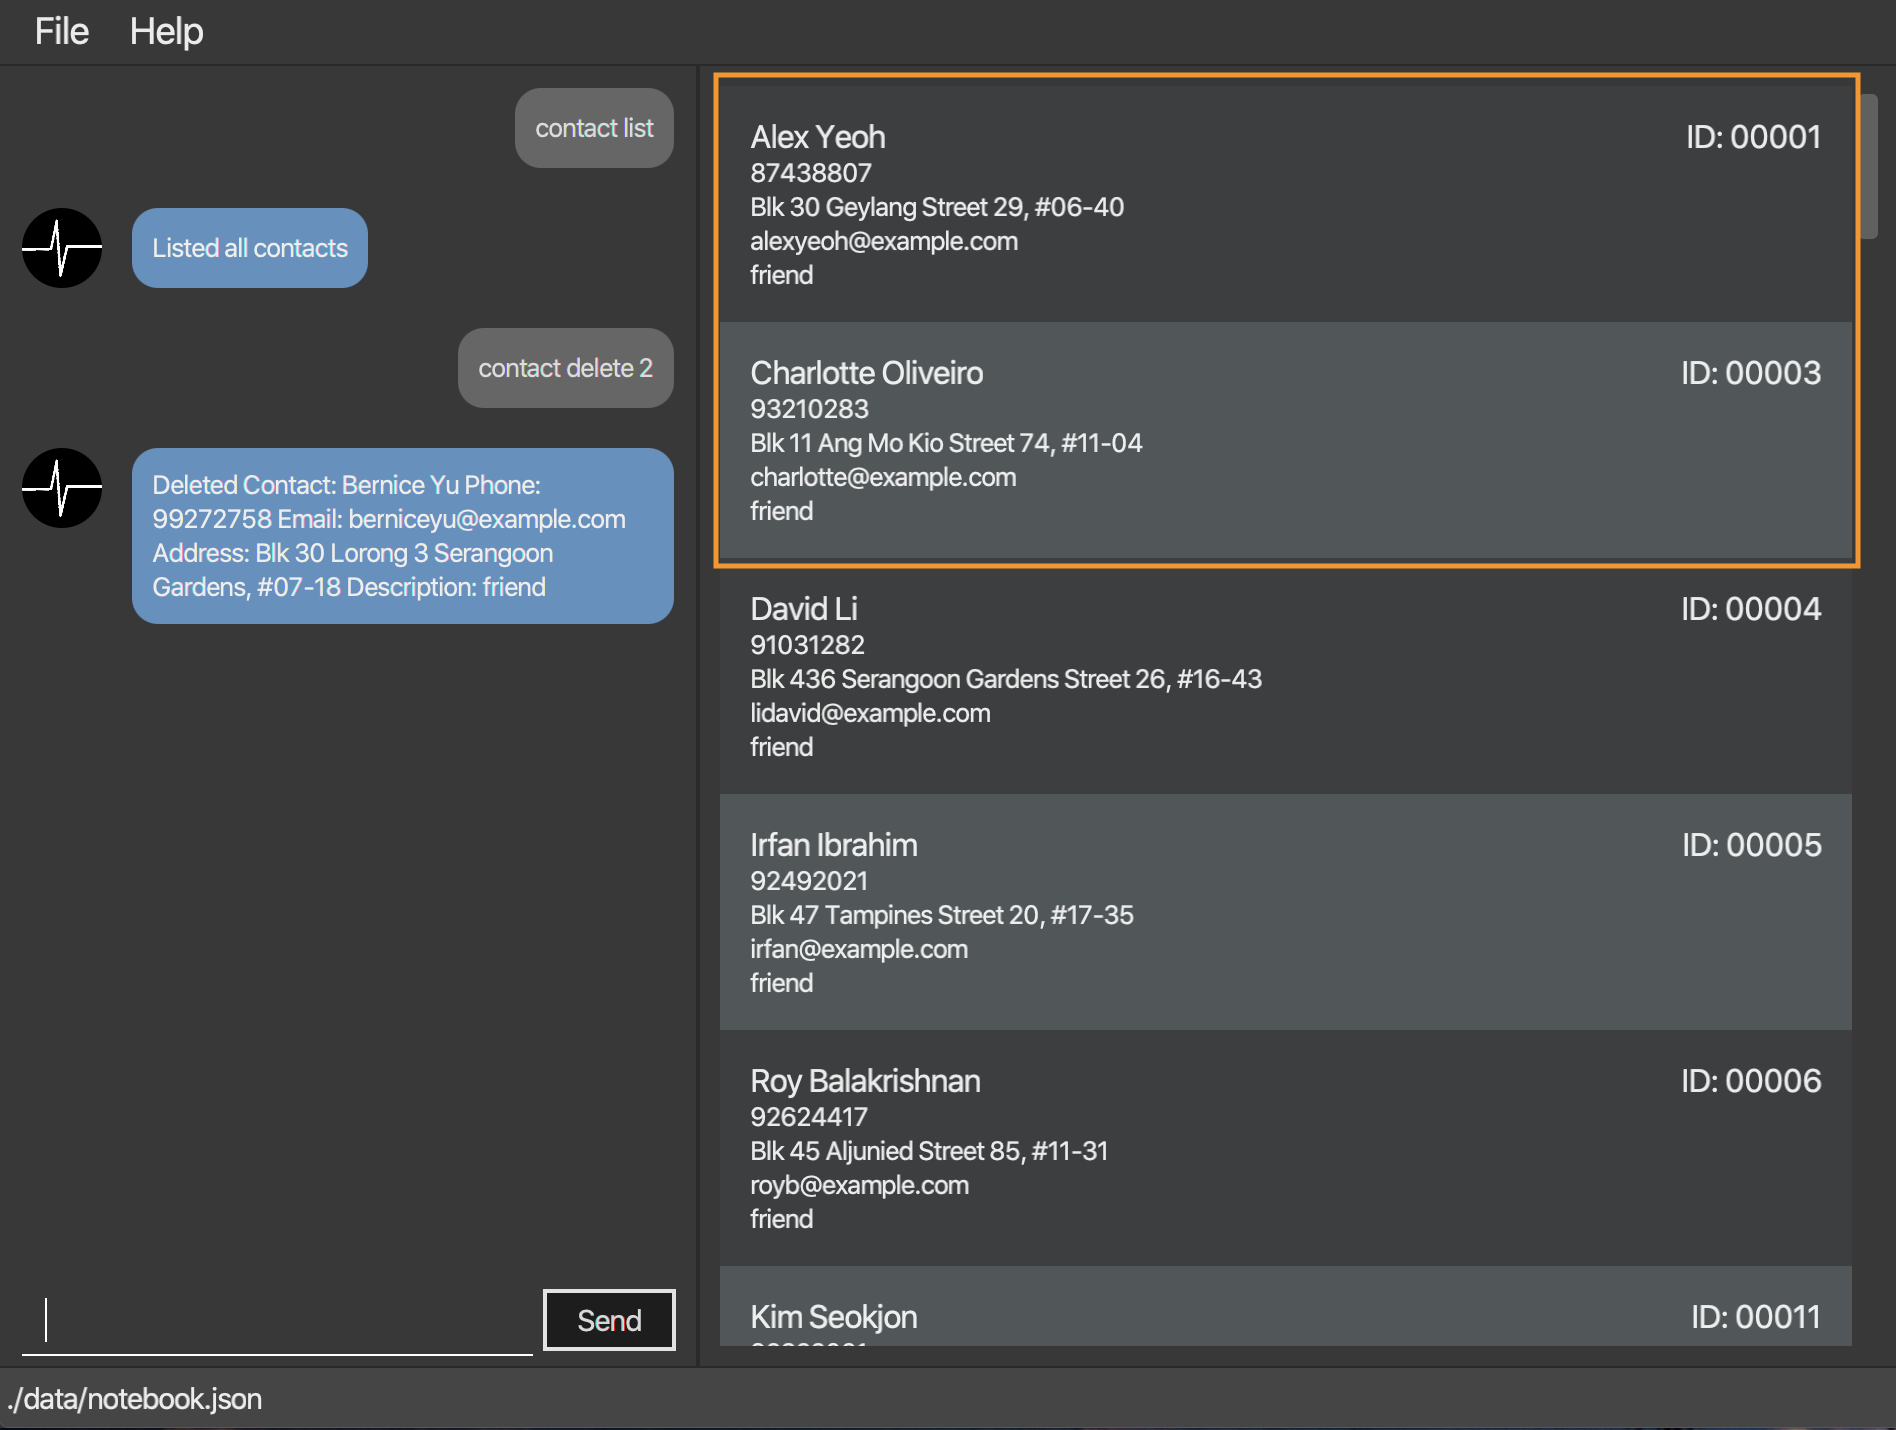 Figure 7. Command executed, the specified contact deleted.
4.2.4. List all contacts: list
Lists all contacts in the application.
Format:
contact list
Example:
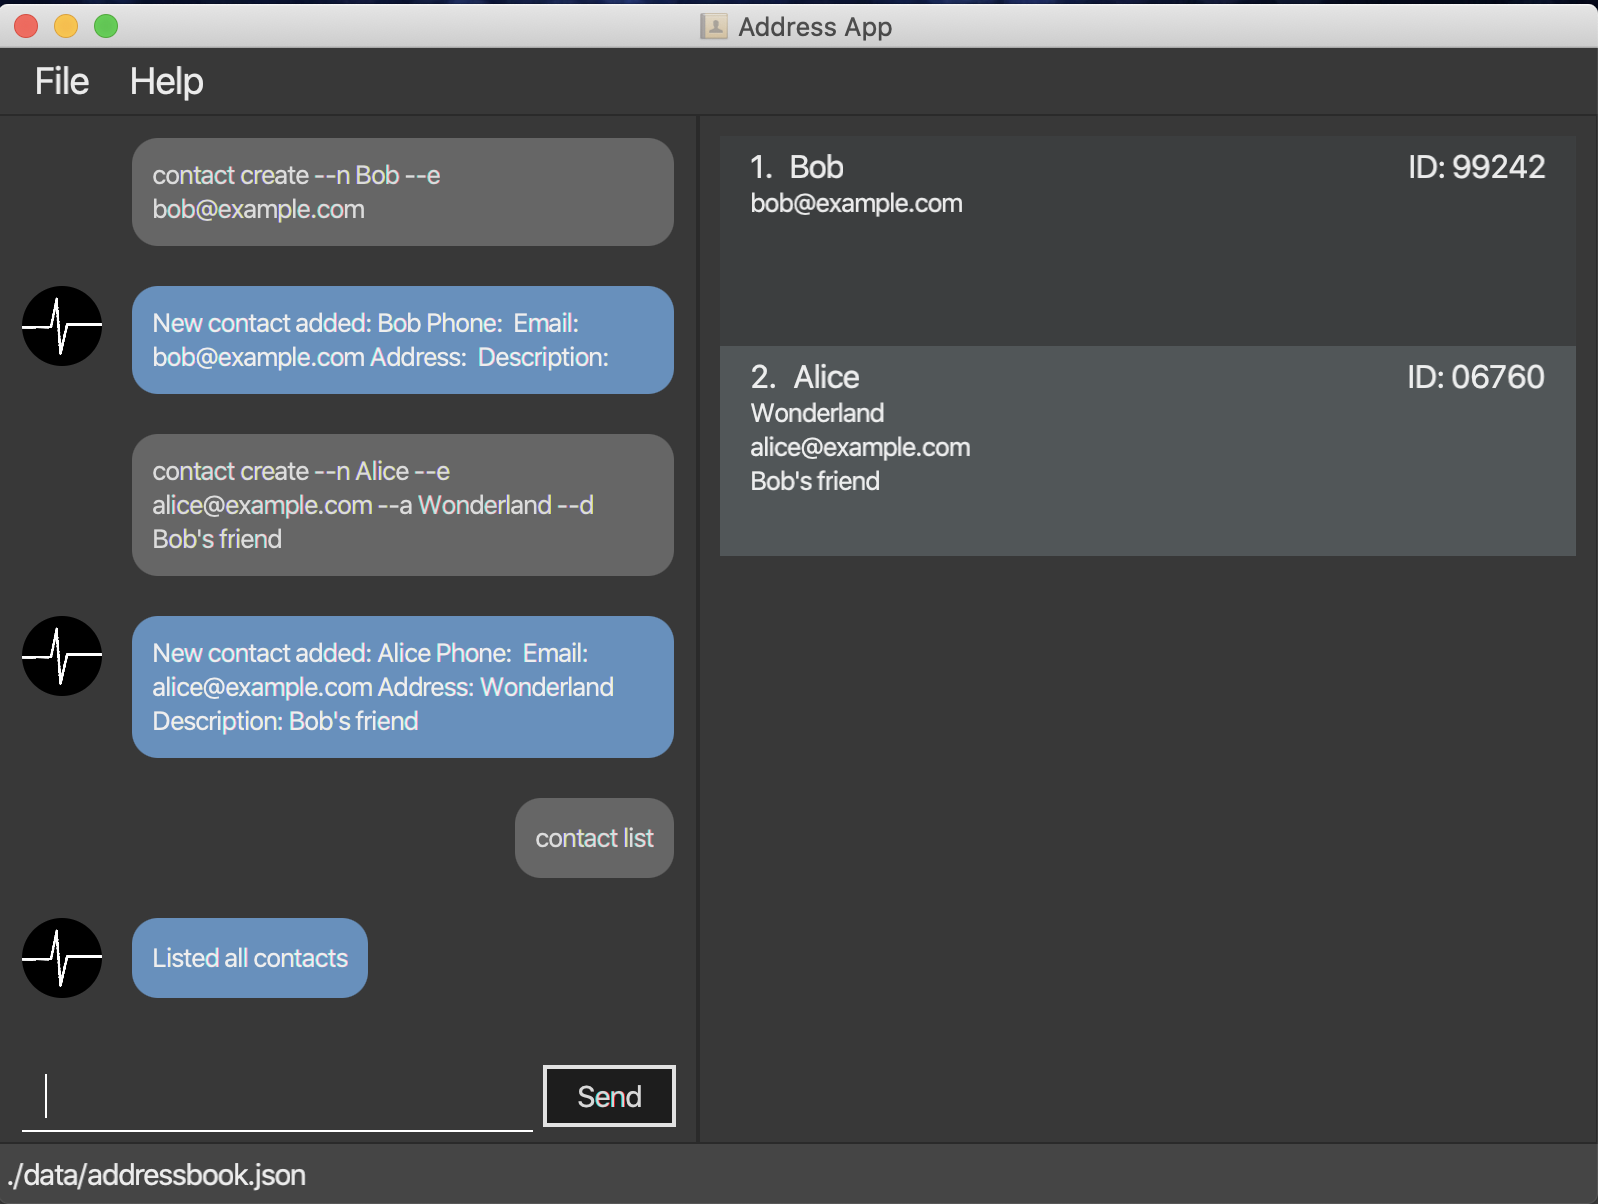
-
Suppose you want to know all the contacts that are stored in Tagline.
You can just enter the following command:contact list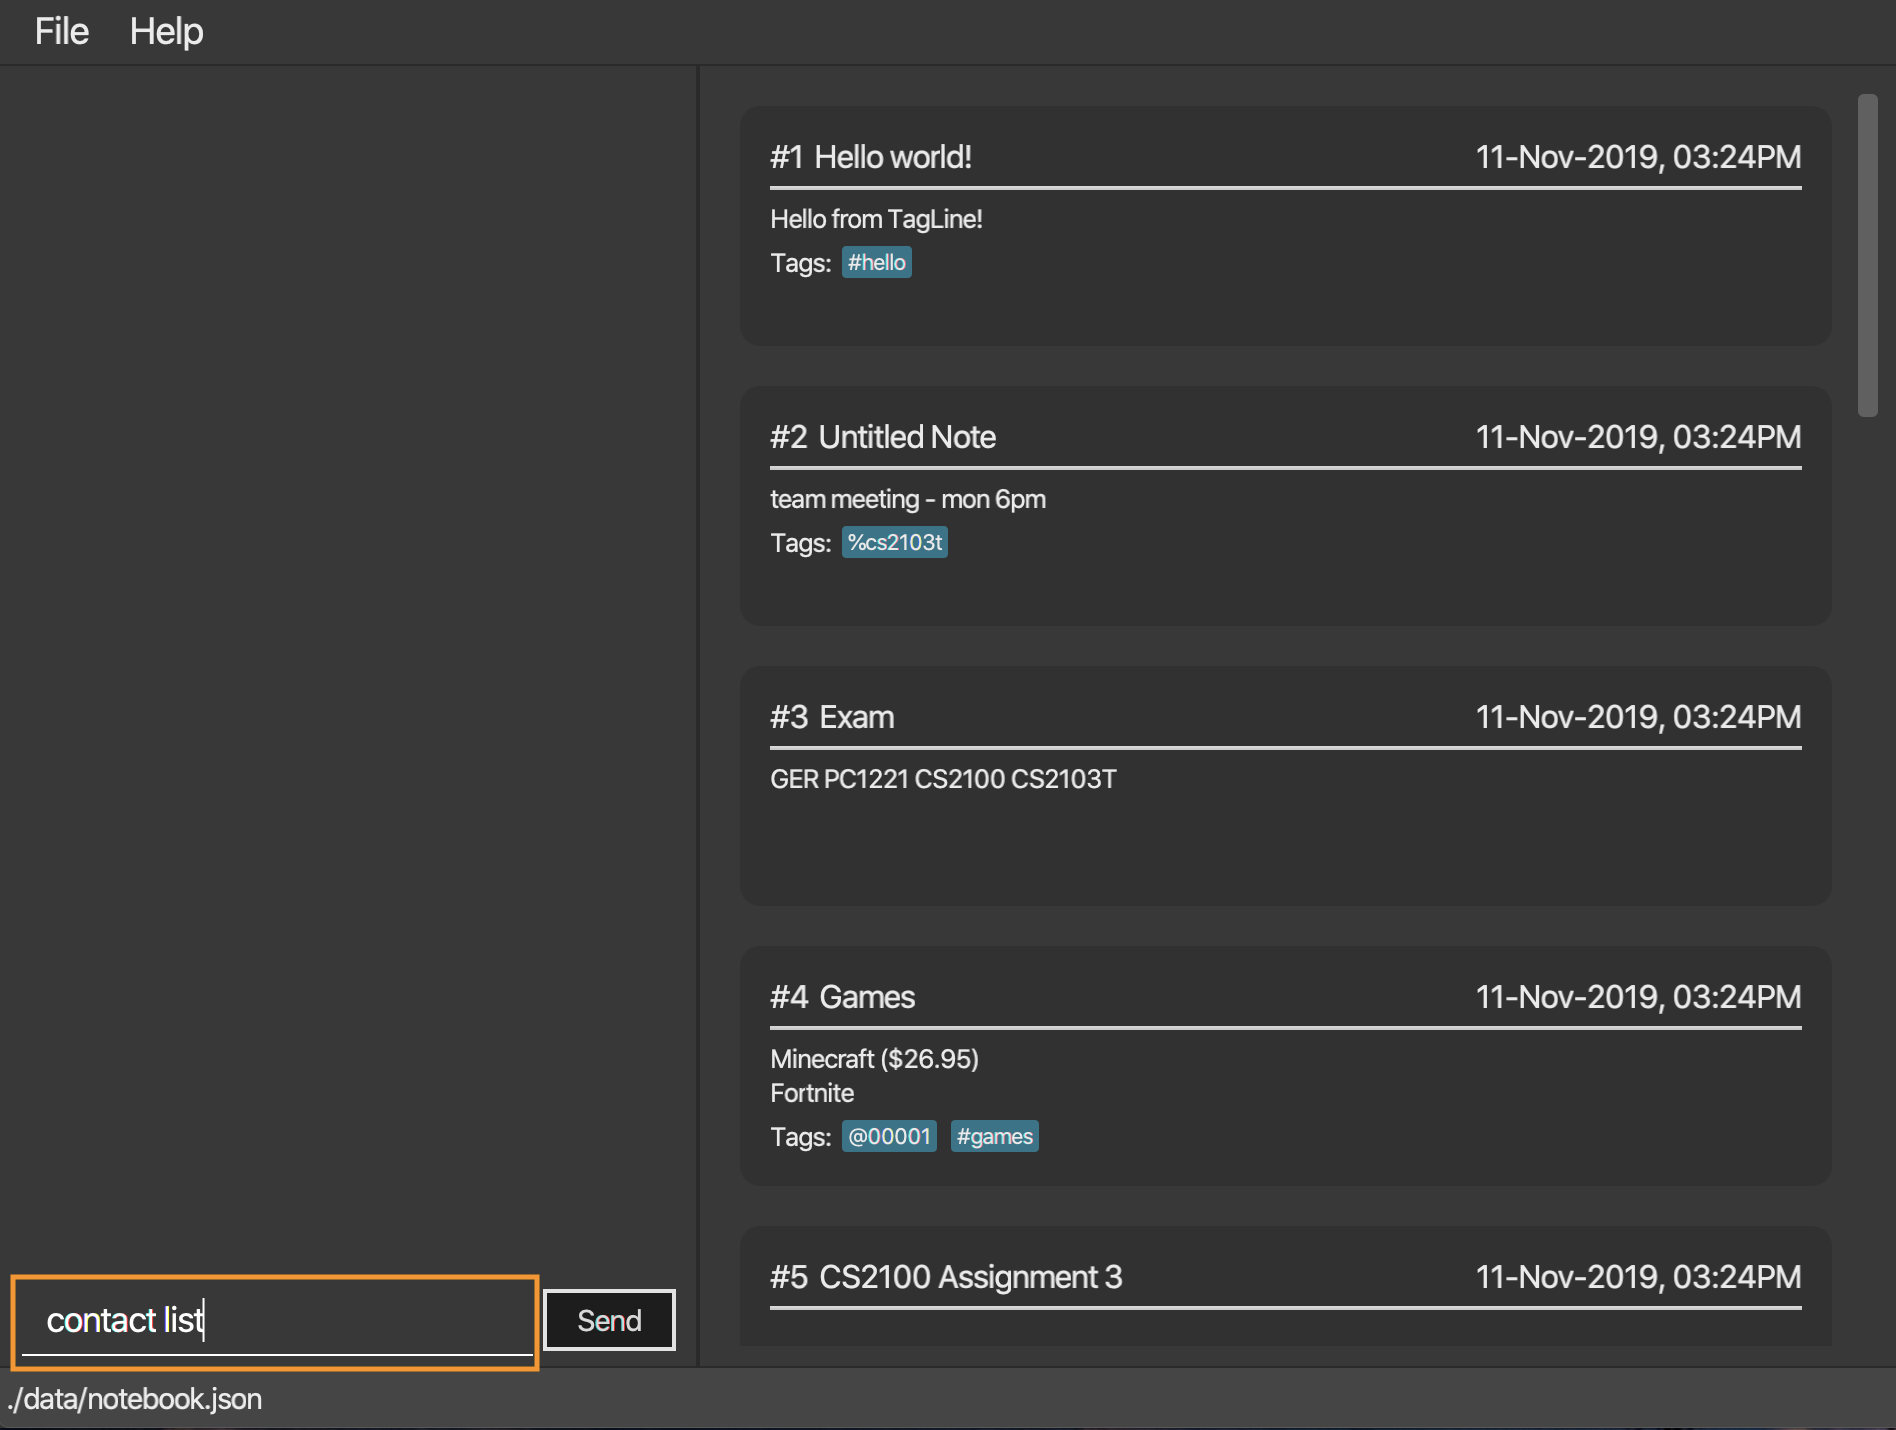 Figure 8. Entering the command
 -
This deletes an existing contact with the contact id that you entered.
The display will show the refreshed contact list.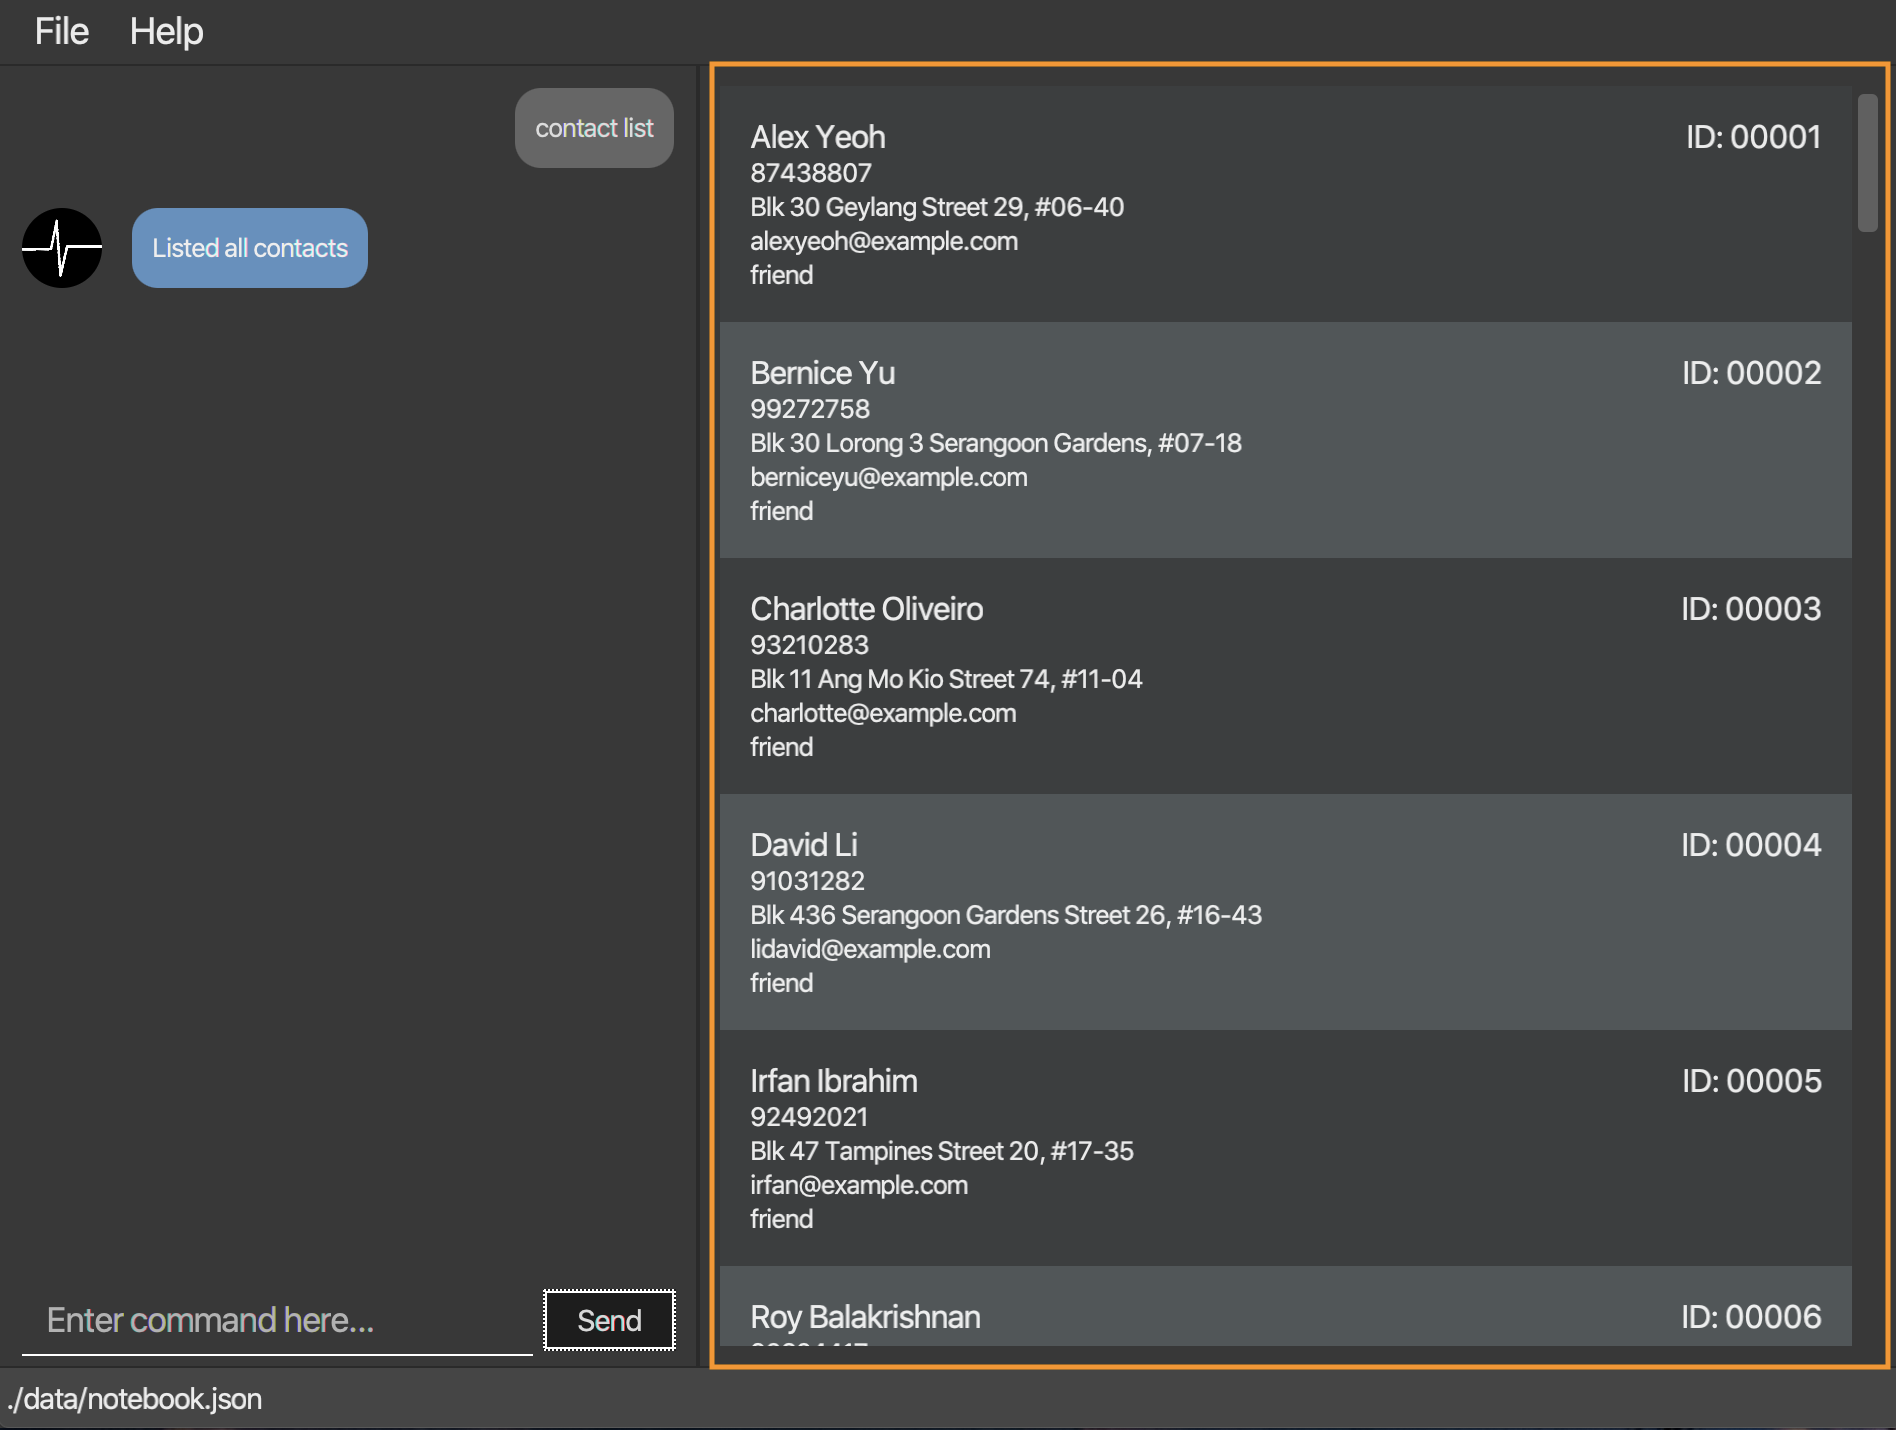 Figure 9. Command executed, all contacts displayed.
4.2.5. Locate persons by keyword: find
Lists all contacts whose name matches the given keyword.
Format:
contact find KEYWORD
Example:
-
Suppose you just listed all the contacts. However, after seeing so many contacts, you are only interested in finding contacts with that contain
Alexin its name. Figure 10. Initial list of contacts.
 -
This command allows you to contacts with the specified name easily.
You can just enter the following command:contact find Alex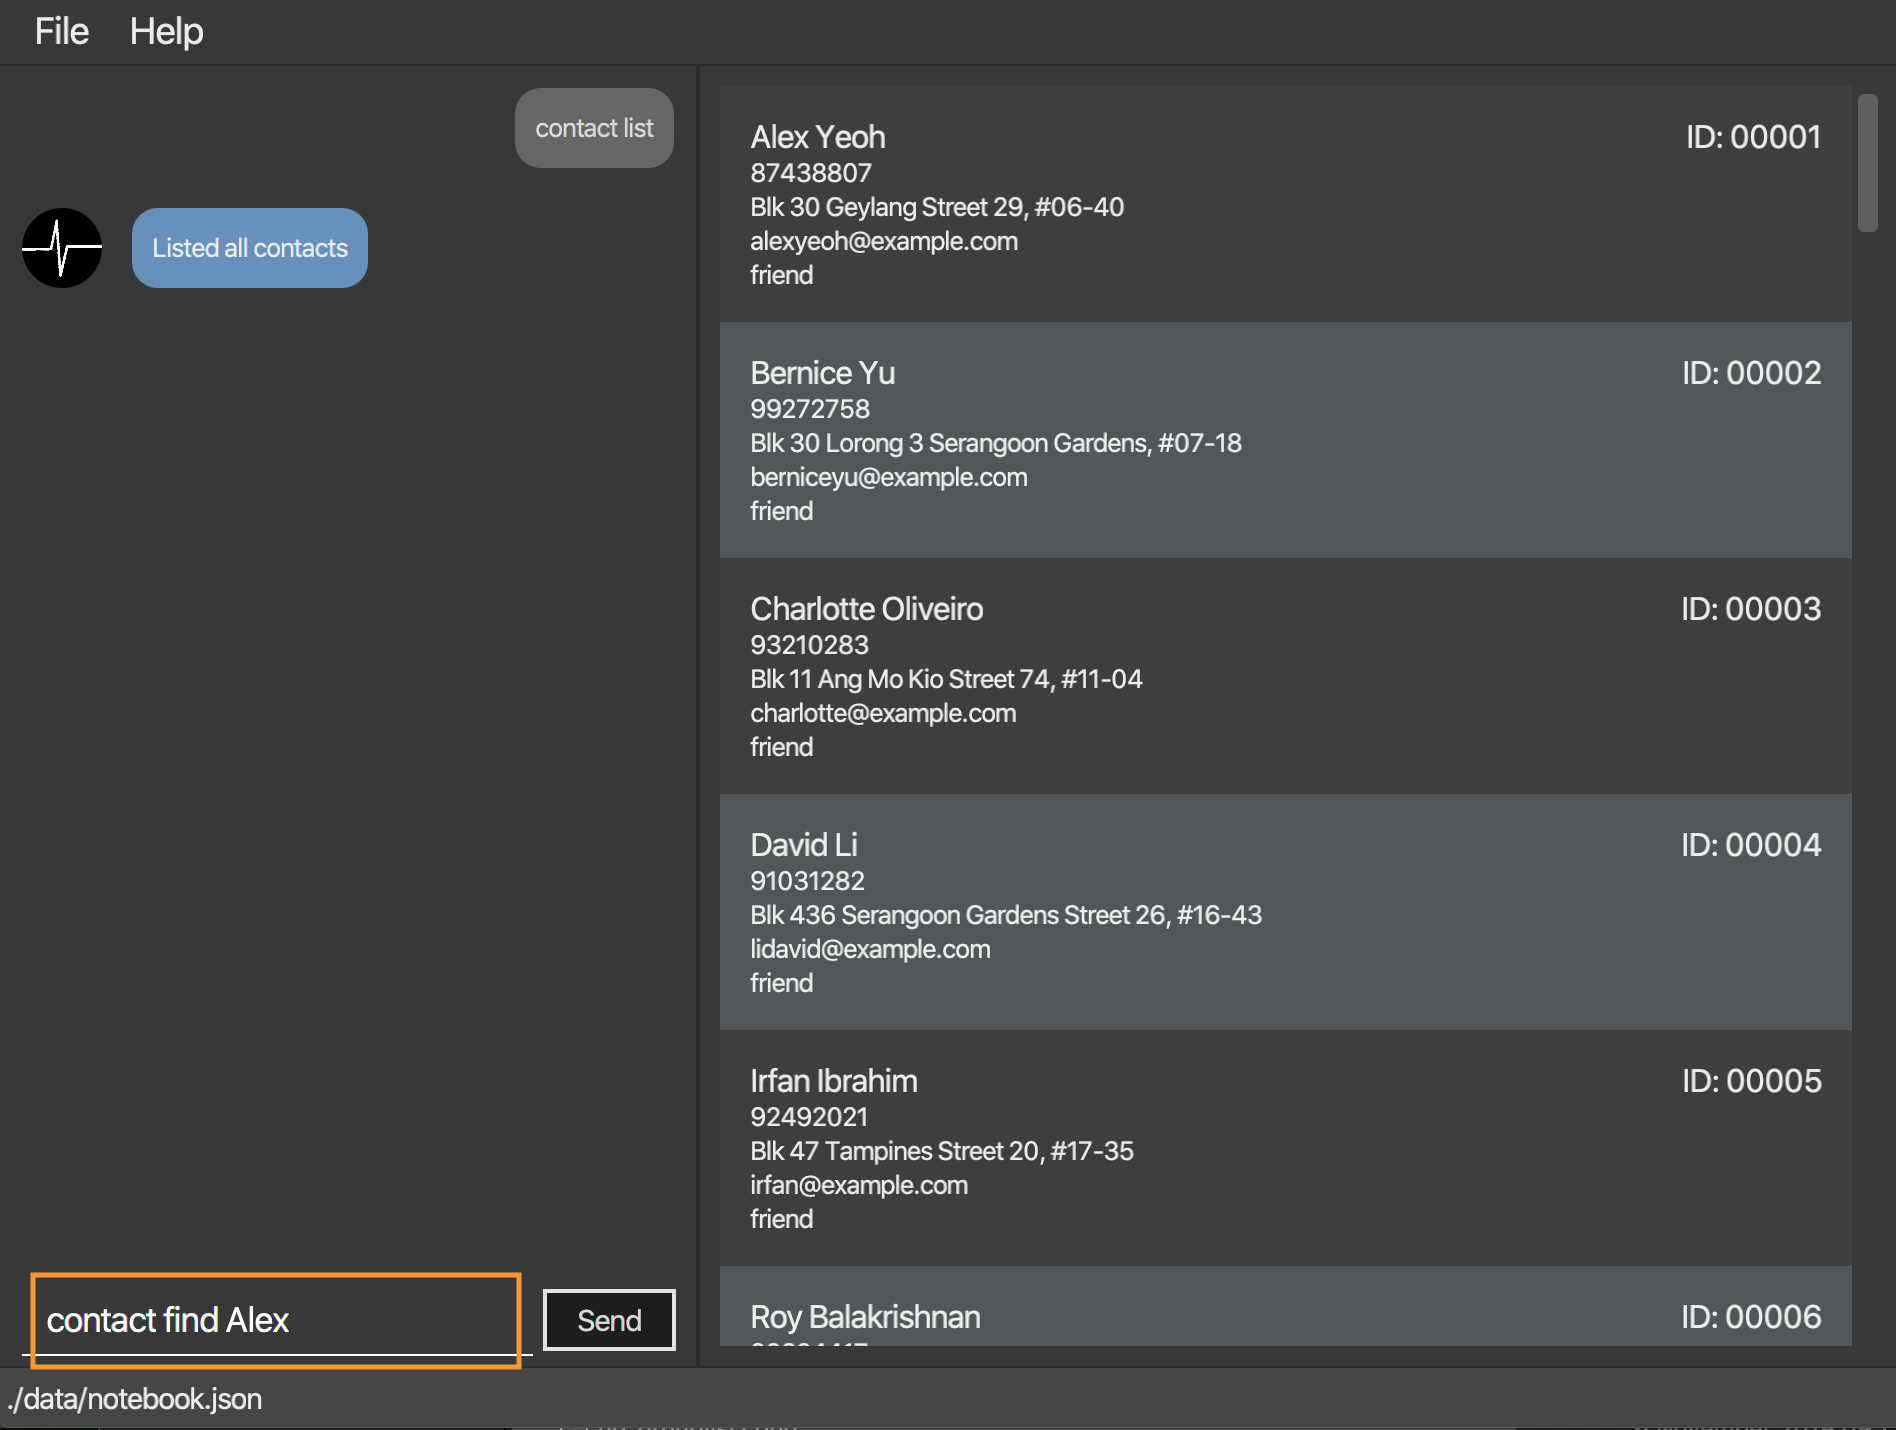 Figure 11. Entering the command
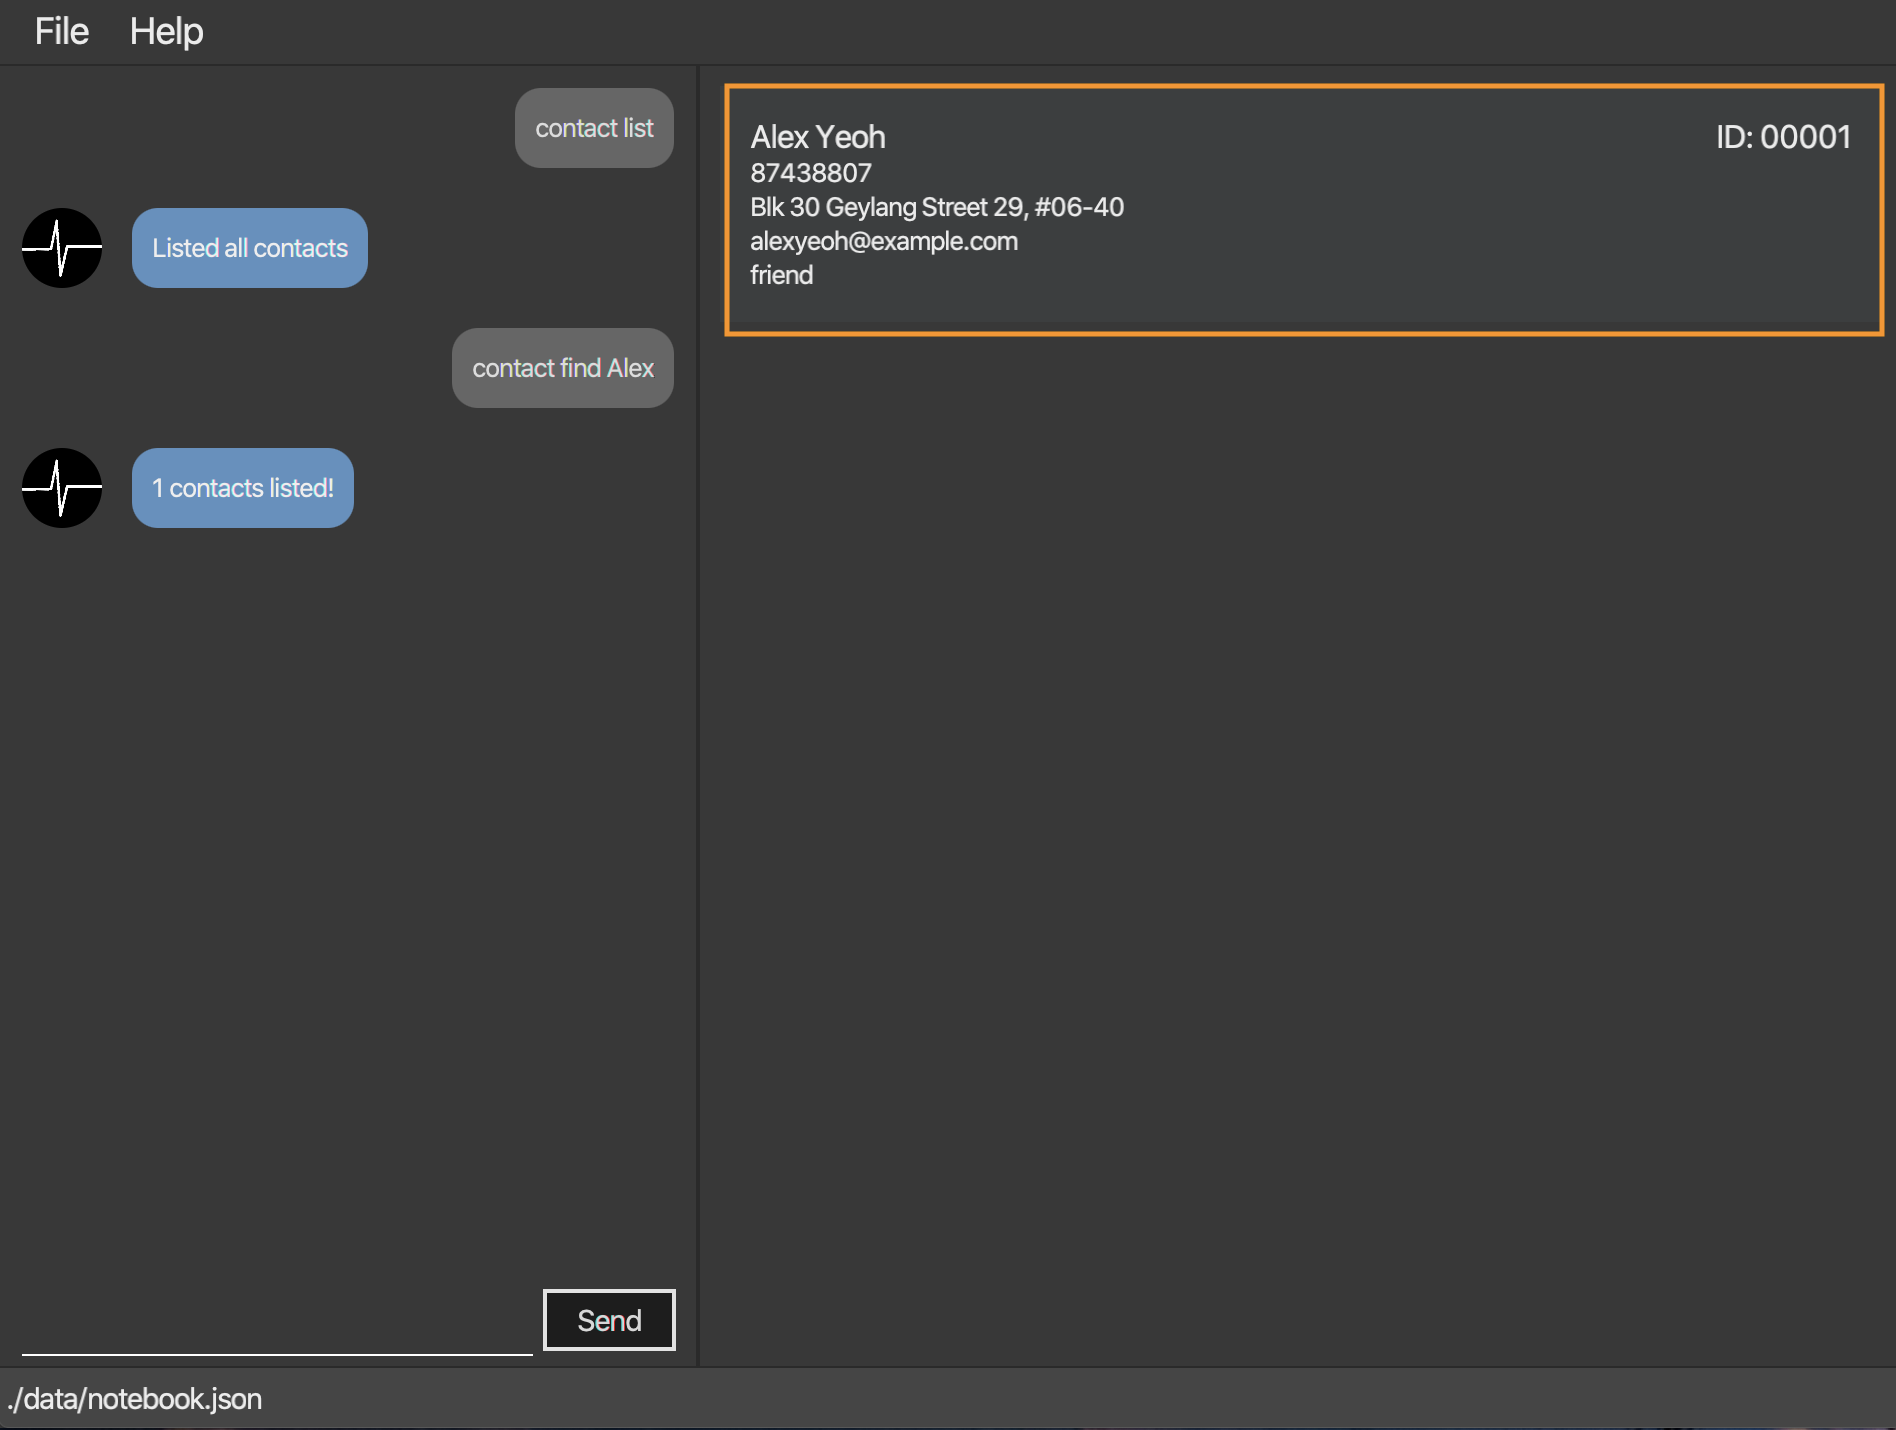 Figure 12. Command executed, only contacts that contain the specified name displayed.
4.2.6. Display the profile of a person: show
Displays a contact profile that contains information and list of notes that are associated with a given contact id.
Format:
contact show CONTACT_ID
Example:
-
Suppose you are interested to know information and notes that are associated with your contact
Alex Yeohwhich is stored with a contact id equals to1in Tagline. In addition, suppose that Tagline currently stores the following data: Figure 13. List of all contacts that are stored by Tagline.
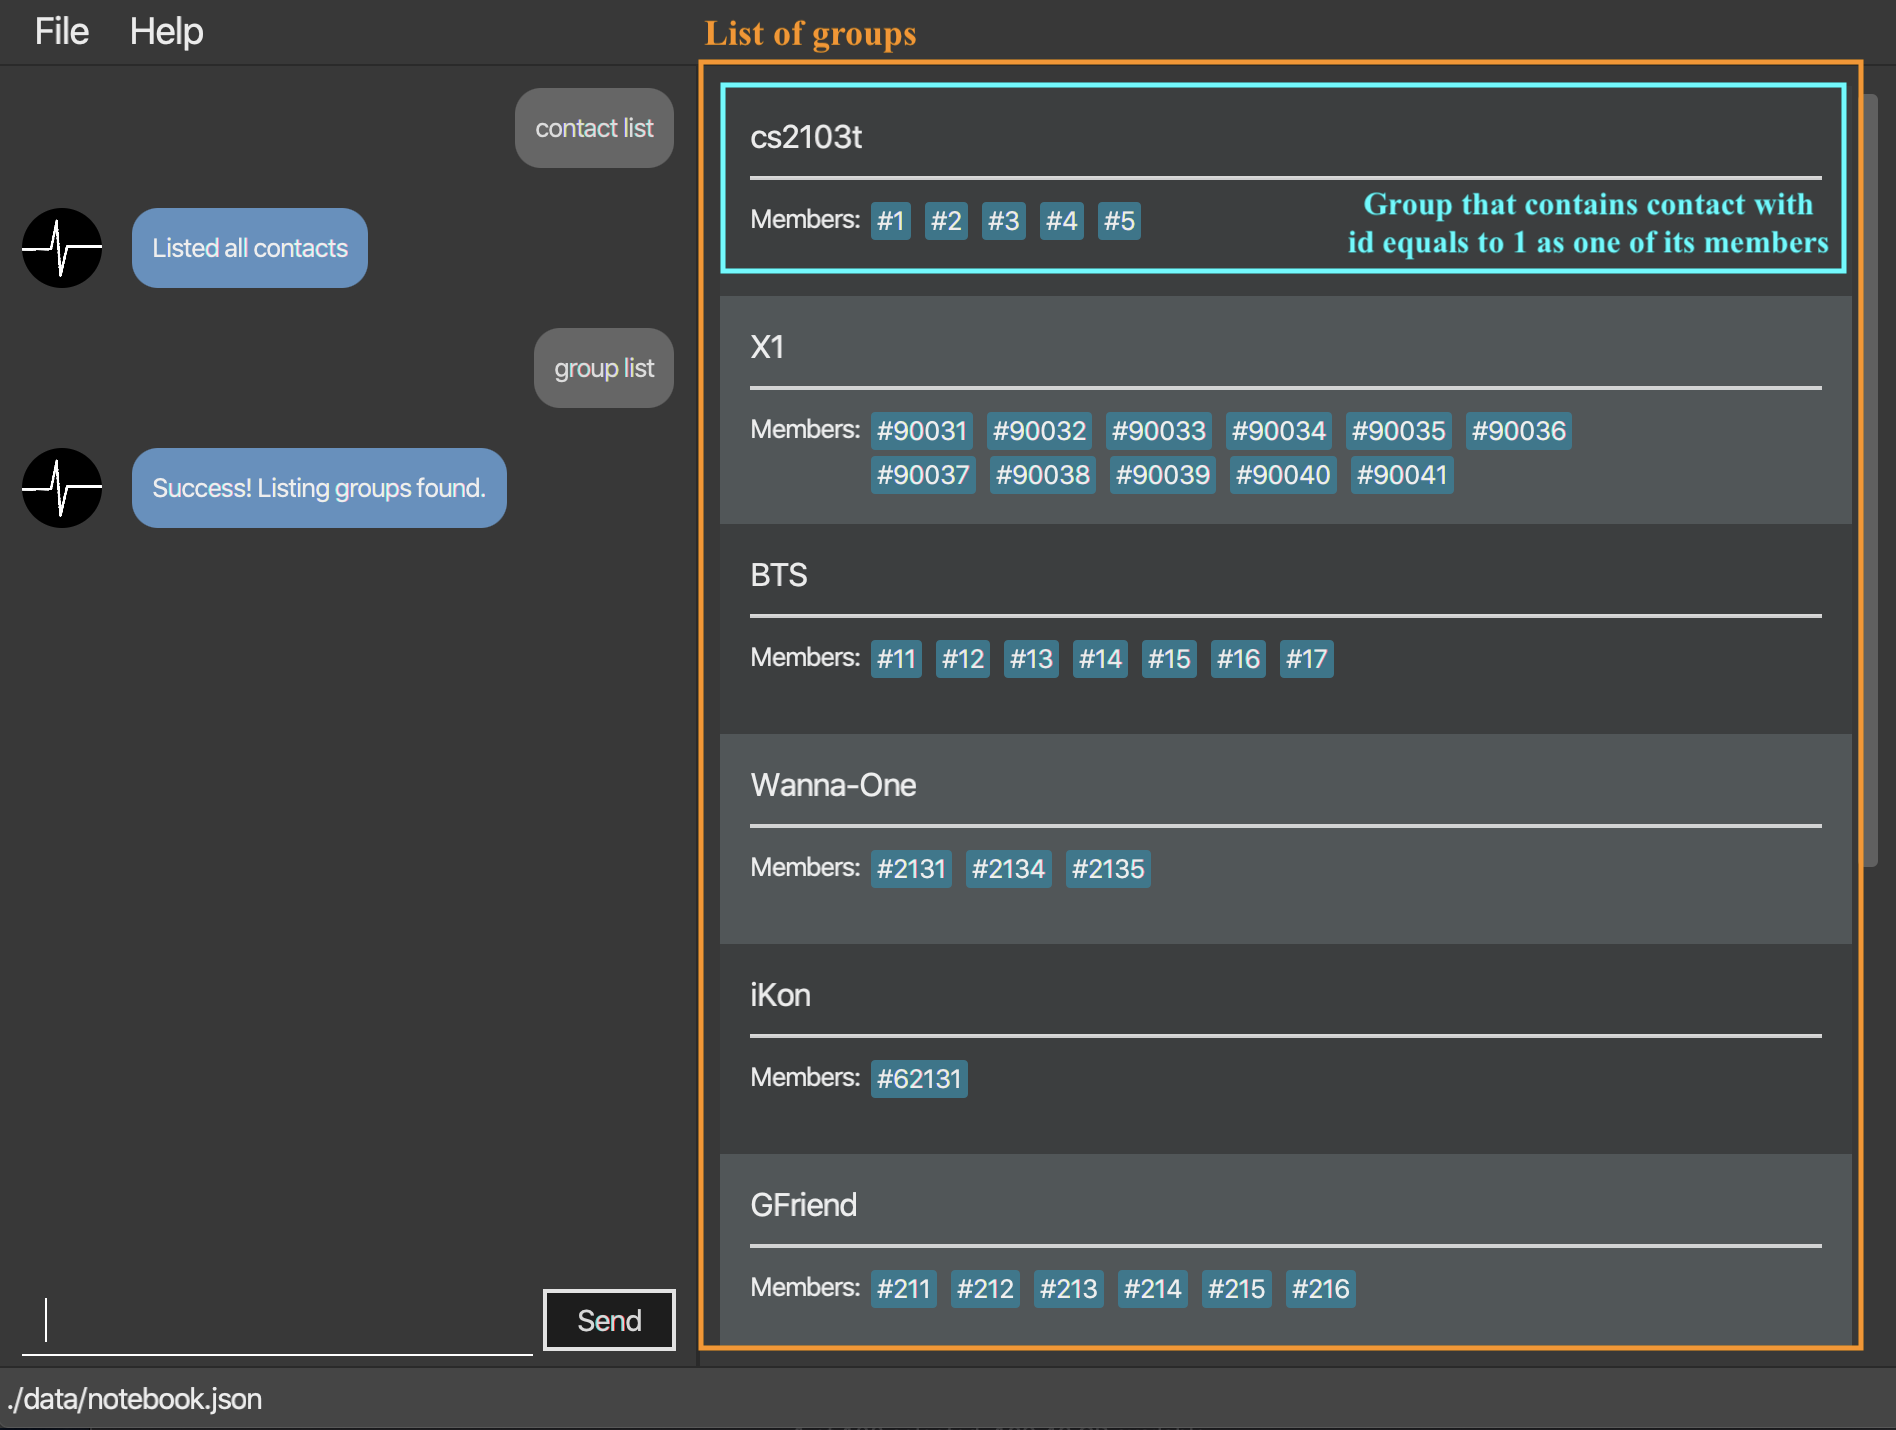 Figure 14. List of all groups that are stored by Tagline.
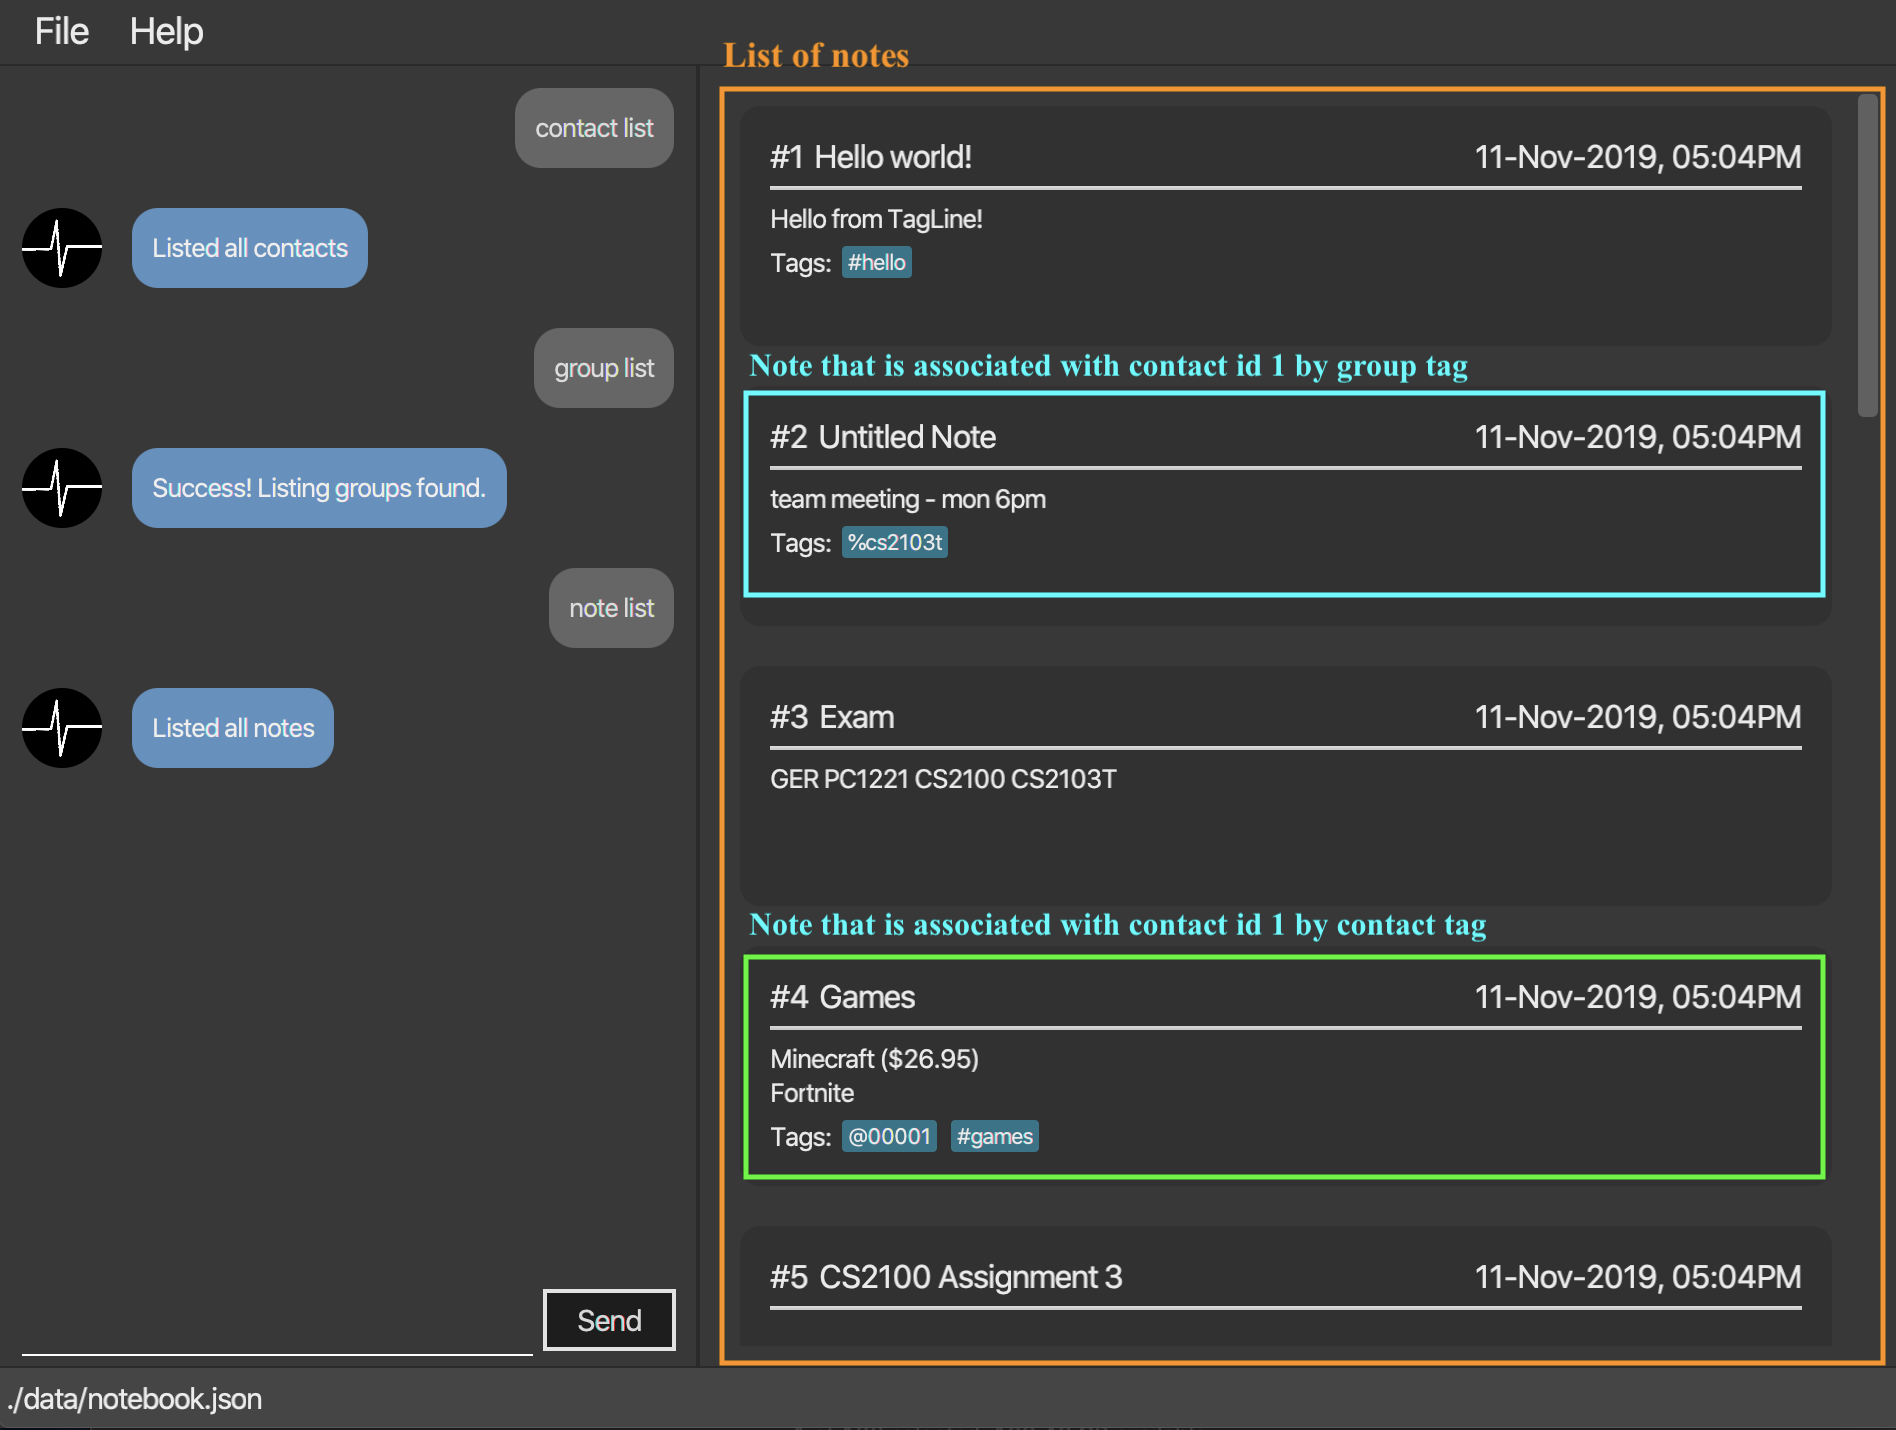 Figure 15. List of all notes that are stored by Tagline.
 -
Instead of checking association between notes and contacts one by one, you can just enter the following command:
contact show 1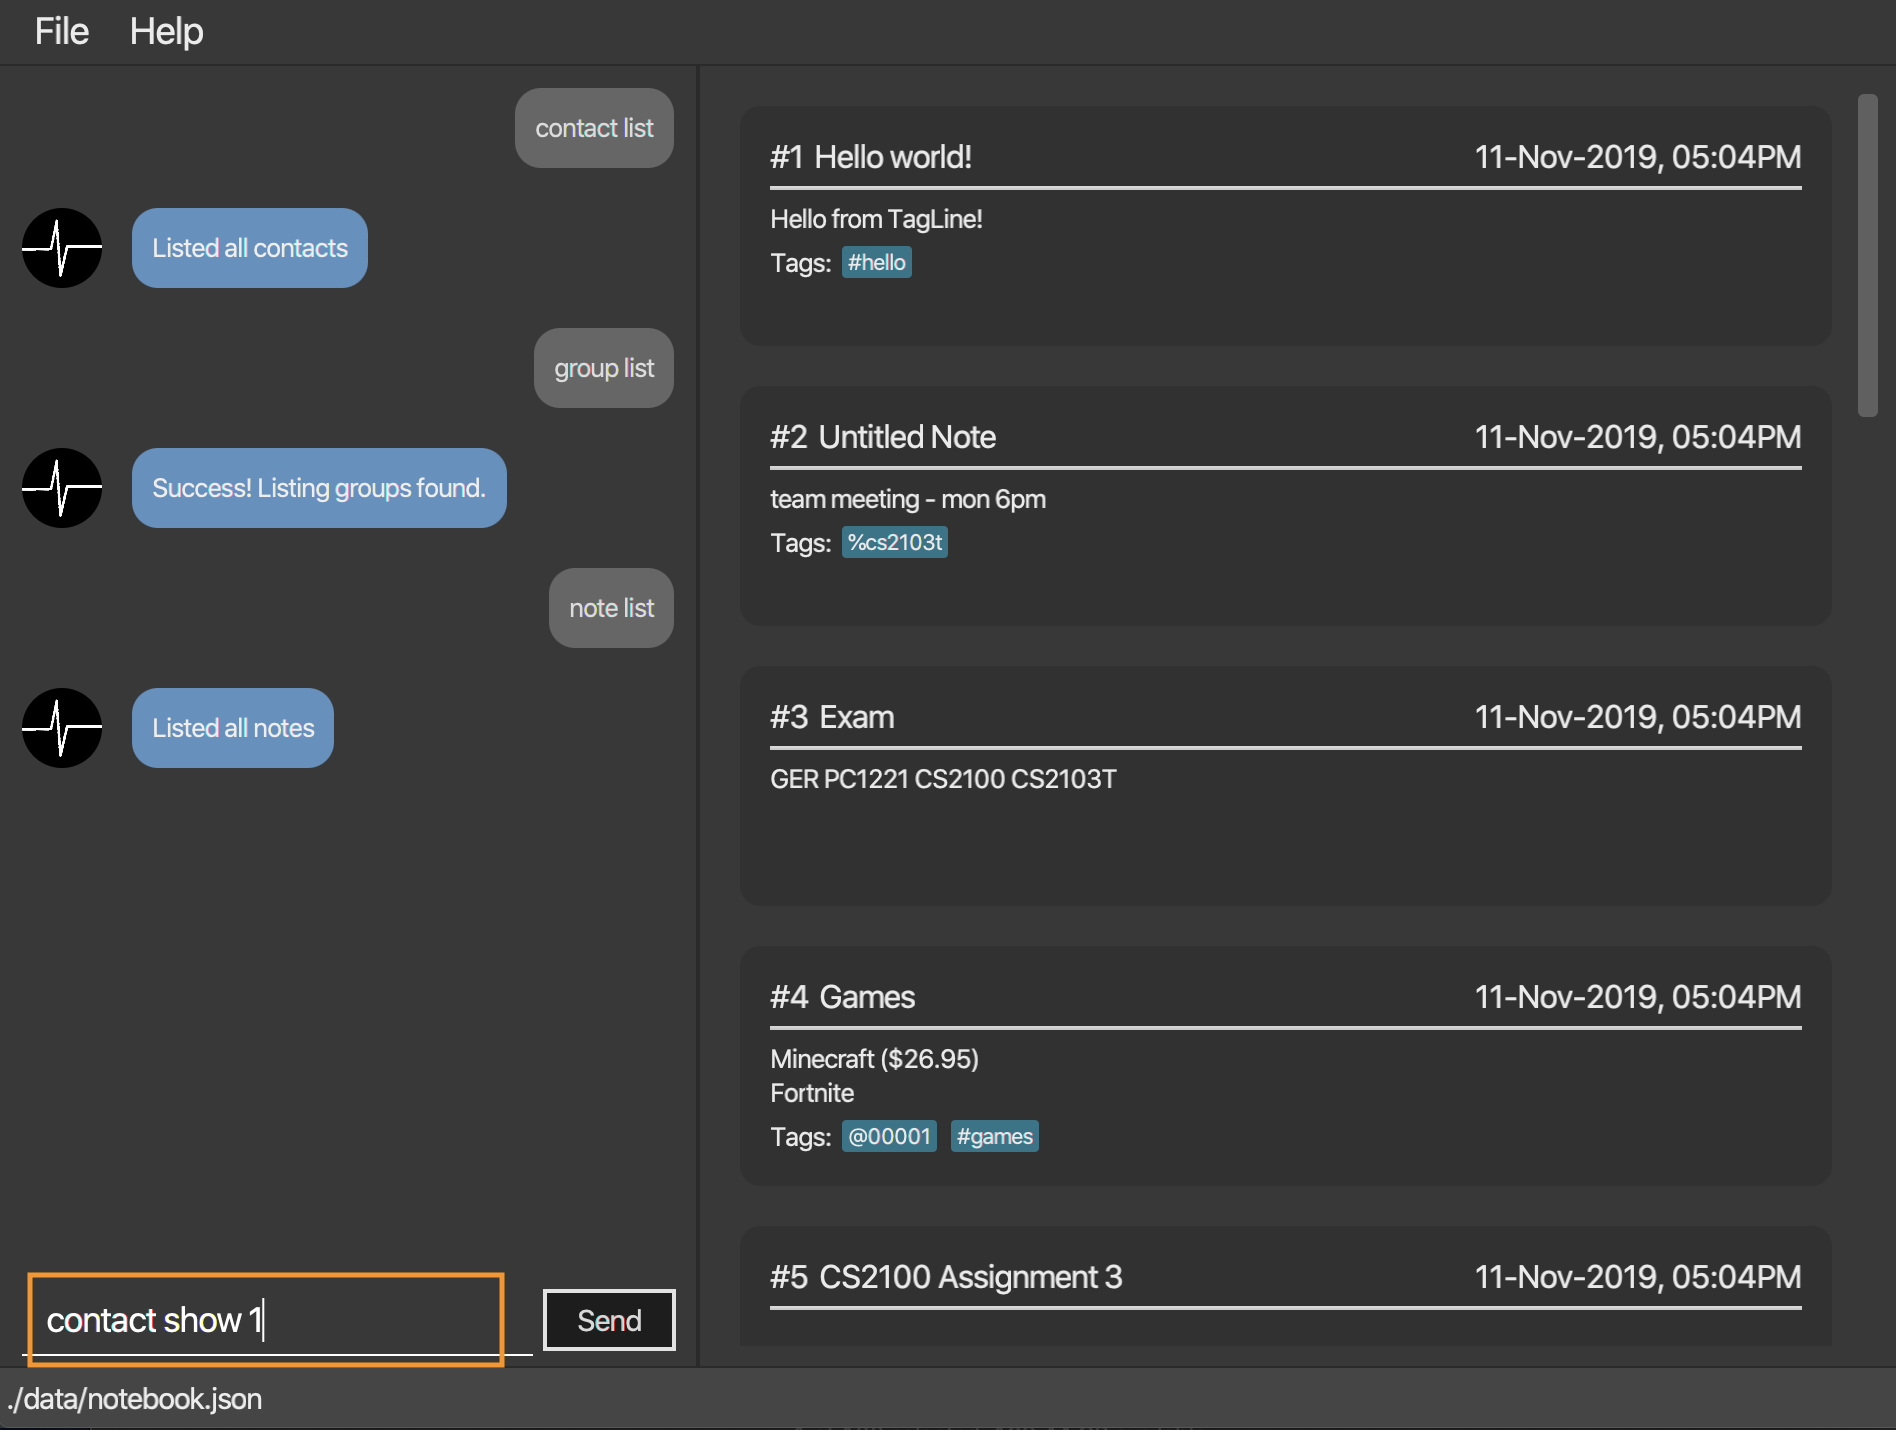 Figure 16. Entering the command
 -
This command allows you display a profile for a contact with id equals to
1. The profile contains basic information about a contact (i.e. name, email, phone number, address, and description) and list of notes that are associated with it.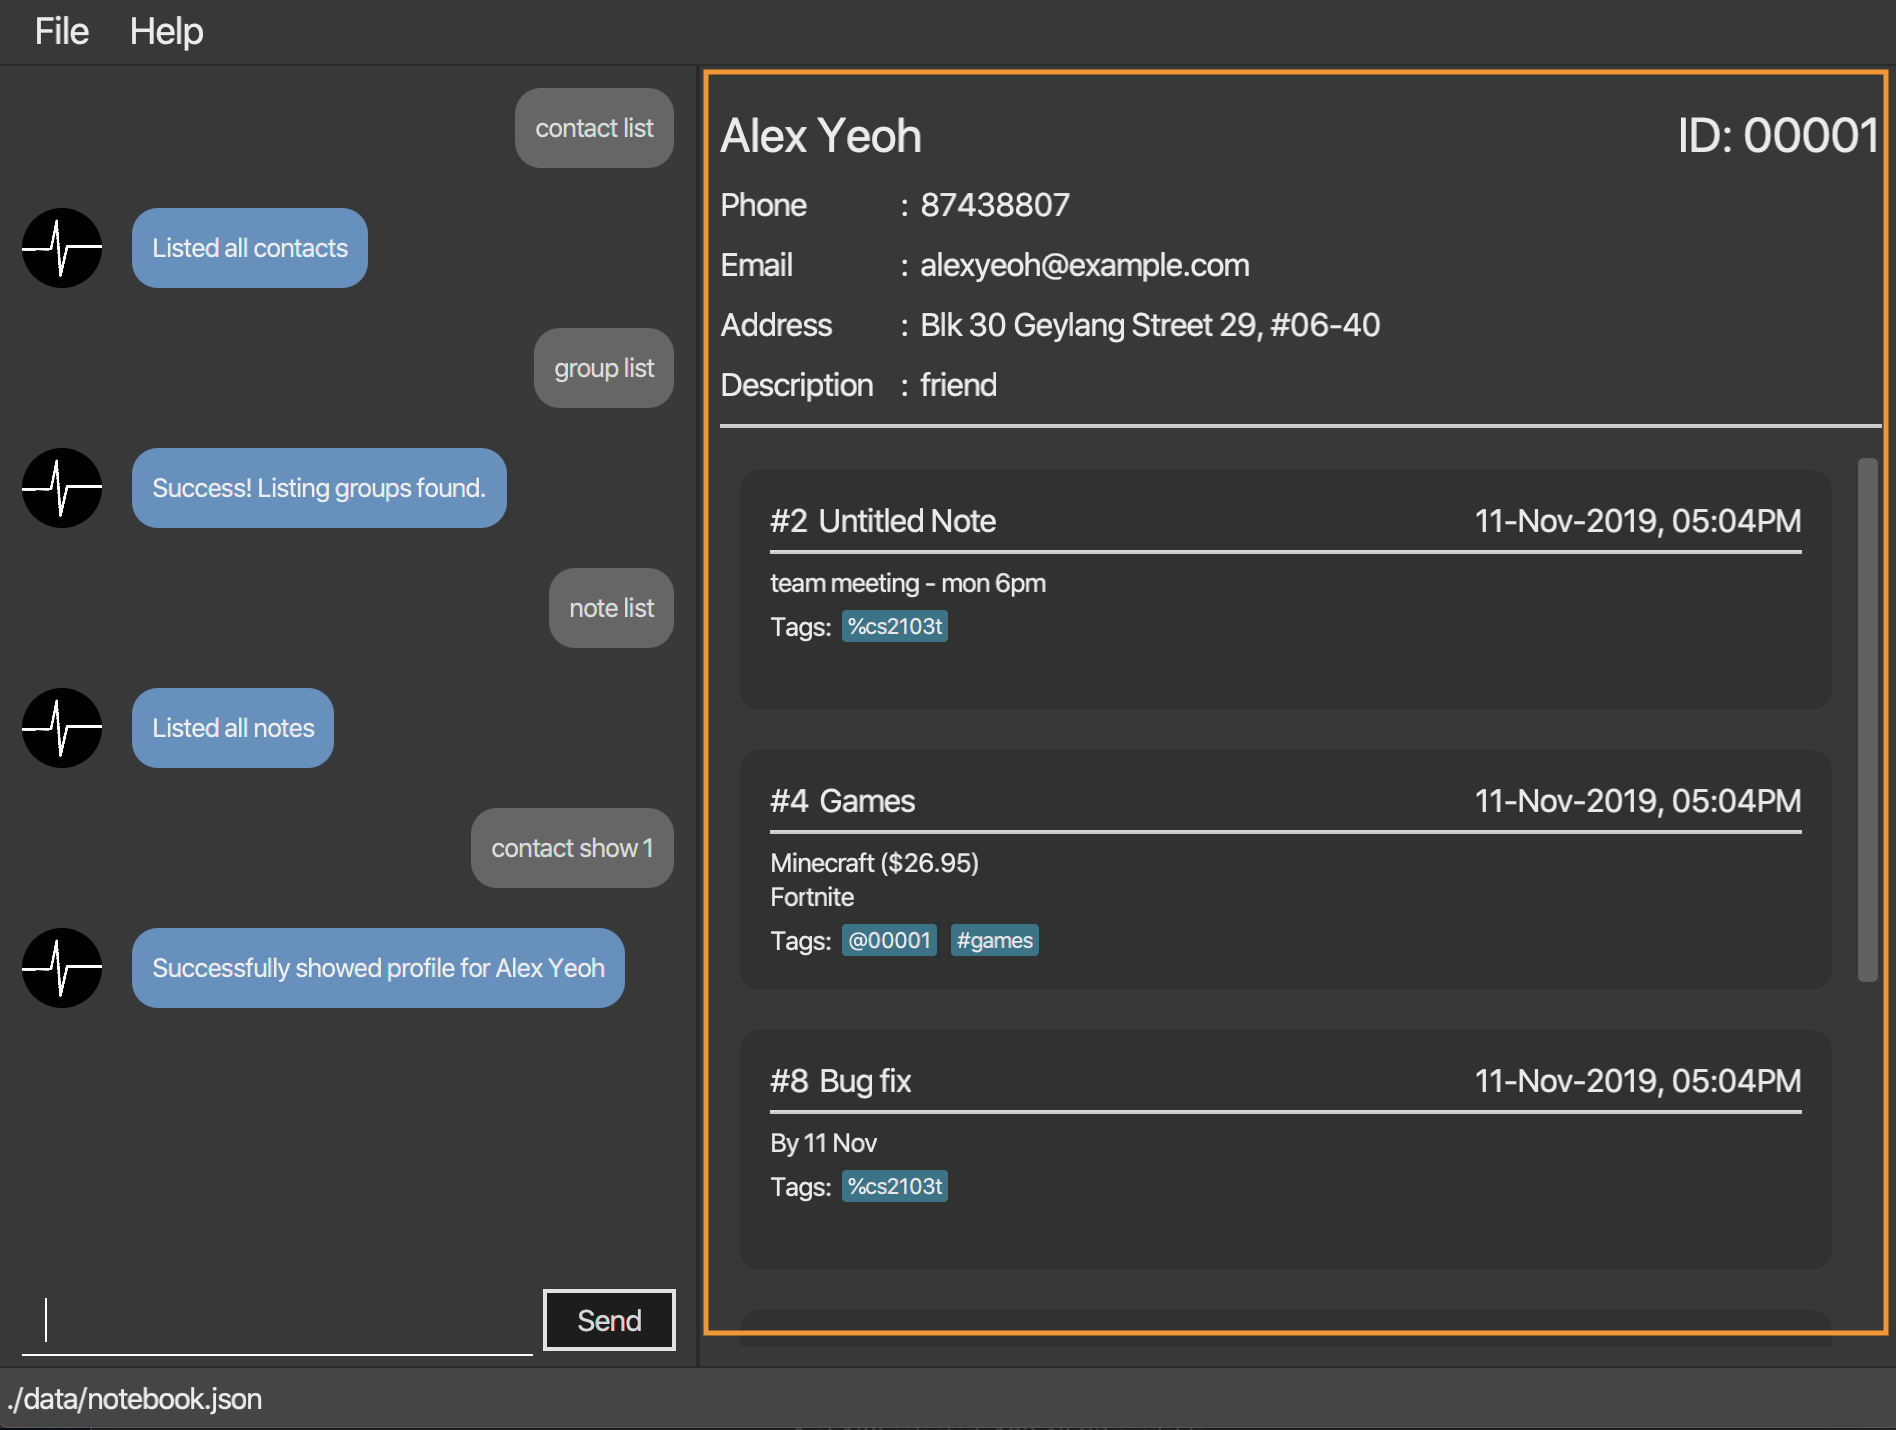 Figure 17. Command executed, contact profile displayed
4.2.7. Pin a person: pin [coming in v2.0]
Pins a contact to the top of the contact list.
Format:
contact pin CONTACT_ID
Examples:
-
contact pin 00343
4.2.8. Clear all entries : clear
Clears all data that you have in your contact list. Before executing this command, the application will also ask for confirmation through the chatbot because you won’t be able to undo this operation.
Format:
contact clear
Examples:
-
contact clearExecuting this command will trigger a confirmation in the chatbot:
Please confirm some additional details for the command. Press the escape key to abort.
Are you sure you want to clear your contact list? Enter 'Y' to continue.
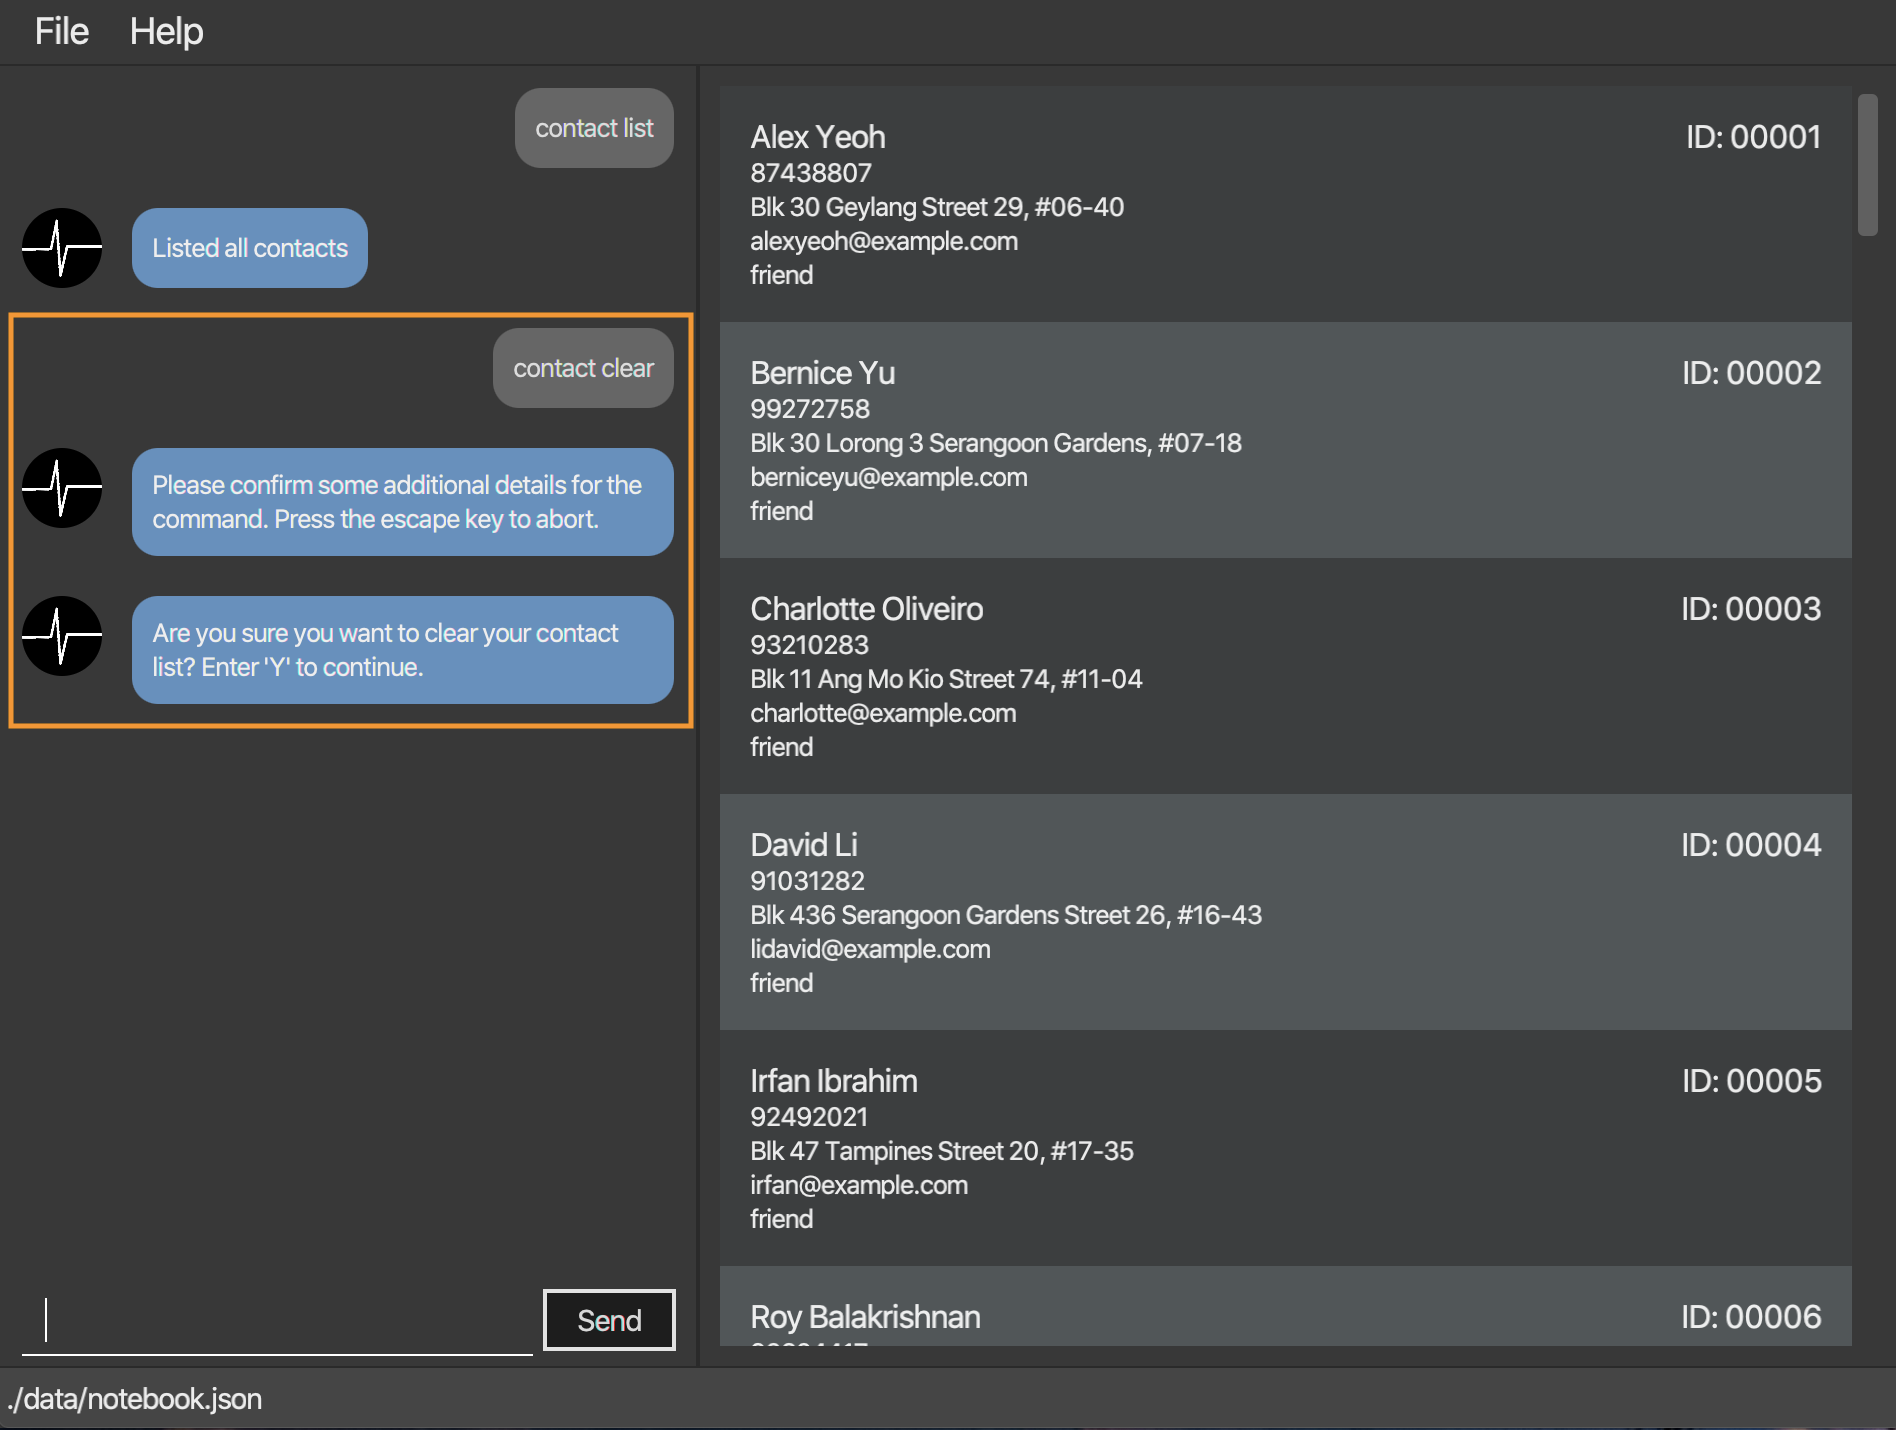 Figure 18. Confirmation for clearing notes
Then, if you answer "Y", the chatbot will clear all data in your contact list.
+ .Command executed, the contact list cleared. image::ug_contactclear2.png[width="600"]
If you press the ESC key, the command will be aborted.
4.3. Manage groups: group
| group descriptions and editing groups will be supported in v2.0, disregard any group description references here |
4.3.1. Create a contact group: create
Creates a new group. If any contacts are mentioned, the new group will contain all of the mentioned contacts.
Format:
group create GROUP_NAME [--i CONTACT_ID]*
Example:
-
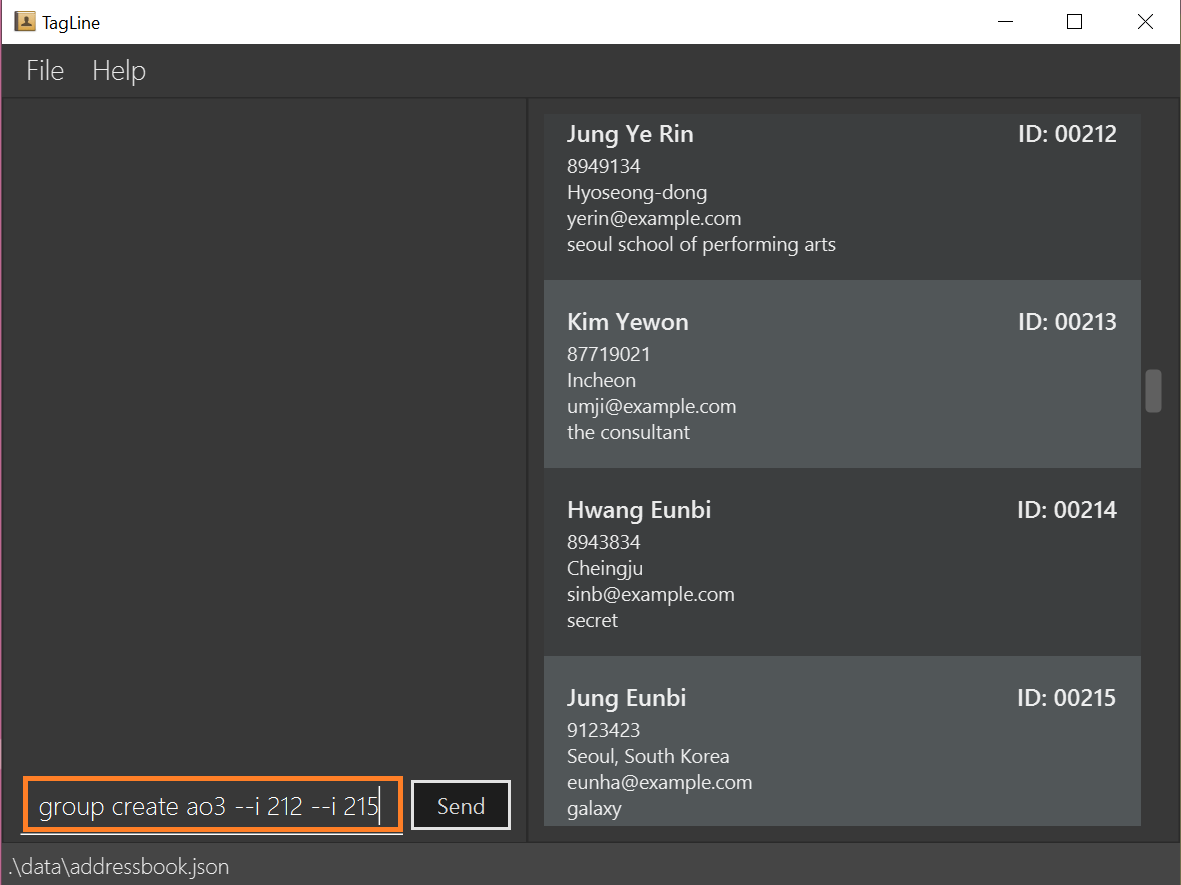
Lets imagine we wish to organize our contacts better by starting a mailing list of 'ao3' fanfic readers. We can start by creating an 'ao3' group with a few initial members using the command
group create ao3 --i 212 --i 215
-
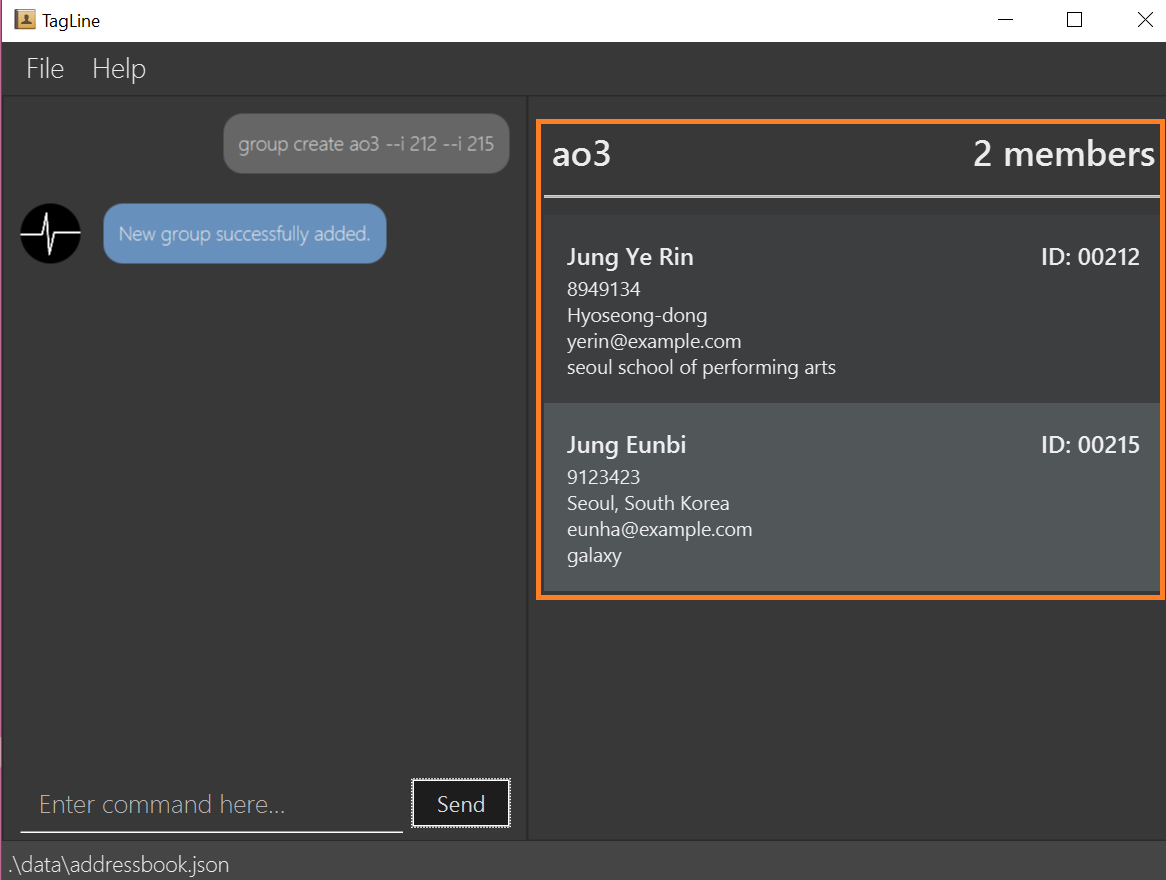
This creates a group with name 'ao3' that contains contacts with ID '212' and '215'
The display will show the group created and the contact that has been added.
| group descriptions and editing groups will be supported in v2.0 |
4.3.2. Remove member from a group: remove
Removes member from a group.
Format:
group remove GROUP_NAME [--i CONTACT_ID]+
Example:
-
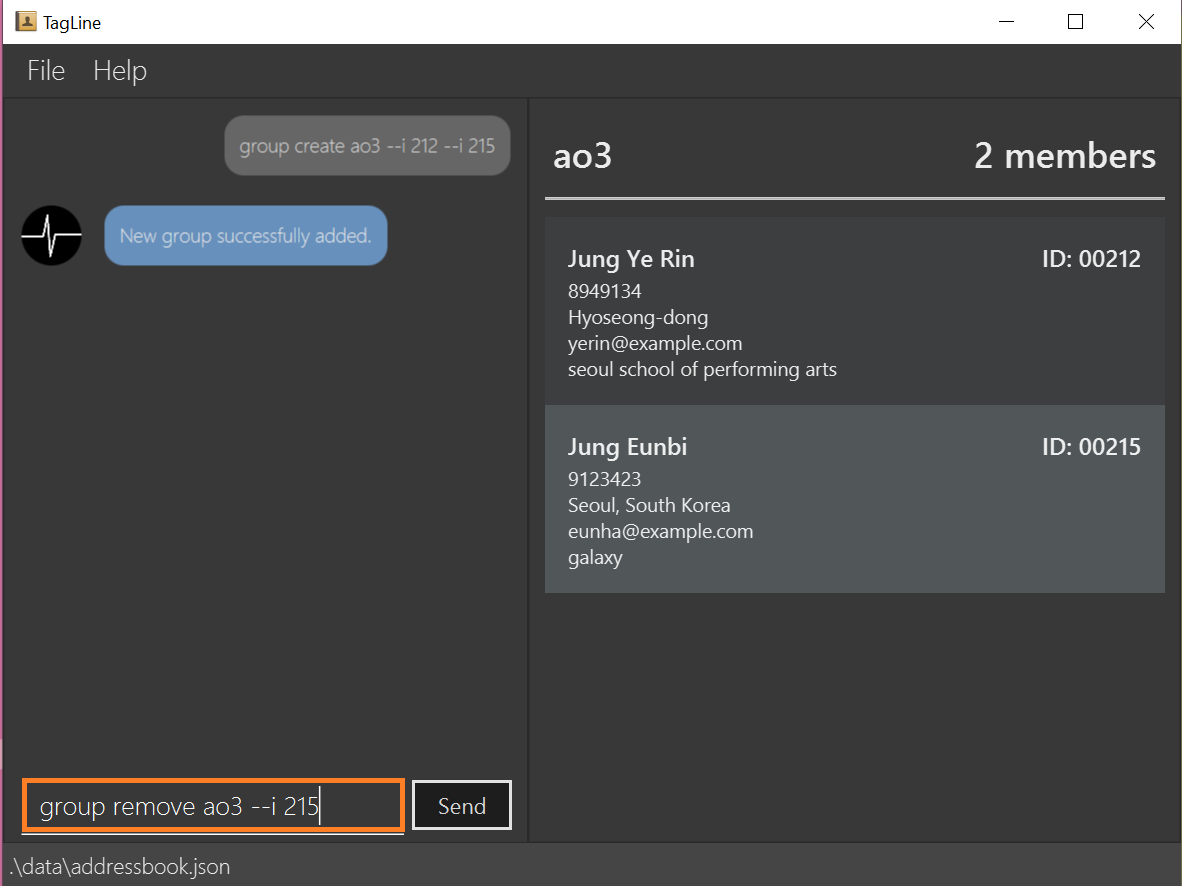
Social circles change over time. One of our former 'ao3' members have left us to join rival fanfic site 'wattpad'. To remove an 'ao3' members we can do so with the command
group remove ao3 --i 215
-
This adds a removes the contact with ID '000215' from the group with name 'ao3' The display will show the group and the contact left in the group.
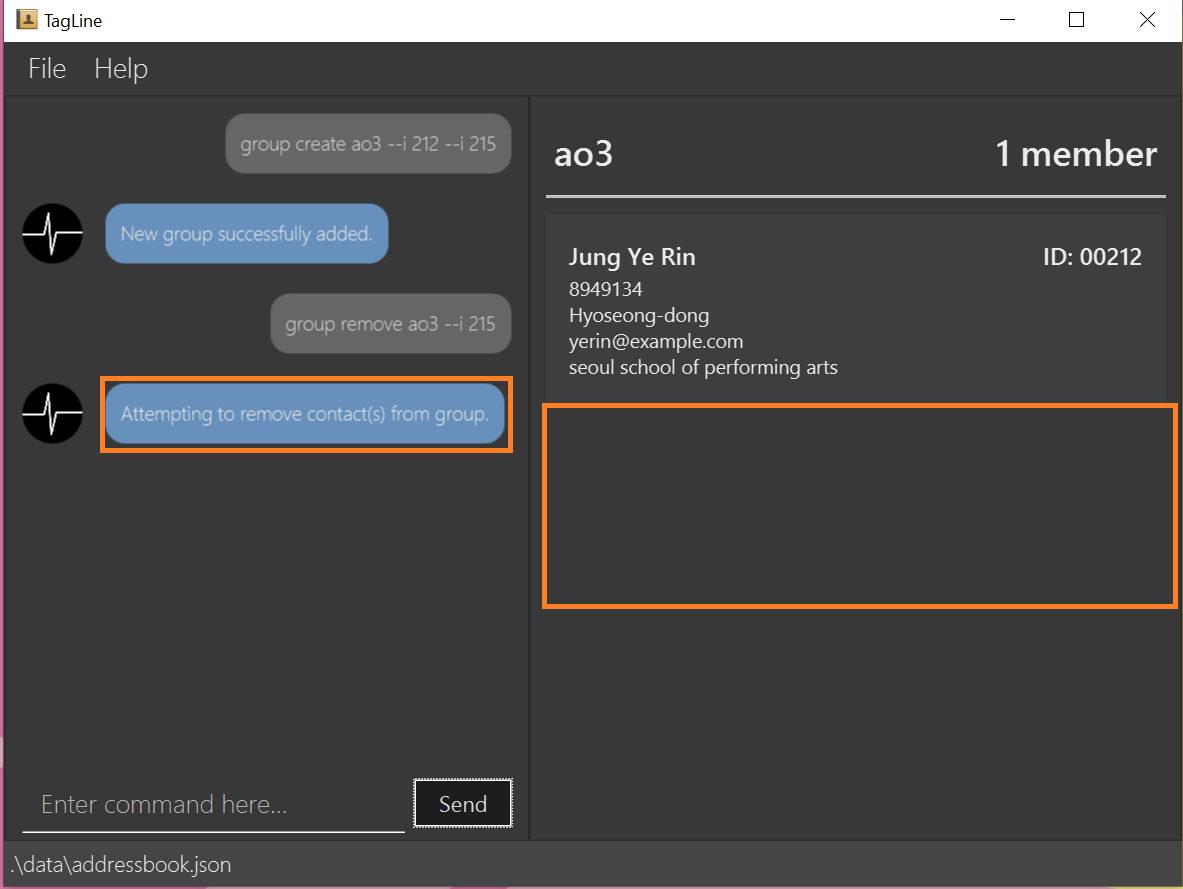
| The UI prompt would indicate 'Attempting to remove contact(s) from group' this prompt is a confirmation and signals that the command has been executed and no other prompt will be given. The prompts purpose is to warn that contact ids given which do not appear in the Group would not be detected and the user should check it manually. Auto detection of contacts to be deleted that are not found in the Group is left to v2.0 |
4.3.3. Add member to a group: add
Adds members to a group.
Format:
group add GROUP_NAME [--i CONTACT_ID]+
Example:
-
Over time our 'ao3' group has grown with new members joining. We need to update our group to record the recent addition. To add a member to our 'ao3' group we can use the command
group create ao3 --i 90040
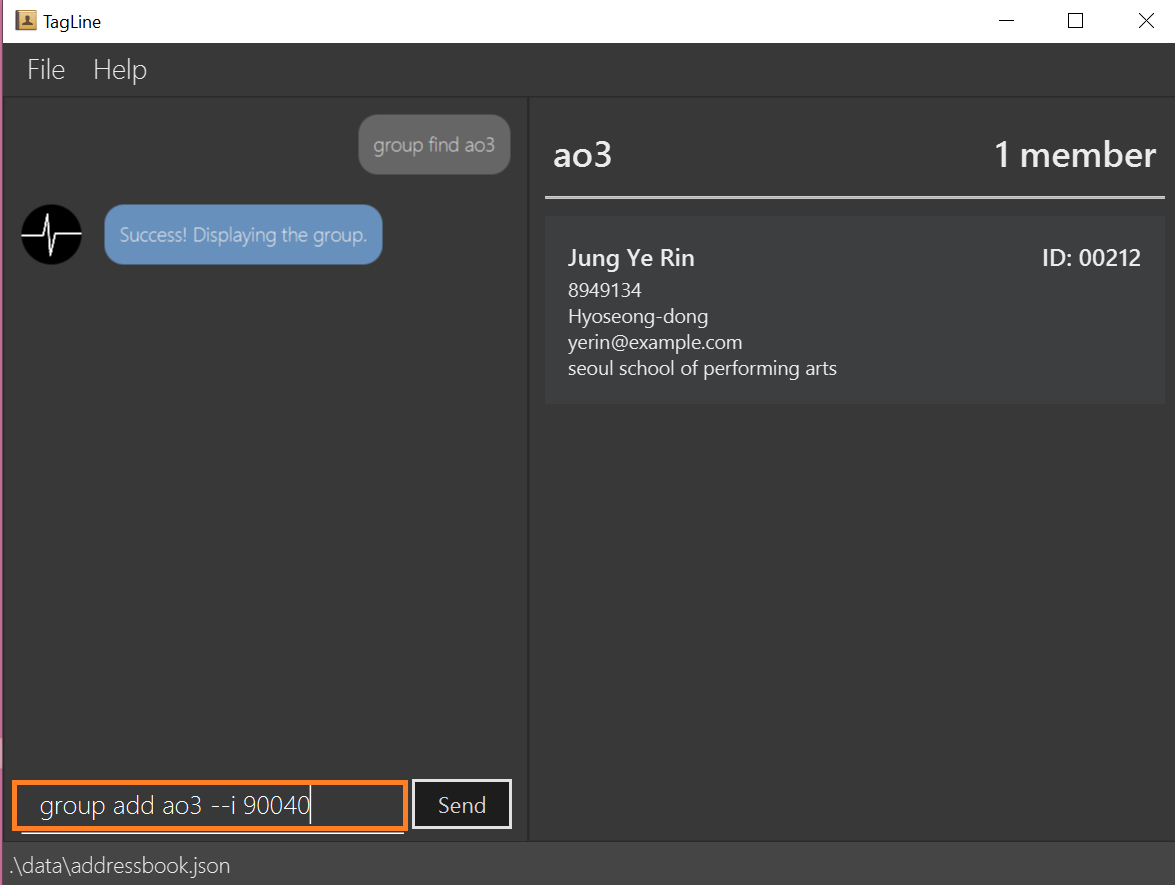
-
This adds a contact with ID '90040' to the group with name 'ao3' The display will show the group and the contact that has been added.
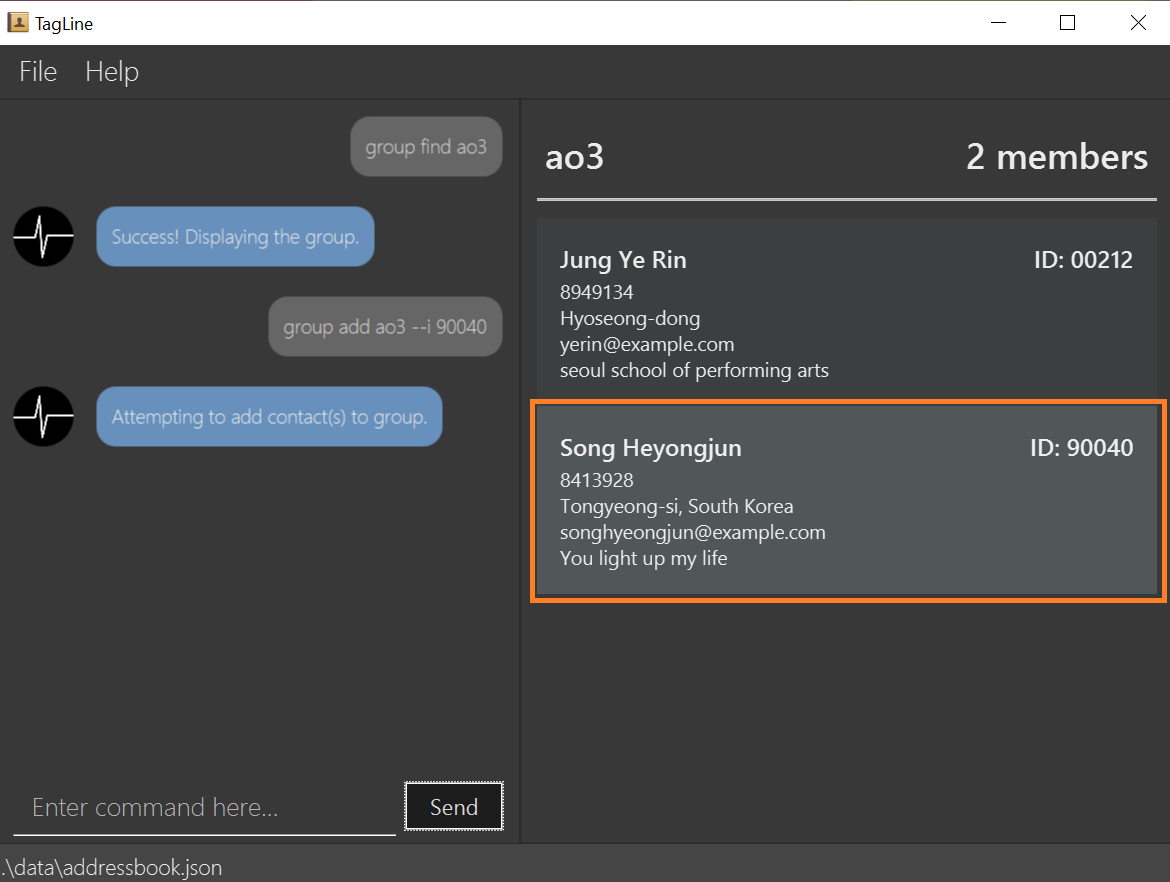
| The UI prompt would indicate 'Attempting to add contact(s) from group' this prompt is a confirmation and signals that the command has been executed and no other prompt will be given. The prompts purpose is to warn that contact ids given which do not appear in the Addressbook would not be detected and the user should check it manually. Auto detection of contacts to be added that are not found in the Addressbook is left to v2.0 |
4.3.4. List all groups: list
Lists all groups
Format:
group list
Example:
-
Sometimes we may wish to take a step back and view all the groups we are managing. To show all the groups stored we can use the command
group list

-
This displays all groups

| group descriptions will be supported in v2.0 |
4.3.5. Find a group: find
Finds a specific group and display the members
Format:
group find GROUP_NAME
Example:
-
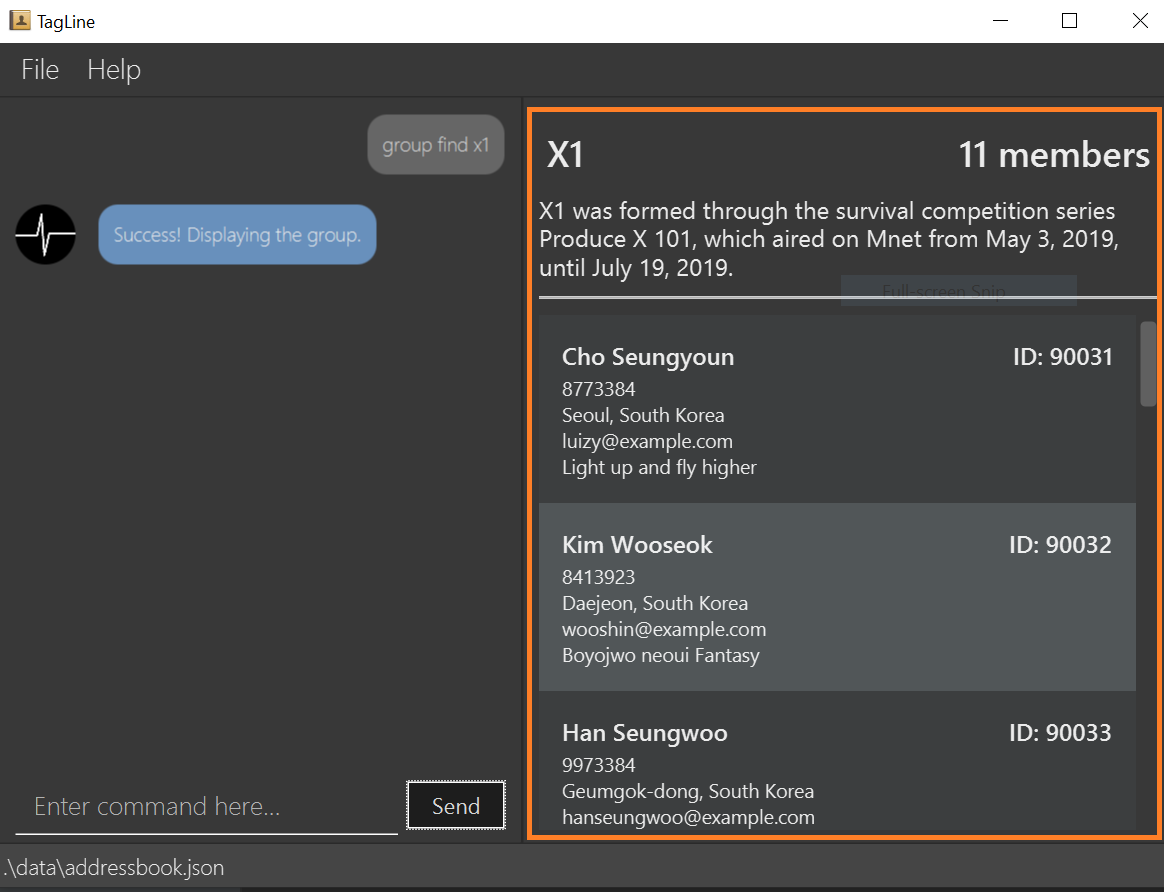
Often we may forget who is in a group and wish to know the contacts currently in a group. To find the 'ao3' group from the list of groups, we can use command
group find ao3with the exact group name we are looking for
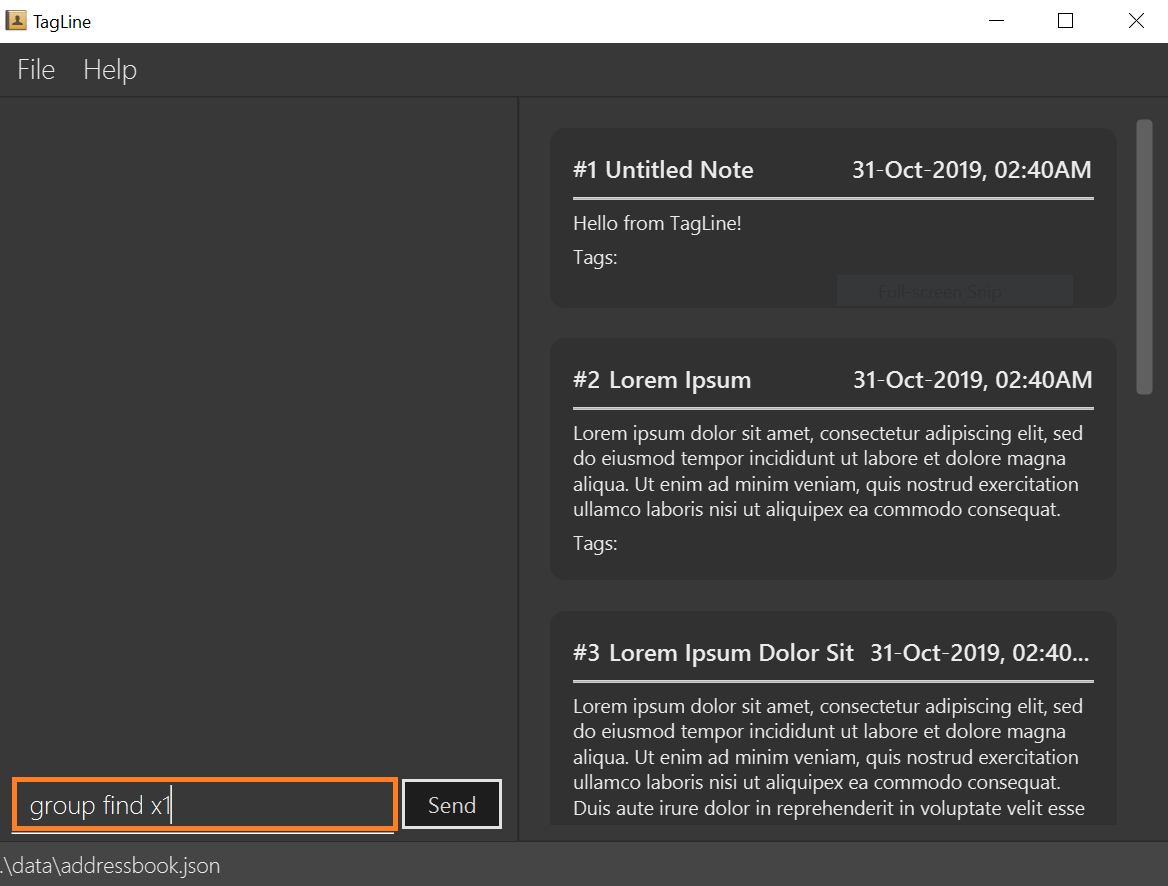
-
This searches for a group with the exact name as group 'ao3' The display will show the group and the group members
| group descriptions will be supported in v2.0 |
4.3.6. Display profile of a group: show [coming in v2.0]
Display the profile page of a contact group which shows the members of the group and notes tagged with the group.
Format:
group show GROUP_NAME
Example:
-
group show CS2103-F12-3
4.3.7. Delete a group: delete
Deletes a group. Note the contacts in the deleted group still exists, only the group has been disbanded.
Format:
group delete GROUP_NAME
Example:
-
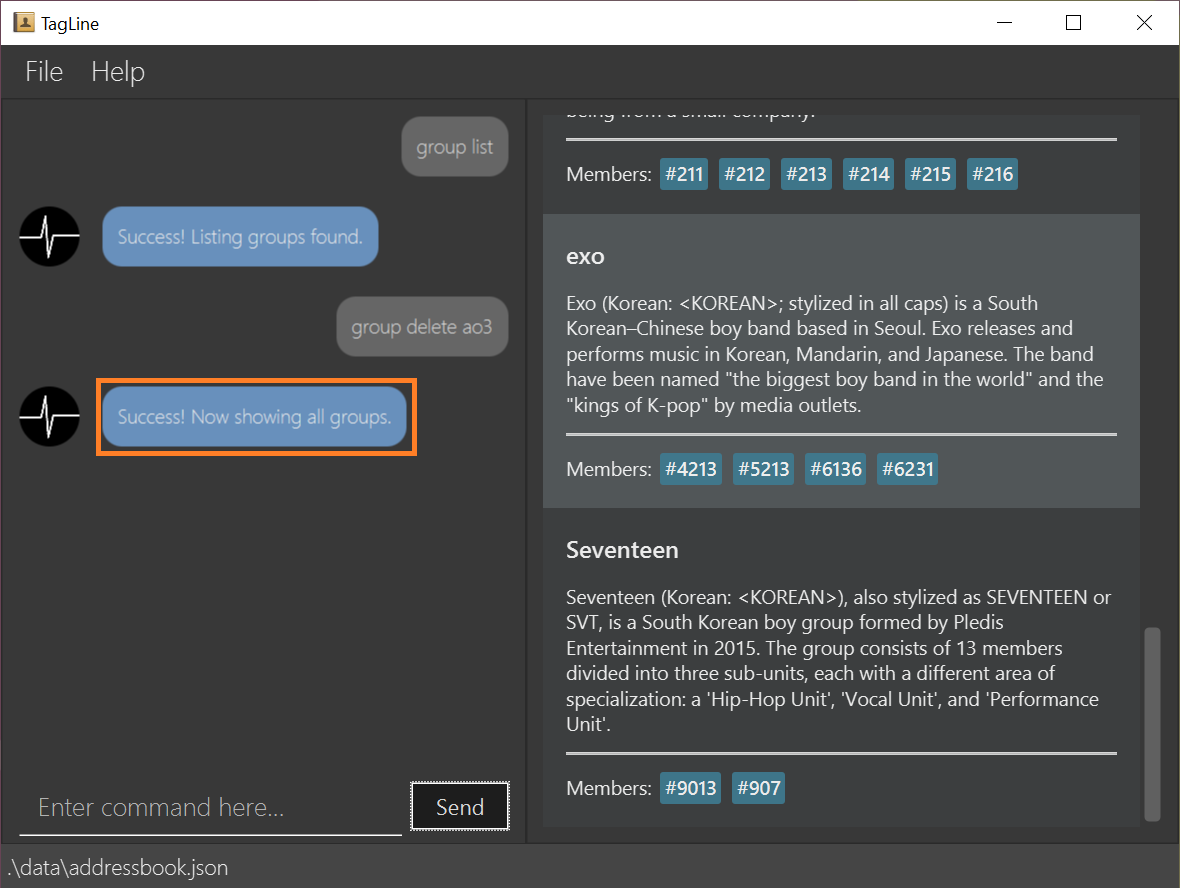
Suffering from success, our little mailing list of 'ao3' members have grown too large and split into several regional chapters to facilitate organization. Its time to disband the original 'ao3' group and make new groups for each chapter. To delete the group 'ao3', we can use command
group delete ao3
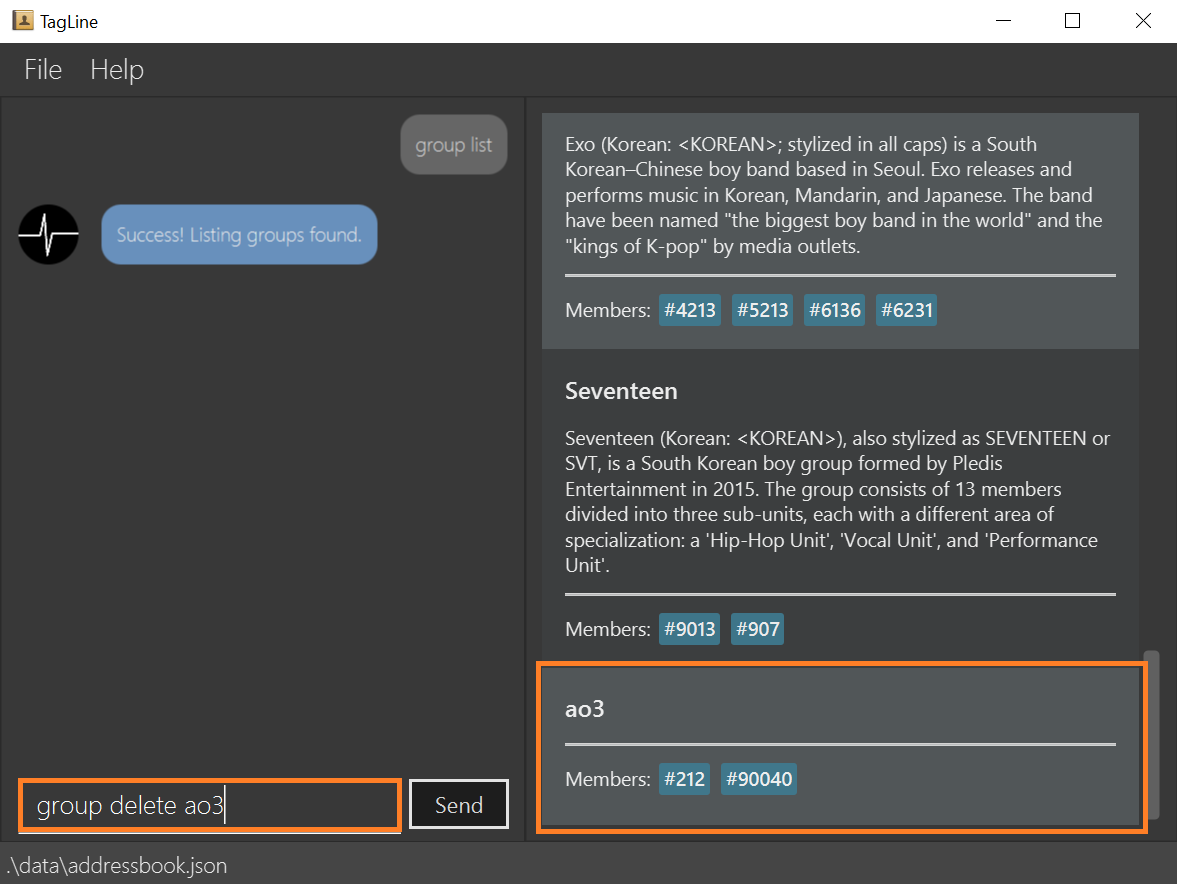
-
This searches for a group with the exact name as group 'ao3' The display will display all remaining groups in a list.
| group descriptions will be supported in v2.0 |
4.4. Manage your notes: note
Tagline can help people to manage their notes easily. When you use note commands, a view that displays a list of notes will appear in the right pane. The left pane still displays a chat bot for user interaction.
4.4.1. Creates a note: create
Creates a new note. If any tags are listed, the note will be tagged with them.
Notes without title will be titled "Untitled Note"
Format:
note create [--T TITLE] [--c CONTENT] [--t TAG]*
| TITLE and CONTENT can be optional if the other is defined but cannot be both empty. |
Example:
-
Let’s say you found a resource link that can be referenced for your assignment and you would like to make a note. You can create a note with the resource link as the content with the following command
note create --T MIPS --c https://en.wikipedia.org/wiki/MIPS_architecture --t #assignment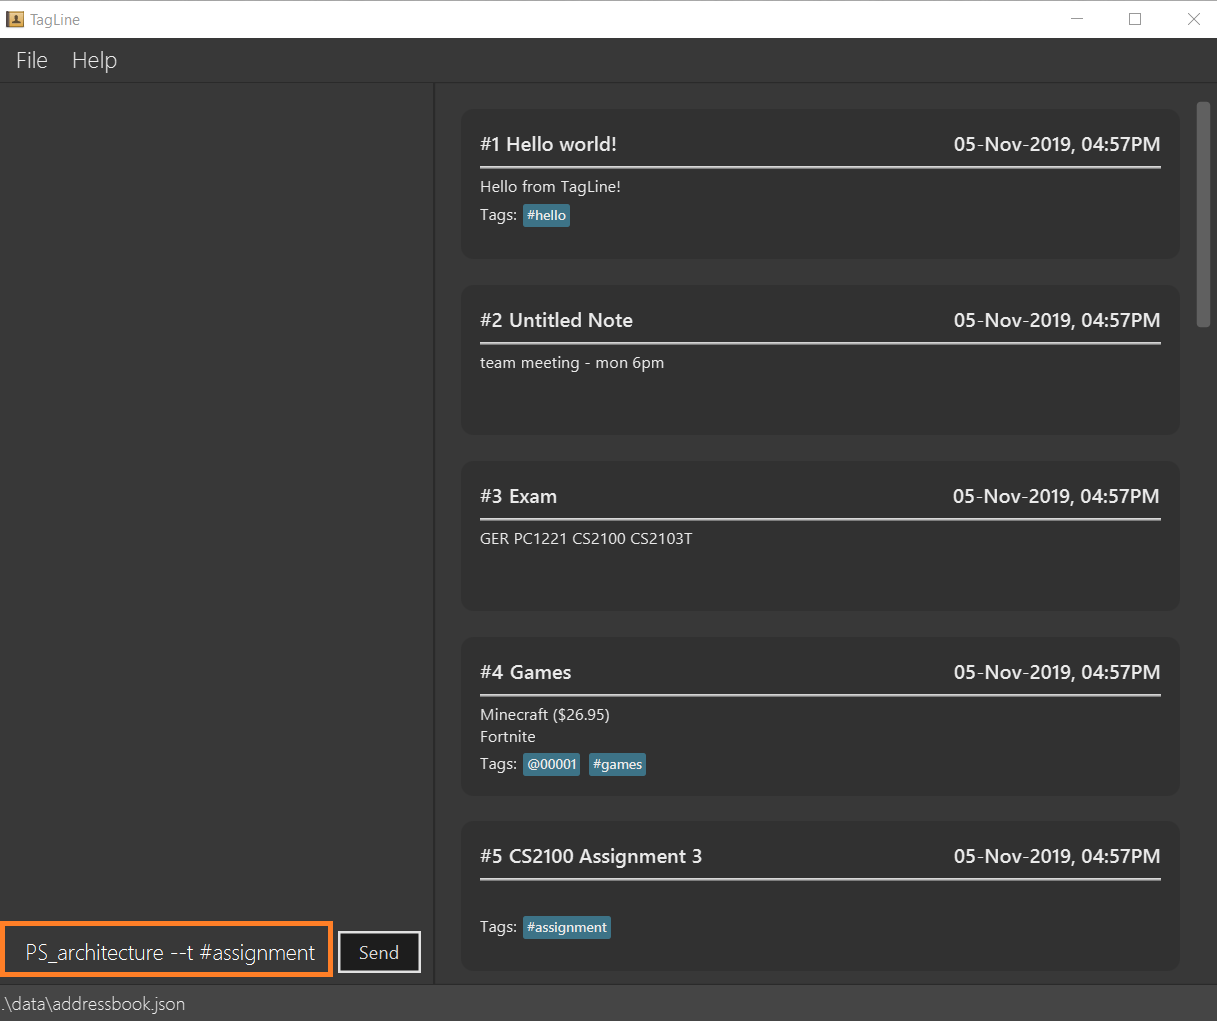 Figure 32. Entering
note createcommand -
A note is created with the title "MIPS" and content "https://en.wikipedia.org/wiki/MIPS_architecture". The note is also tagged with the hashtag "assignment".
The note created is displayed in the right pane.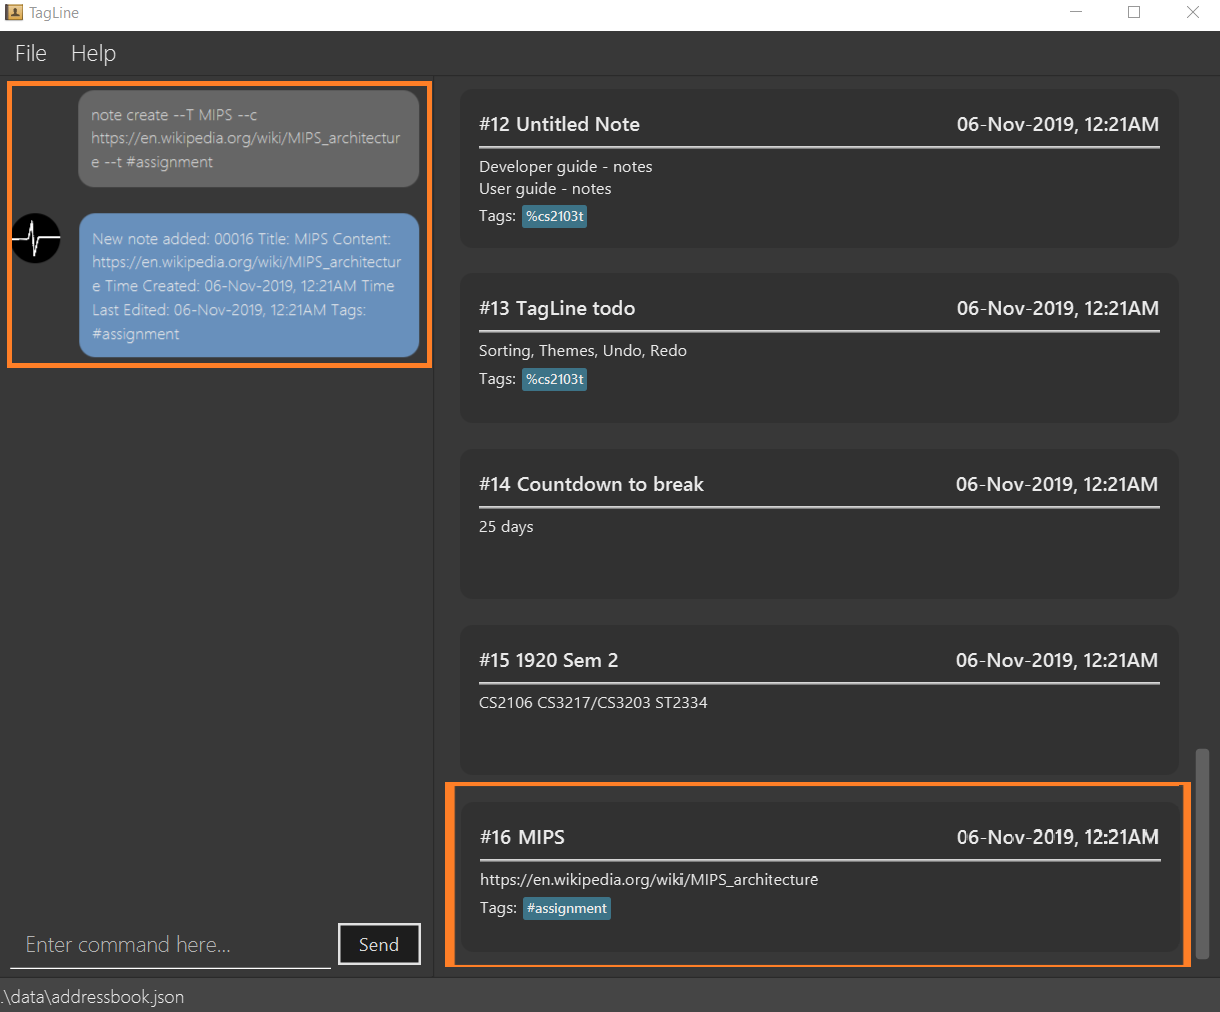 Figure 33. Note created after command execution
| Upload of image will be supported in v2.0 |
4.4.2. Delete a note: delete
Deletes a note.
Format:
note delete NOTE_ID
| As assigned note id is static, deleted note id are not reassigned. |
Example:
-
If you have completed your assignment and would like to delete the note related to the resource link, you can delete with the command
note delete 16.
As the note id is "00016", you can enter "16" as the NOTE_ID parameter.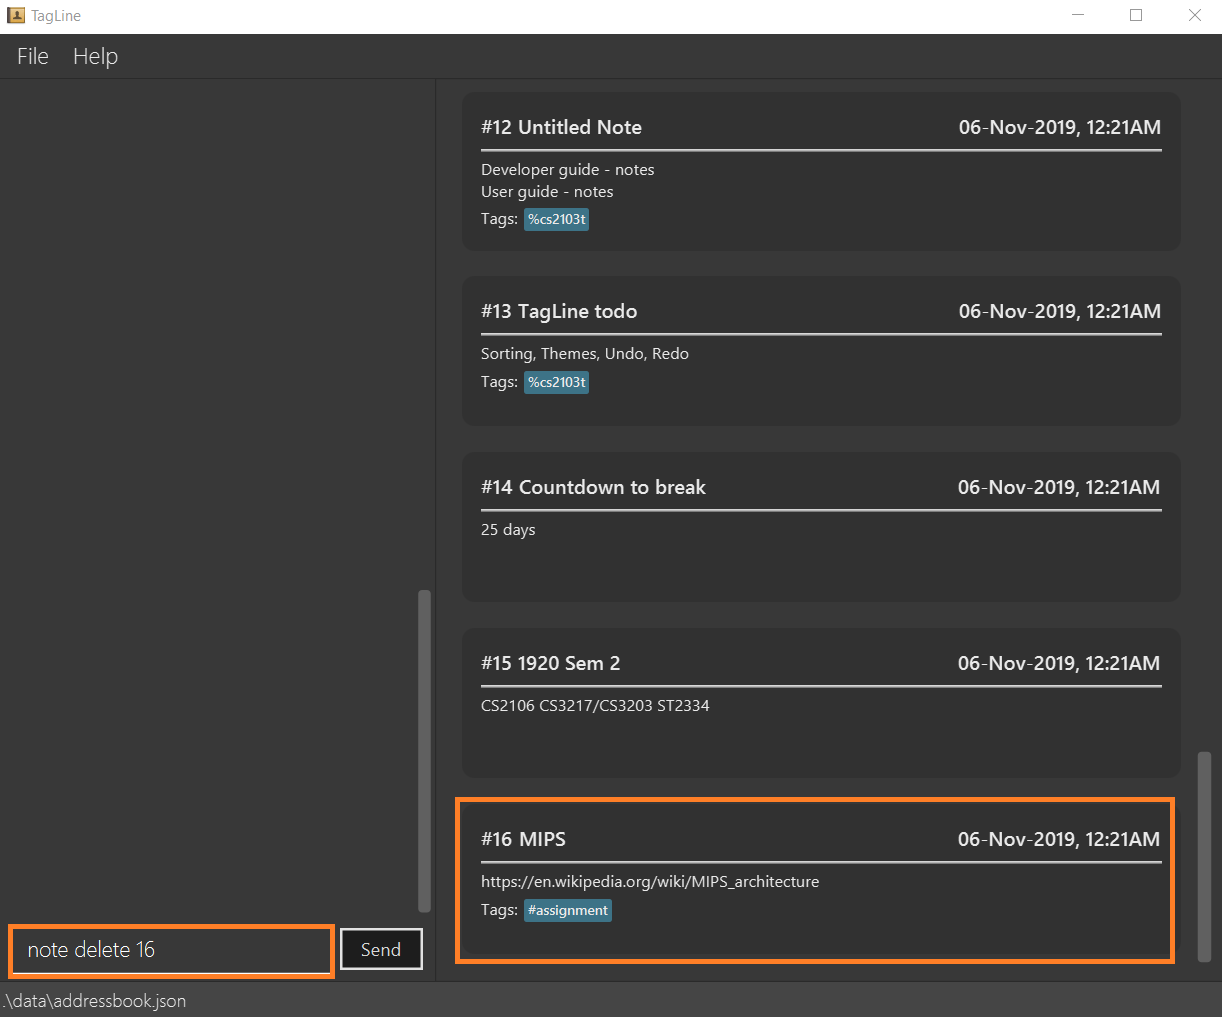 Figure 34. Entering
note deletecommand -
The note will be deleted from TagLine.
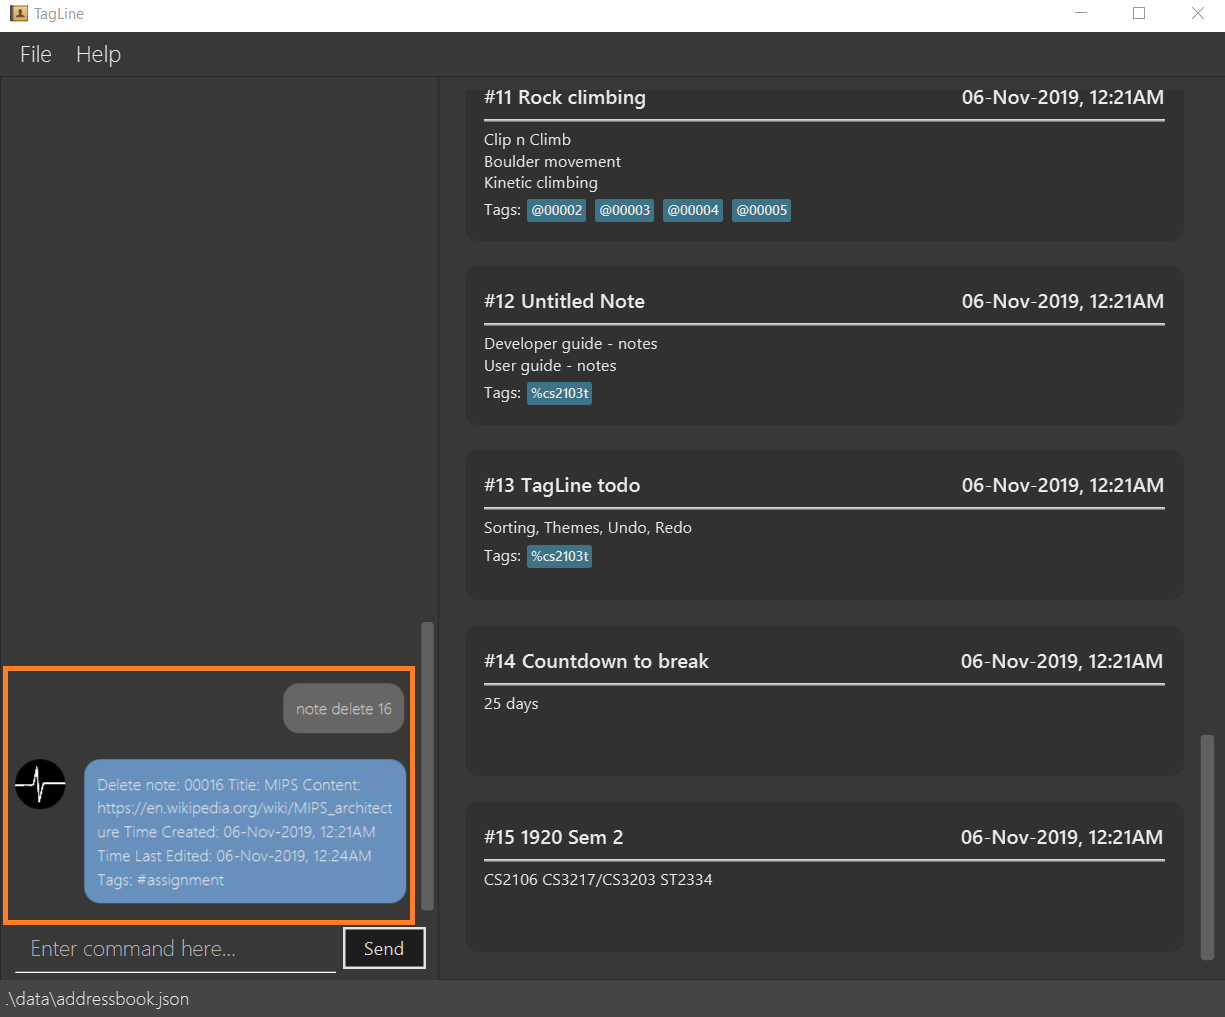 Figure 35. Note deleted after command execution
4.4.3. Edit a note: edit
Edits a saved note.
Format:
note edit NOTE_ID [--T NEW_TITLE] [--c NEW_CONTENT]
| Enter the parameters to update. |
Example:
-
If you find that your note title should have more information, you can enter the command
note edit 16 --T CS2100 Assignment: MIPS Figure 36. Entering
note editcommand -
The title of the note will be changed from "MIPS" to "CS2100 Assignment: MIPS".
 Figure 37. Note edited after command execution
|
Upload of image will be supported in v2.0 Partial editing will be supported in v2.0 |
4.4.4. Tag a note: tag
Tags a note with one or more tags.
Format:
note tag NOTE_ID [--t TAG]+
In Tagline, there are 3 types of tags. They are hash tag, contact tag and group tag.
Tag a note with a hash tag
Hash tag is a tag of the form #TOPIC where TOPIC could be substituted with any string not longer than 30
characters.
Example: #Assignment_1, #Project CS2103T, #Meeting Notes
By tagging a note with a hash tag, user can easily find all notes related to a certain topic.
Here is an example of tagging a note with a hash tag
-
Enter the command
note tag 1 --t #any topicinto the command box.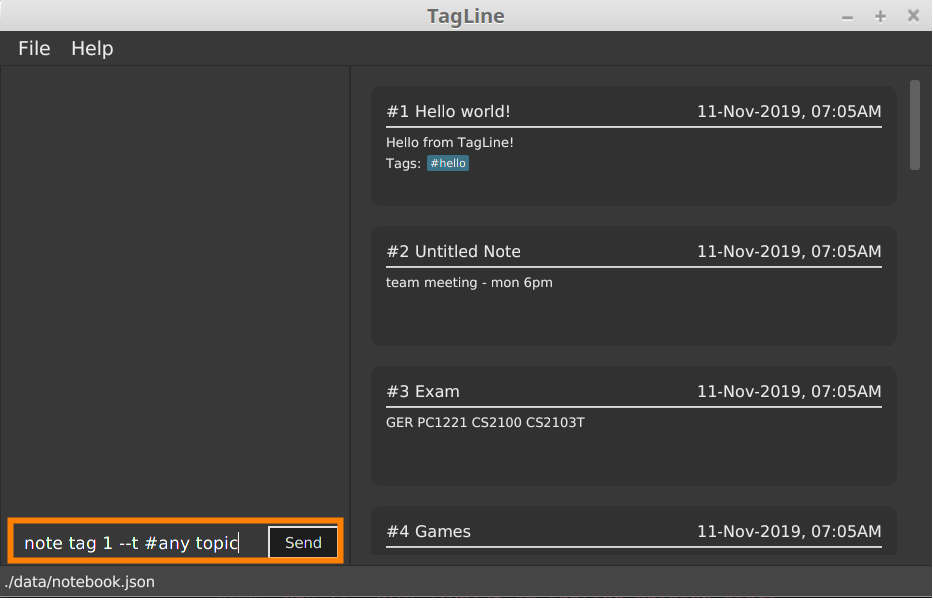
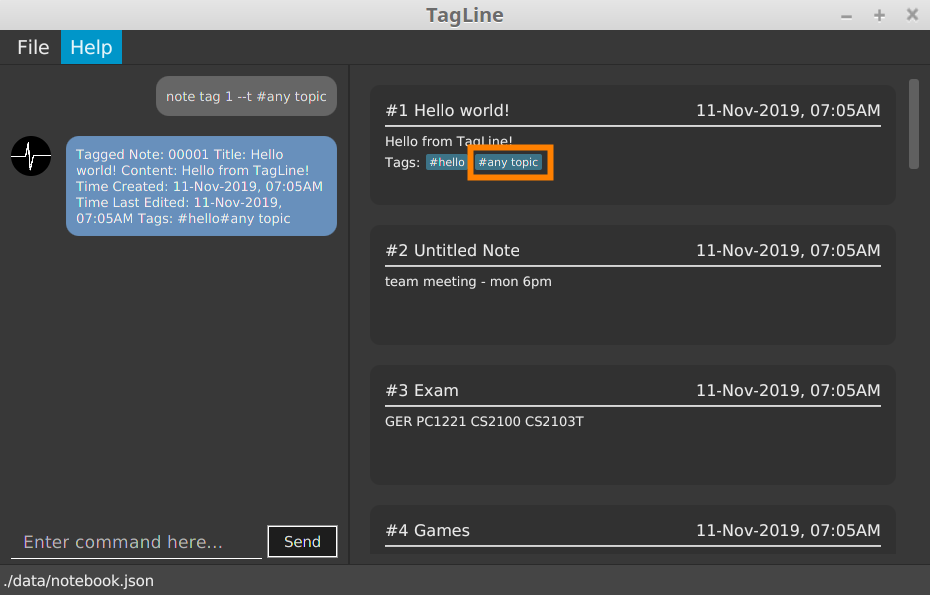
-
Send the command and you will be able to see the tag in the note view.
Tag a note with a contact tag
Contact tag is a tag of the form @CONTACT_ID where CONTACT_ID could be substituted with any non-negative integer with
at most 8 digits.
Example: @12345, @00001, @2
By tagging a note with a contact tag, user can easily find all notes related to a certain contact.
Here is an example of tagging a note with a contact tag
-
Enter the command
note tag 1 --t @2into the command box.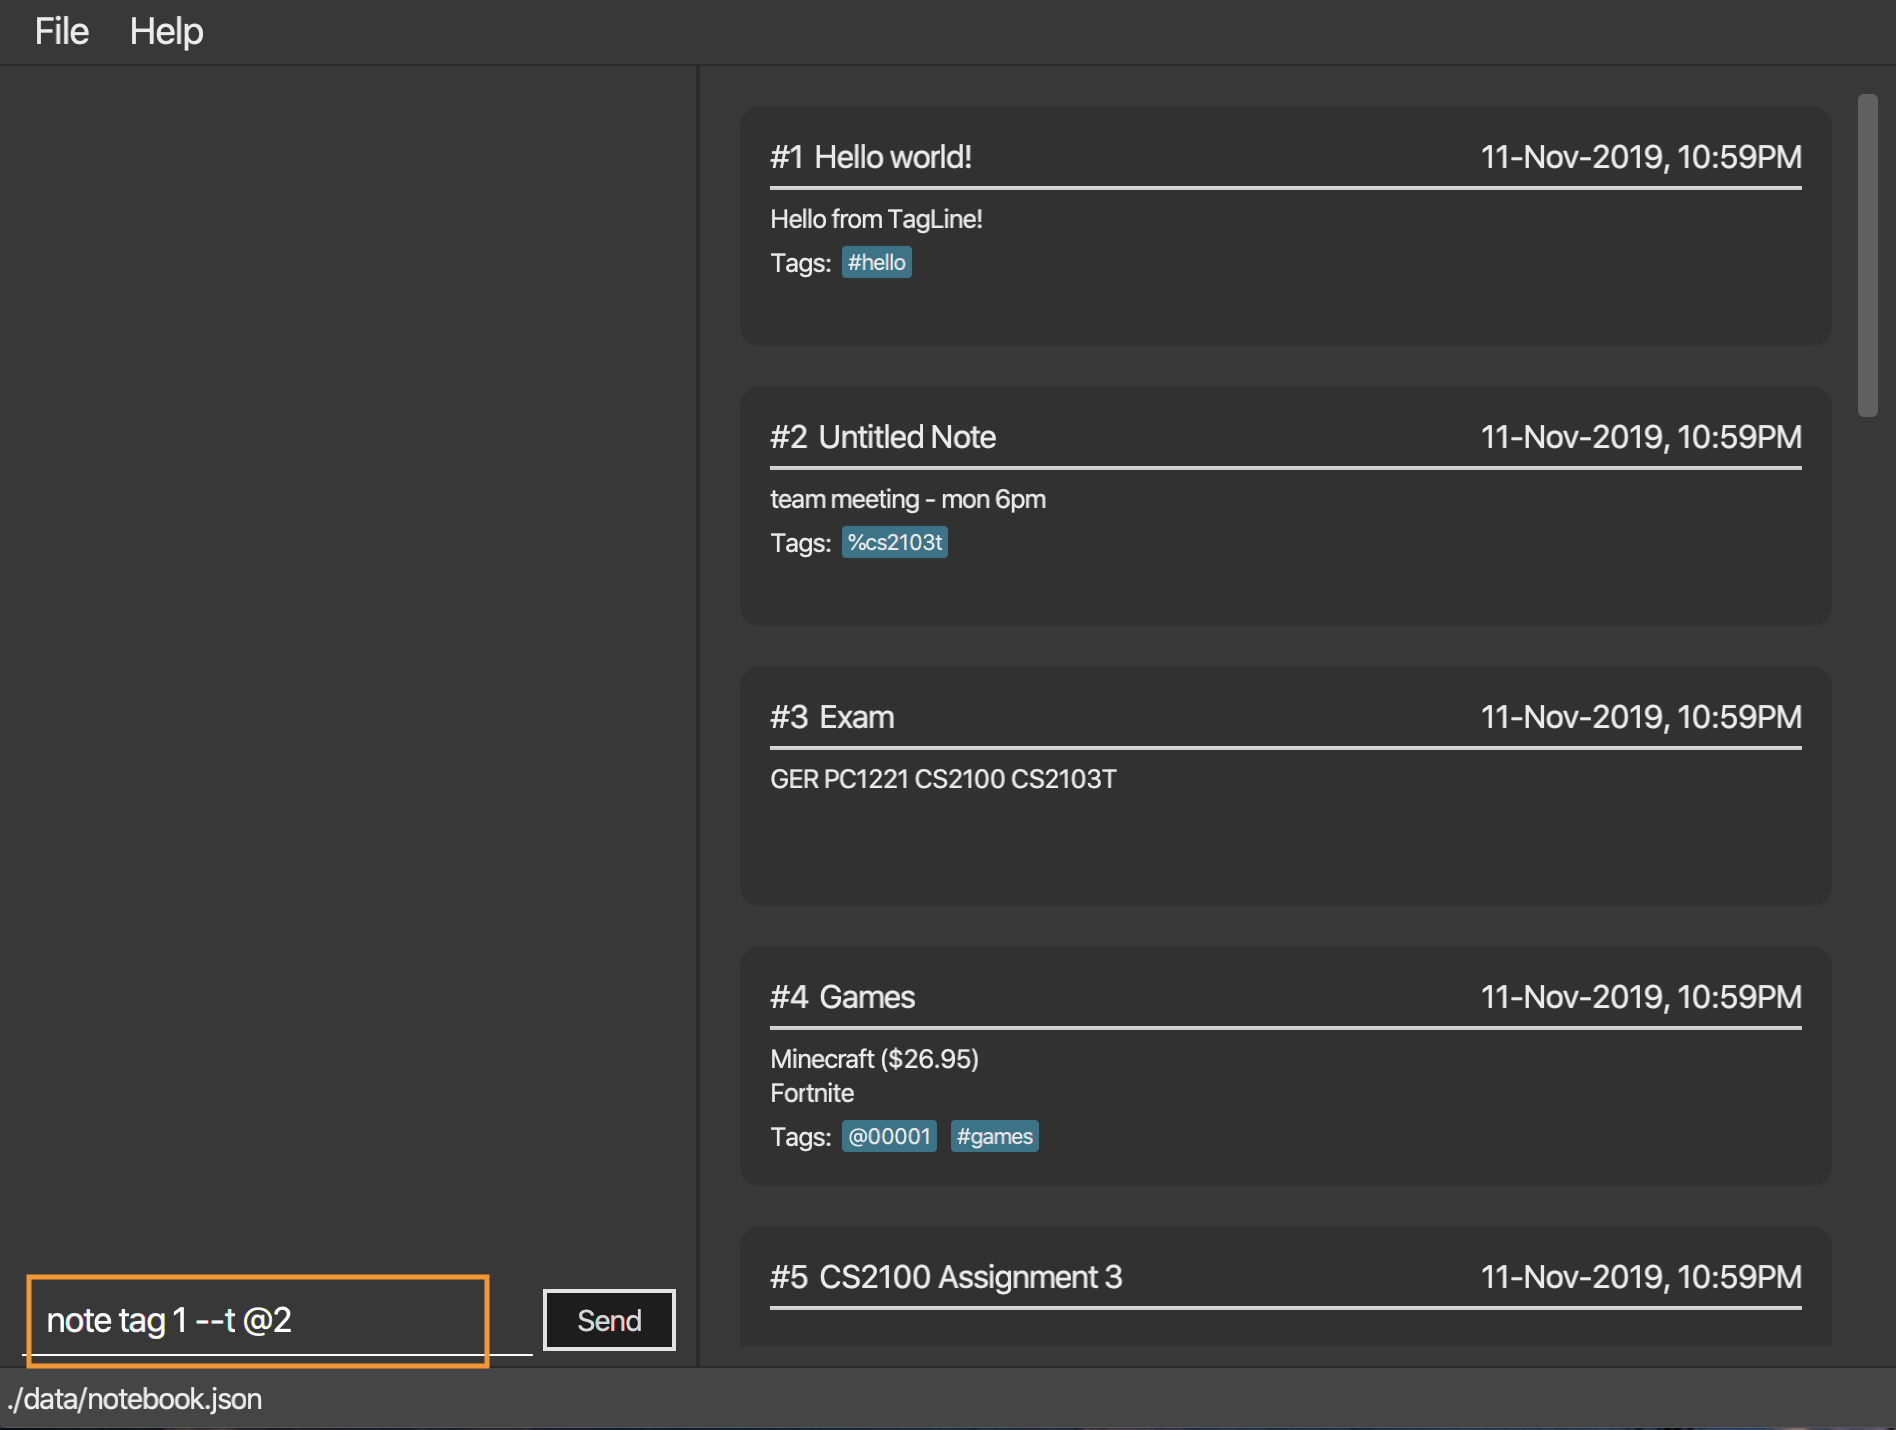
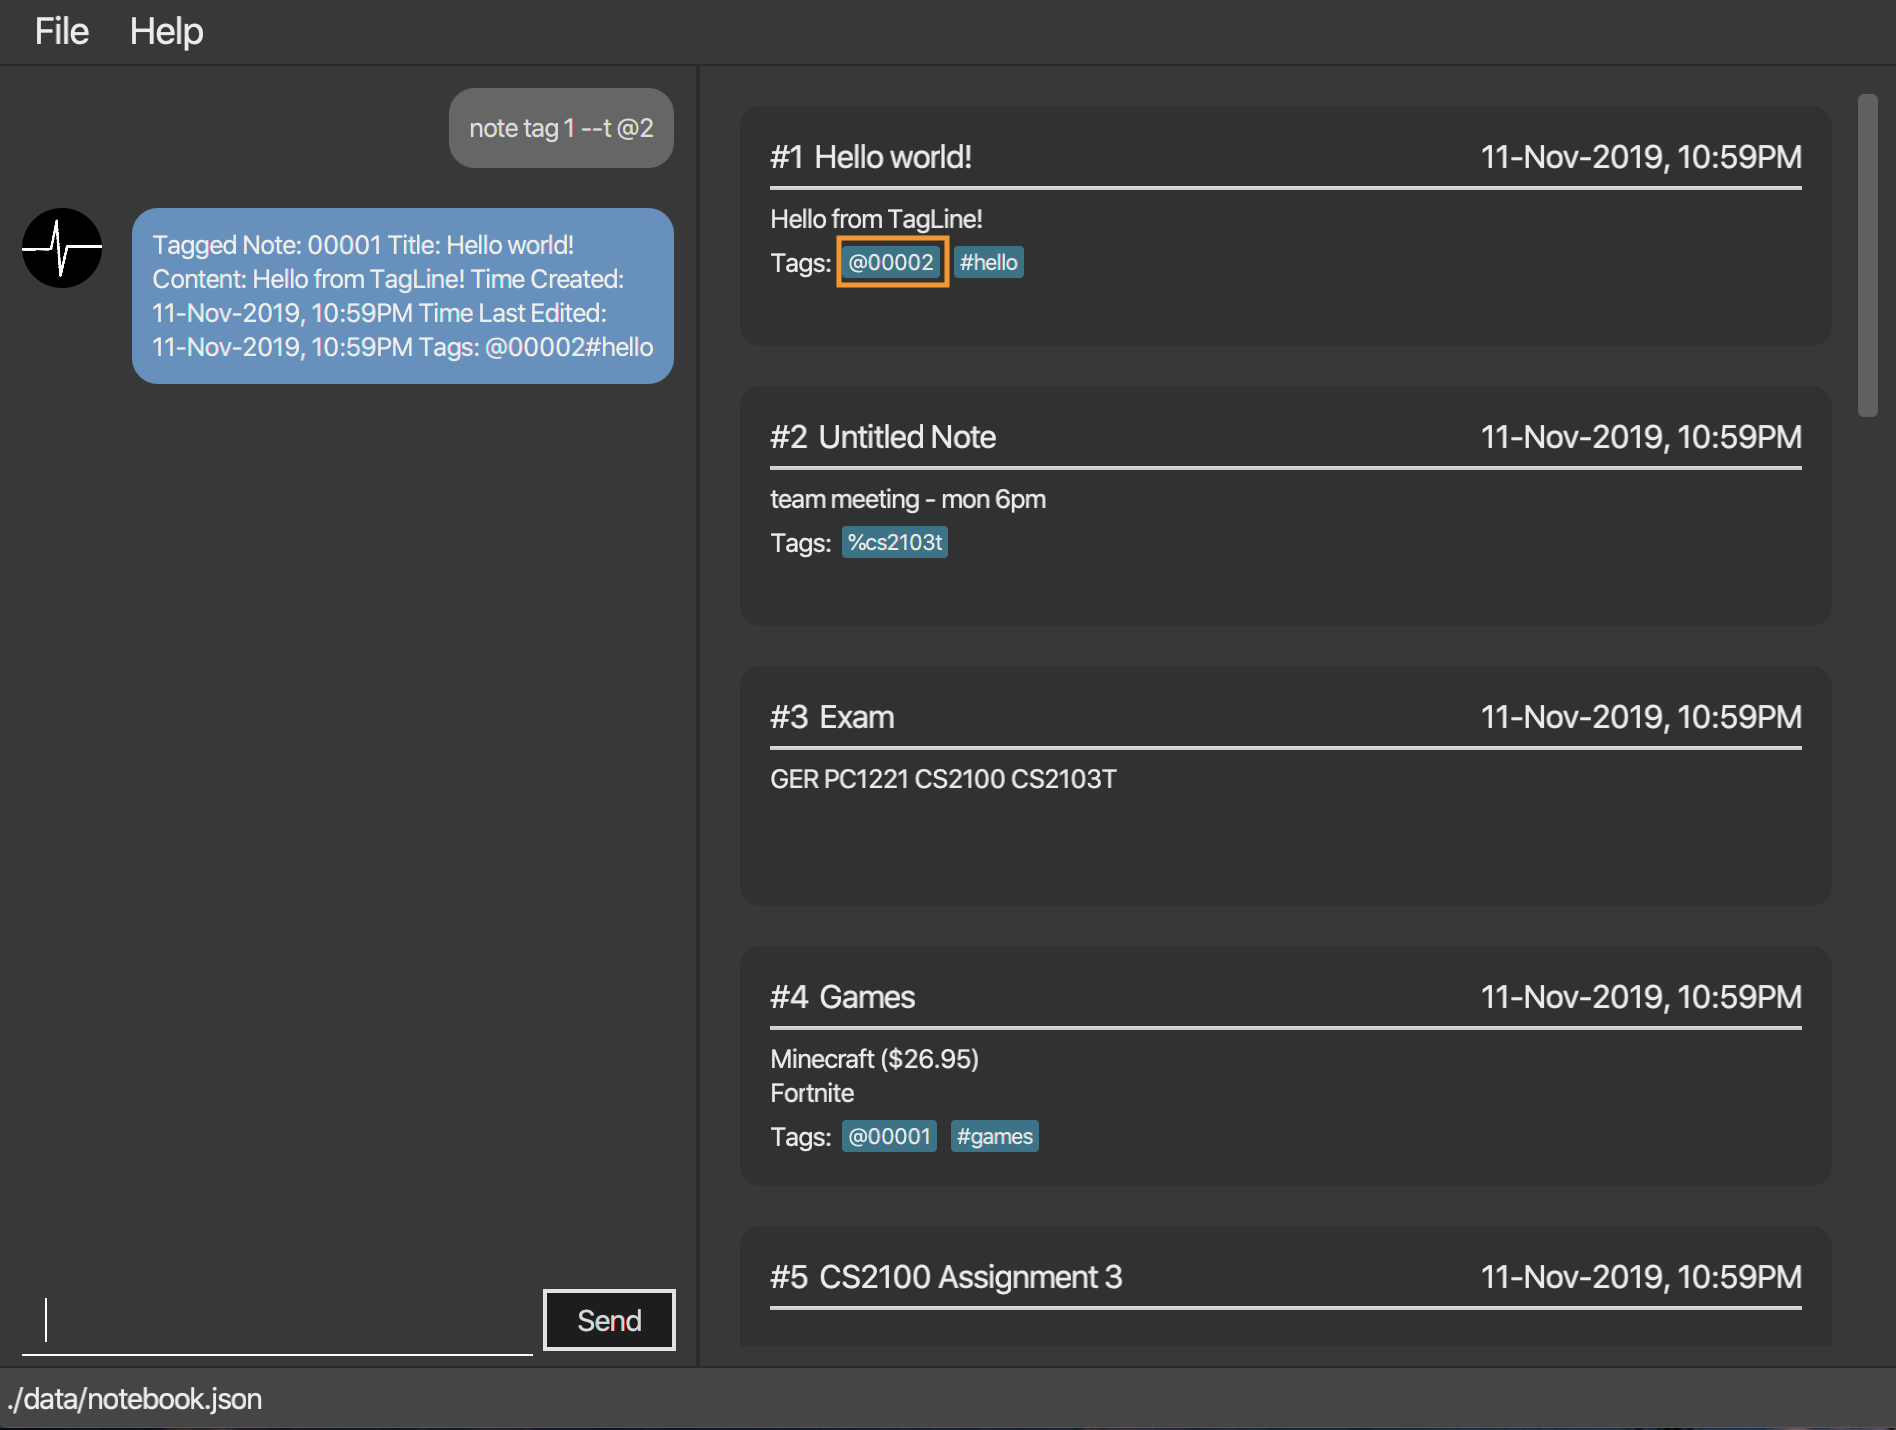
-
Send the command and you will be able to see the tag in the note view.
Tag a note with a group tag
Group tag is a tag of the form %GROUP_NAME where GROUP_NAME could be substituted with any string that does not
contain whitespace.
Example: #cs2103t, #cs2100-cs2101
By tagging a note with a group tag, user can easily find all notes related to a certain group of contacts.
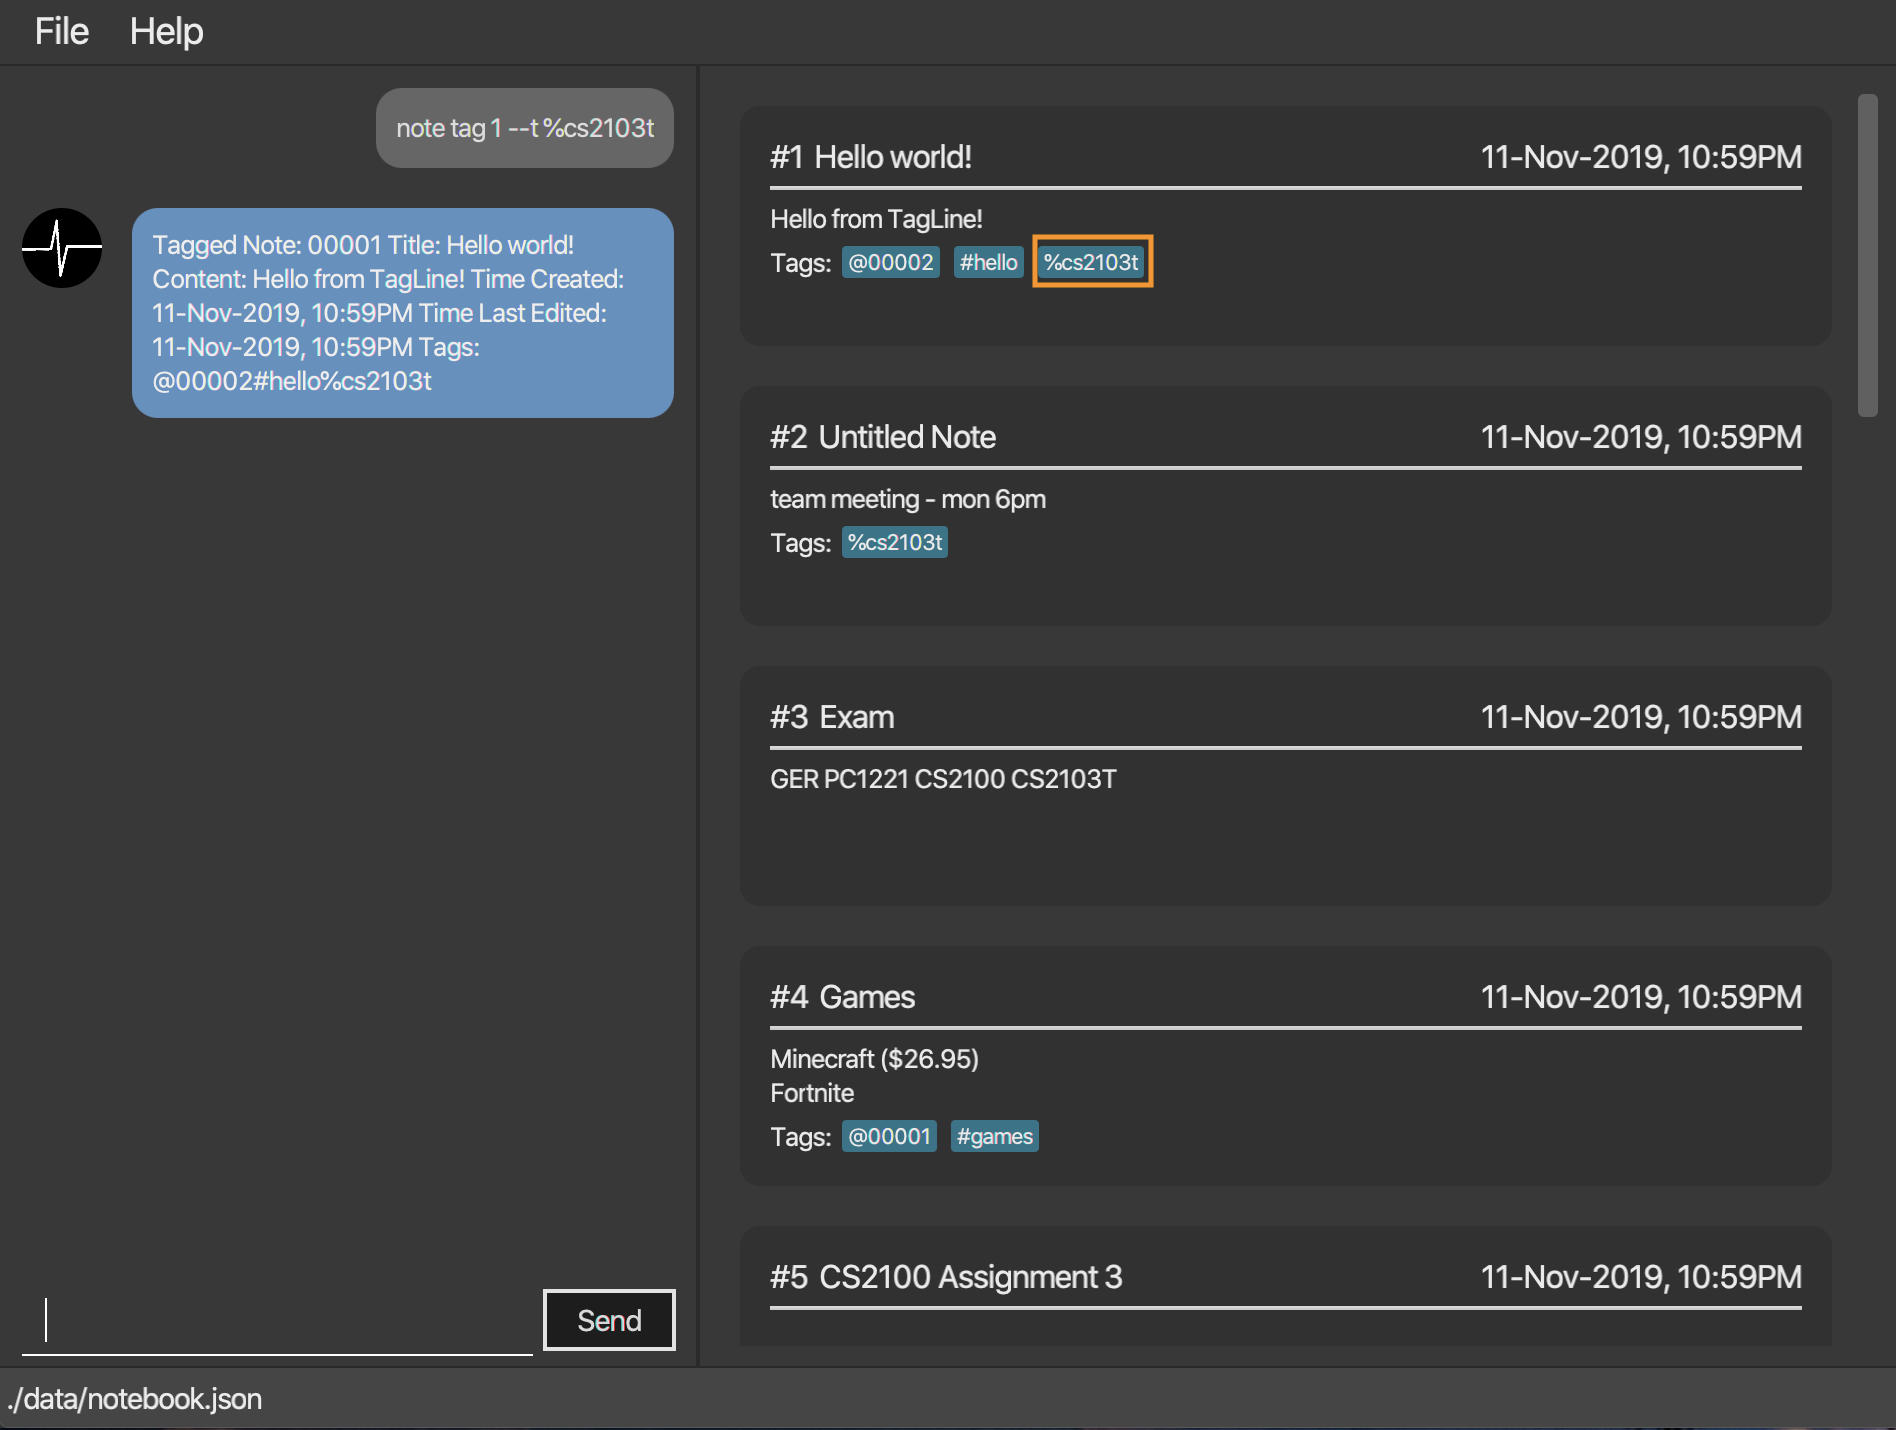
Here is an example of tagging a note with a group tag
-
Enter the command
note tag 1 --t #cs2103tinto the command box.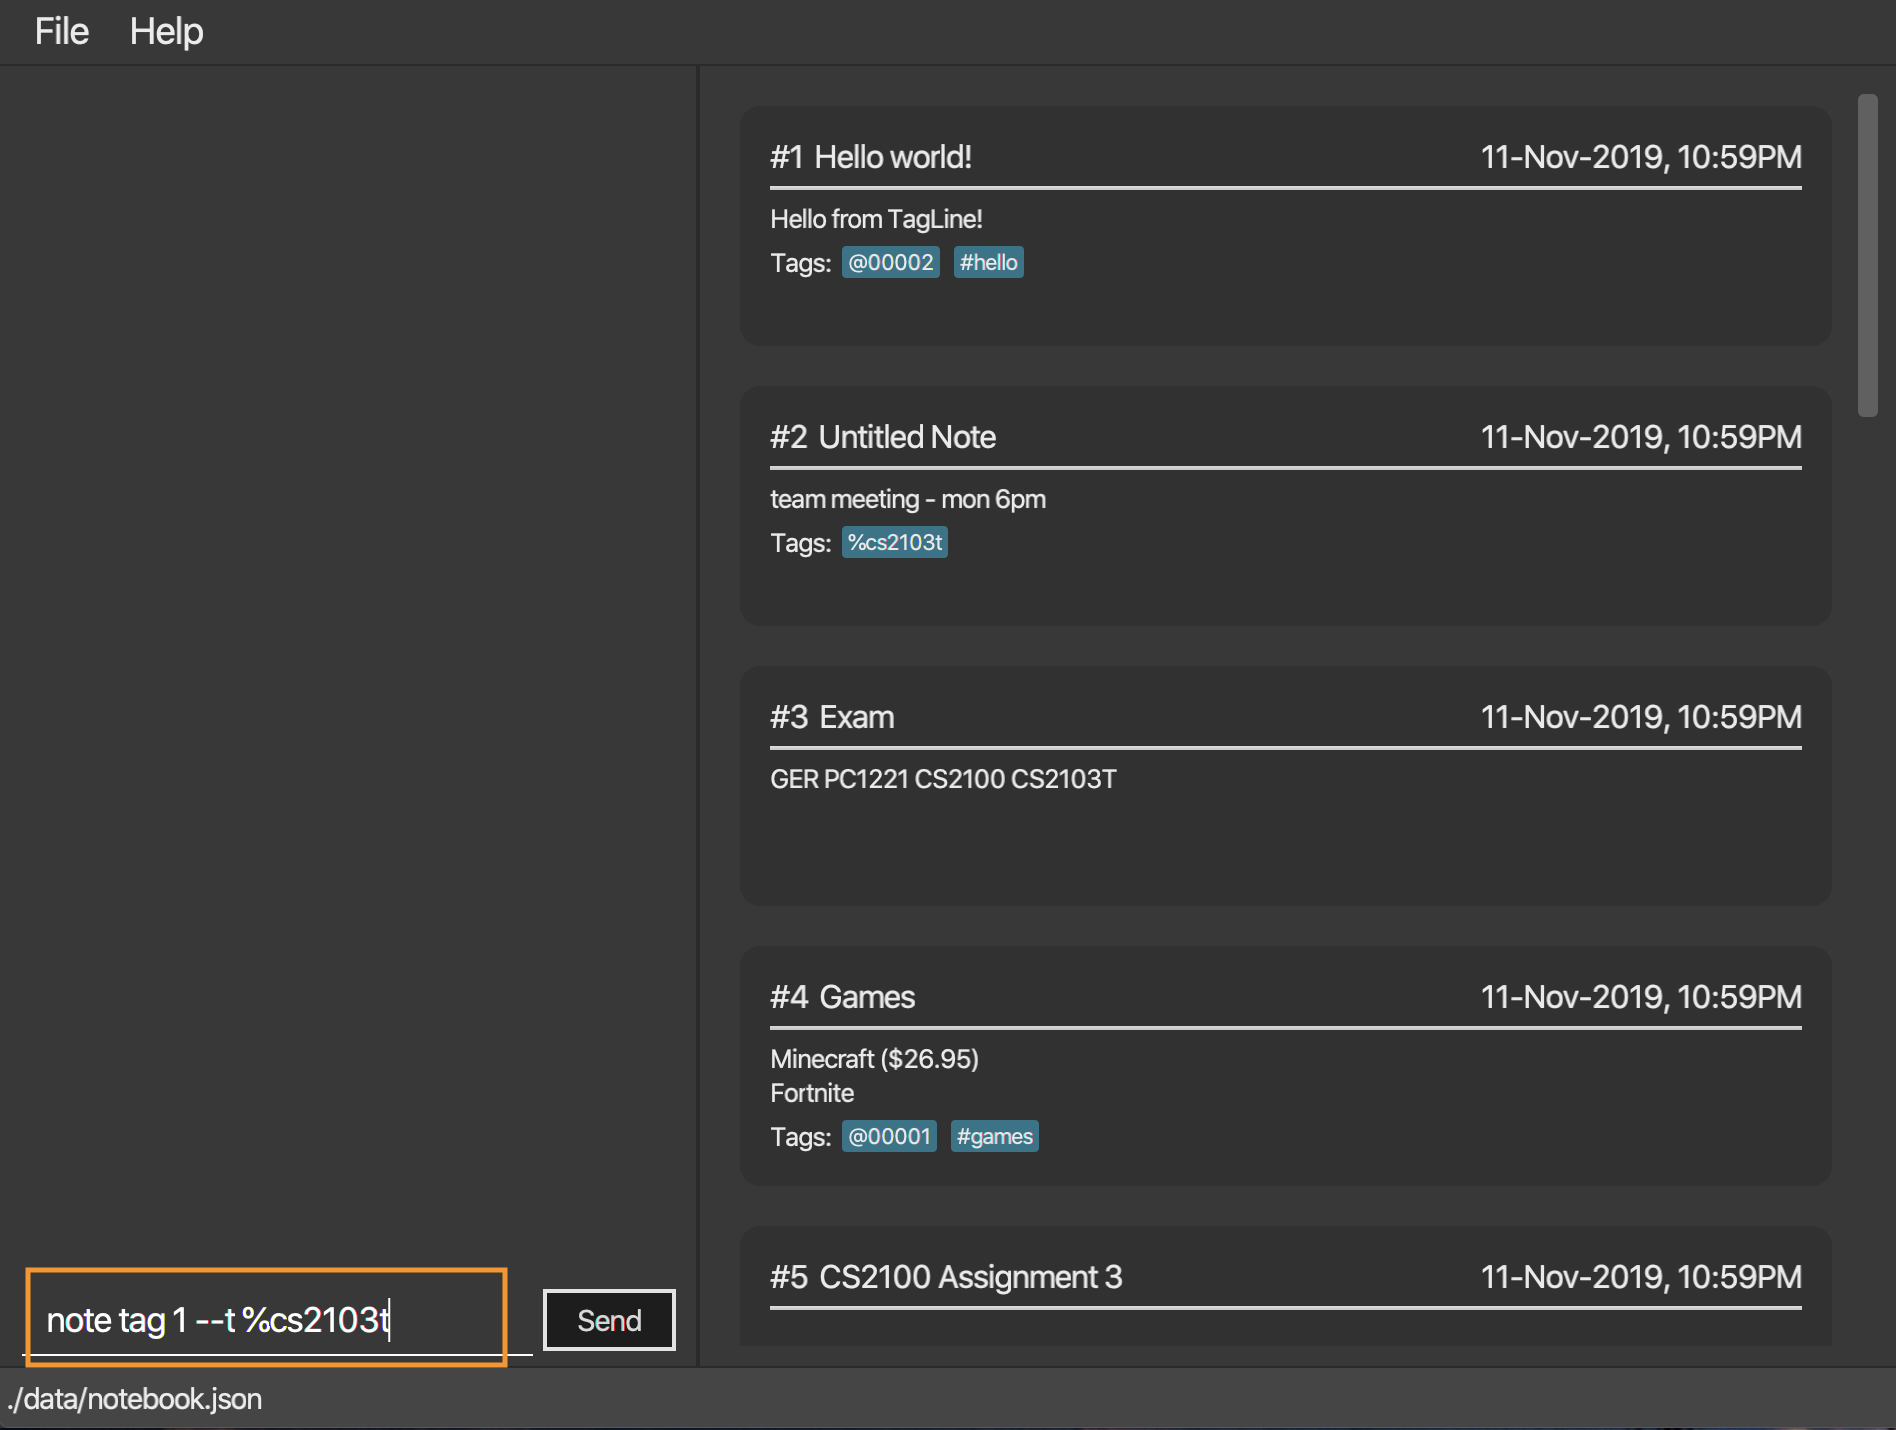
-
Send the command and you will be able to see the tag in the note view.
Tag a note with all tags
We can also combine the three tags above in one note tag command.
Example:
-
note tag 00002 --t #CS2103T --t #Duke --t @12300 --t %cs2103TTags note with id '00002' with tag '#CS2103T', '#Duke' and user with id '@12300' and group '%cs2103T'.
4.4.5. Untag a note: untag
Untags a note from one or more tags.
Format:
note untag NOTE_ID [--t TAG]+
Similar with note tag command we can also untag a note with three types of tags.
Example:
-
note untag 00002 --t #CS2103T --t #Duke --t @12300 --t %cs2103TUntags '#CS2103T', '#Duke' and user with id '@12300' and group '%cs2103T' from note with id '00002'.
4.4.6. List notes: list
Lists all notes in the application. Filters can be applied to show only notes related to certain keywords, hashtags, users or groups.
Format:
note list [# / @ / %][FILTER]
Example:
| Format | Example | Outcome |
|---|---|---|
|
|
Lists all notes. |
|
|
Lists all notes which contain the phrase “meeting”. |
|
|
Lists all notes with the hashtag '#cs2100'. |
|
|
Lists all notes tagged with the contact of ID '12345'. |
|
|
Lists all notes tagged with the group 'cs2103-team'. |
-
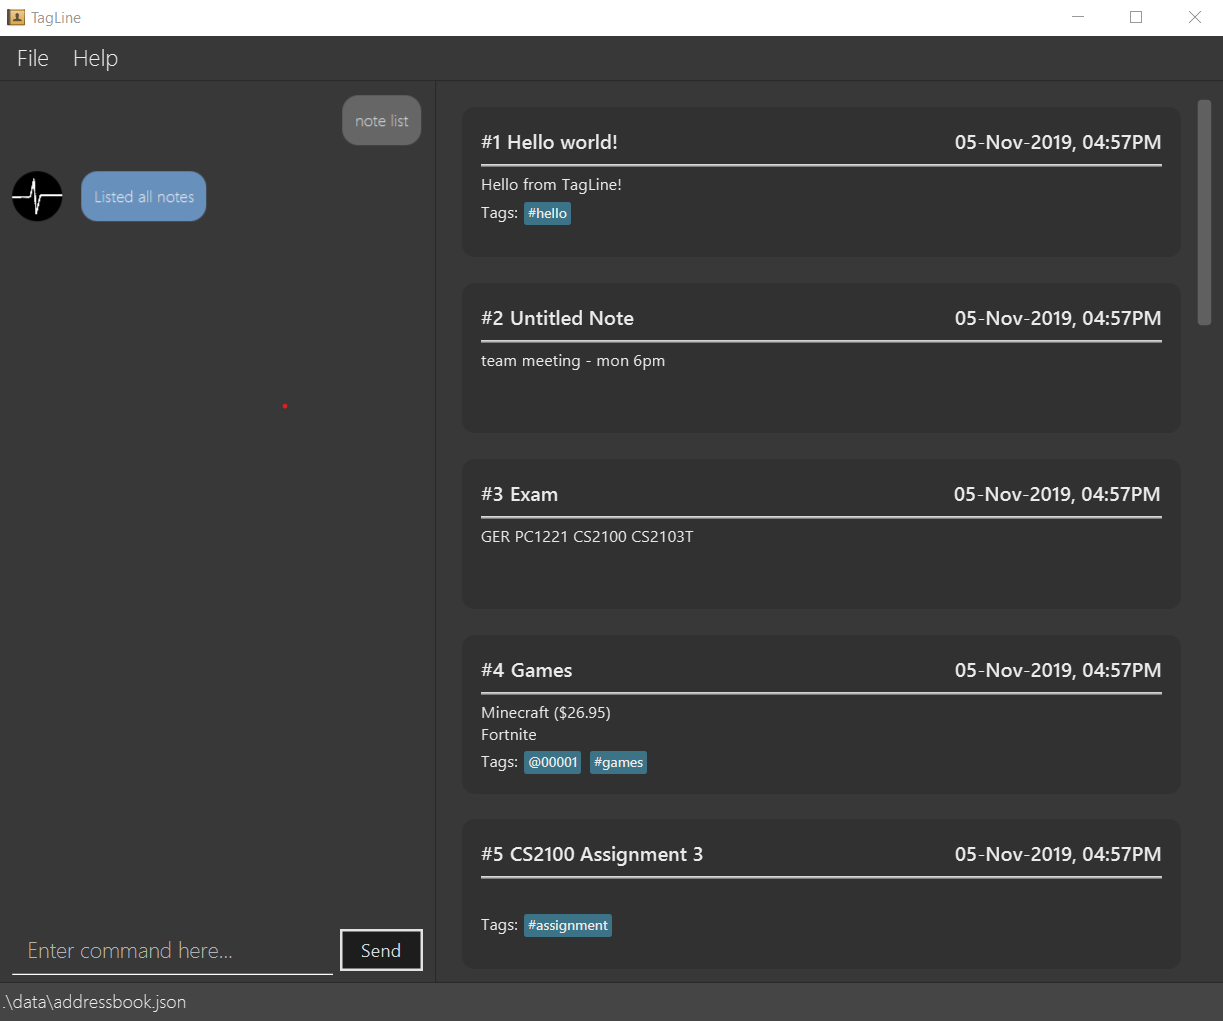
When you would like to see all the notes you have in TagLine, you can enter the command
note list.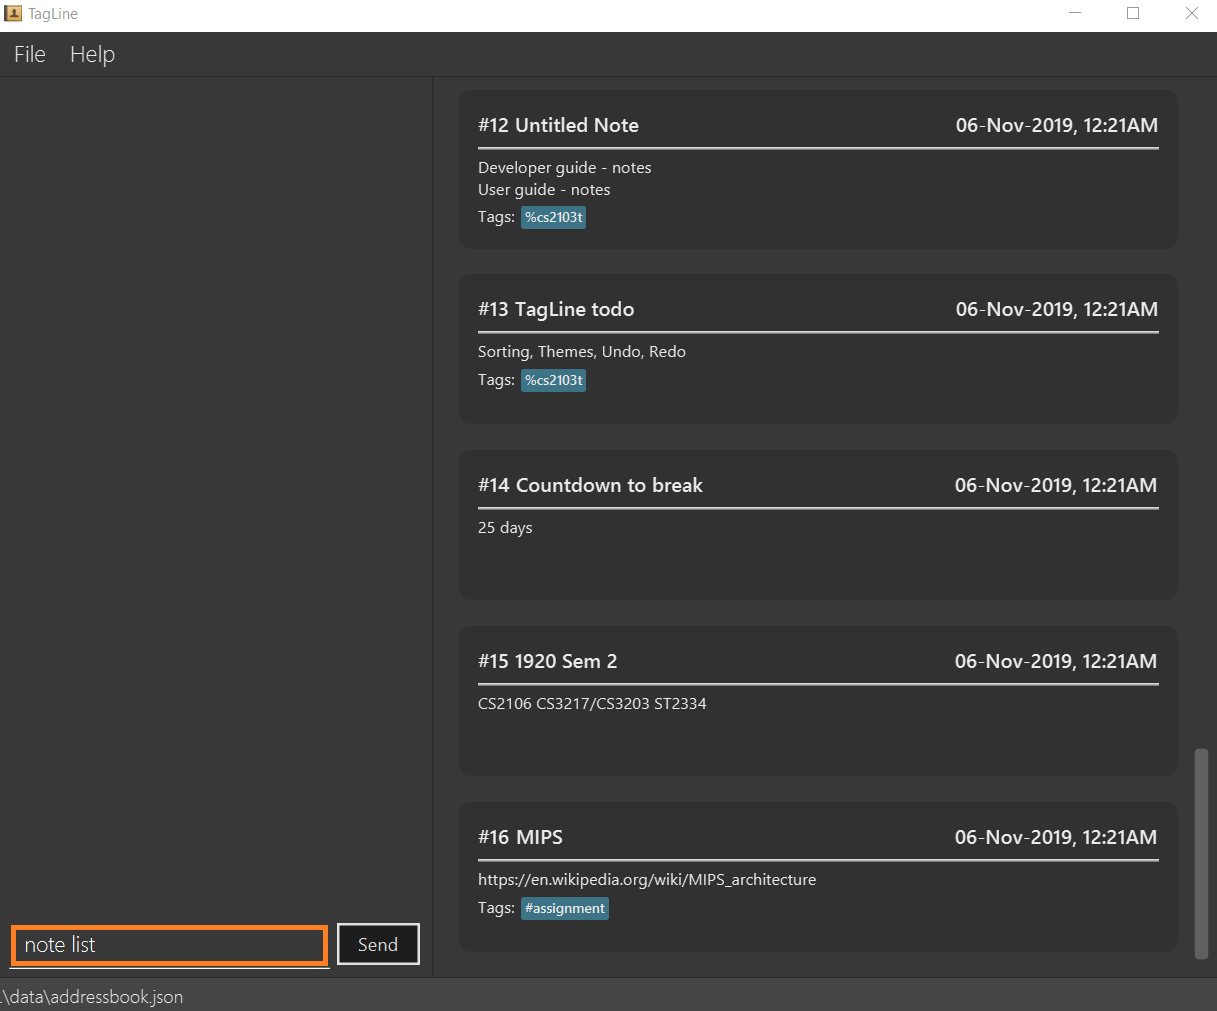 Figure 38. Entering
note listcommand -
All notes are displayed.
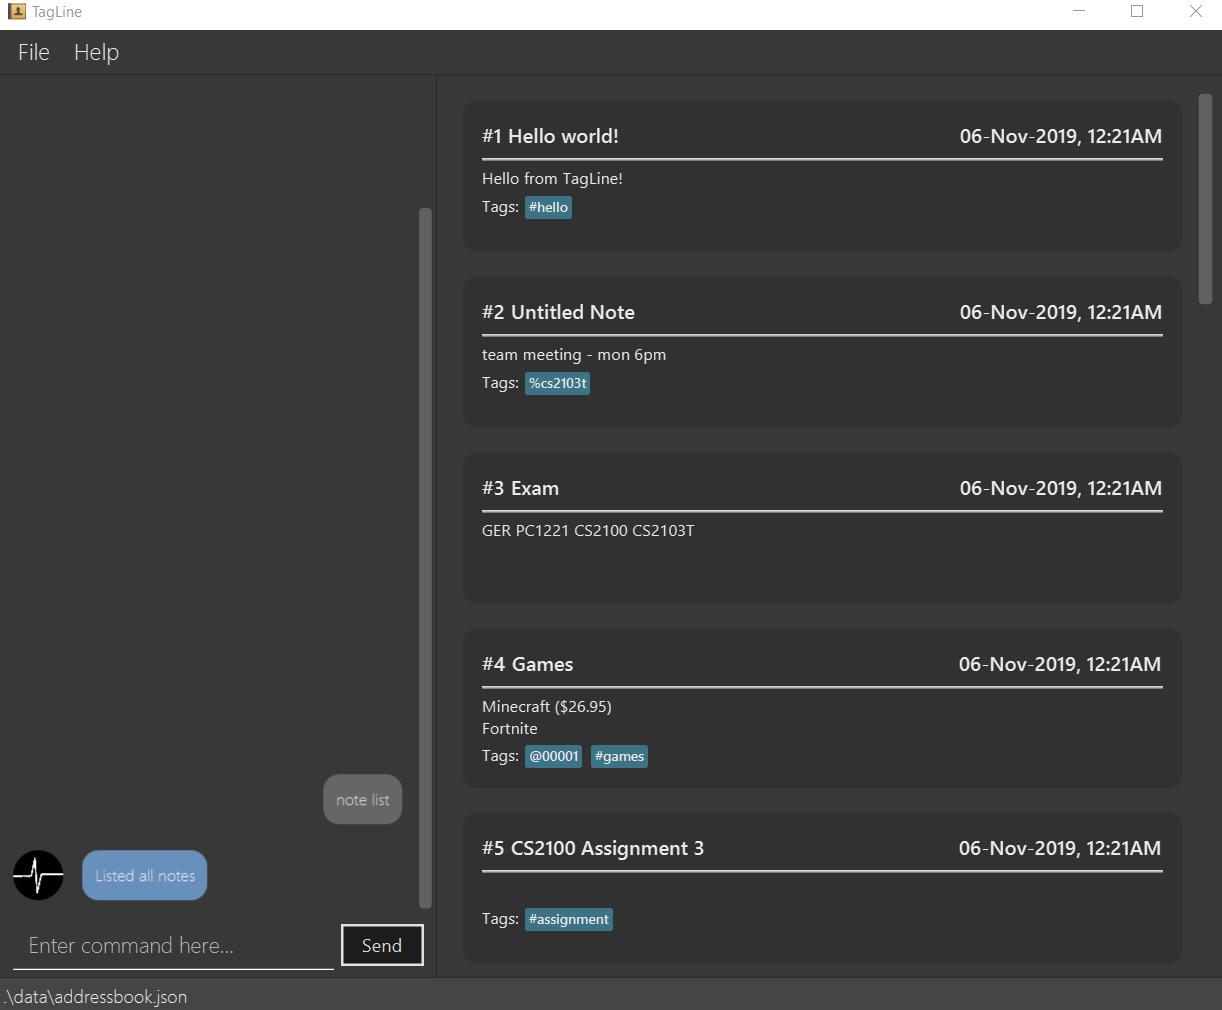 Figure 39. All notes displayed
 -
When you would like to find the notes containing the keyword "cs", you can enter the command
note list cs.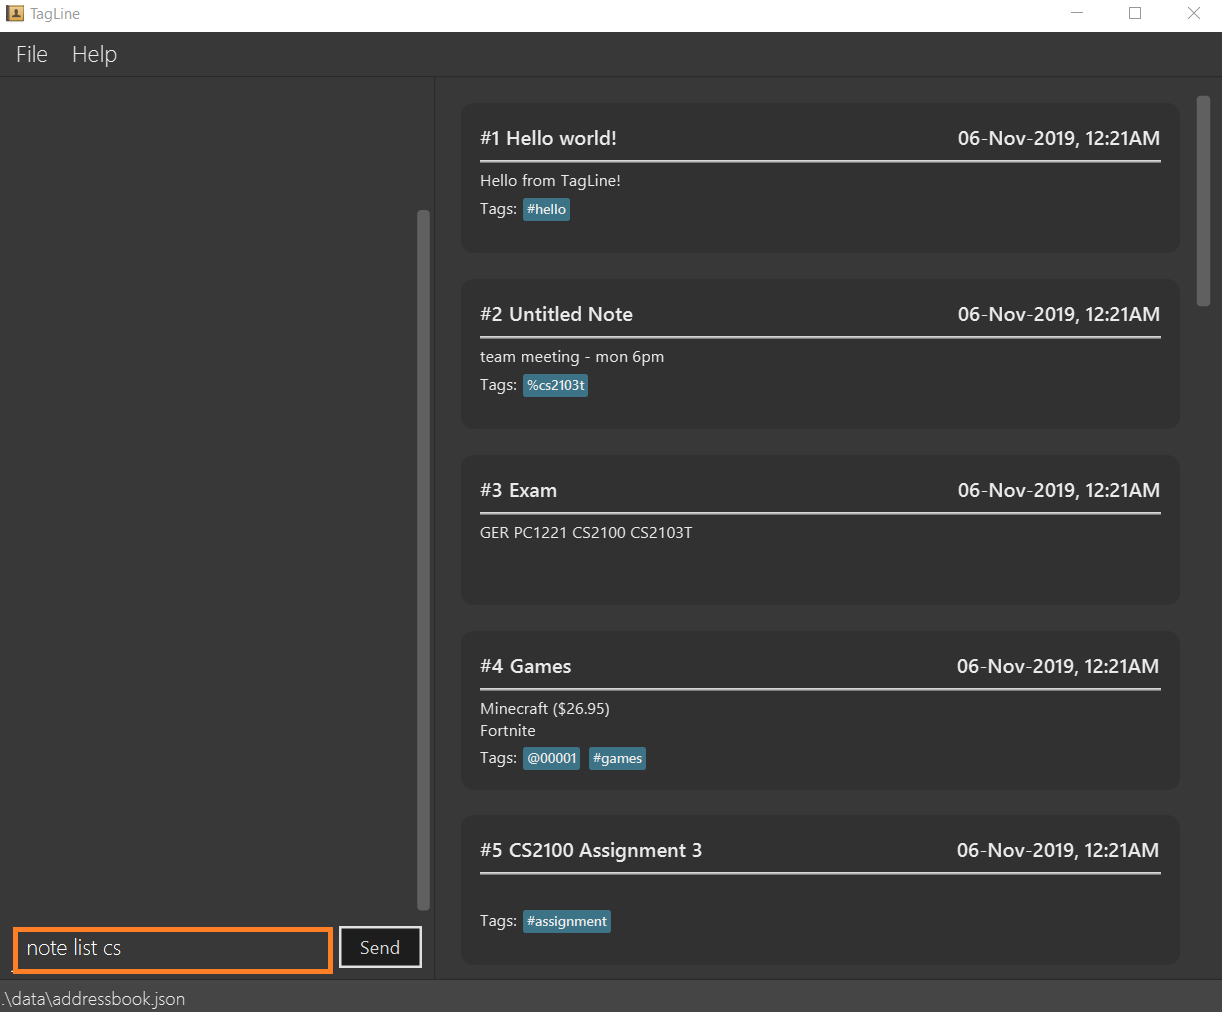 Figure 40. Entering
note listcommand with keyword -
Notes with the keyword "cs" found in the title or content are displayed.
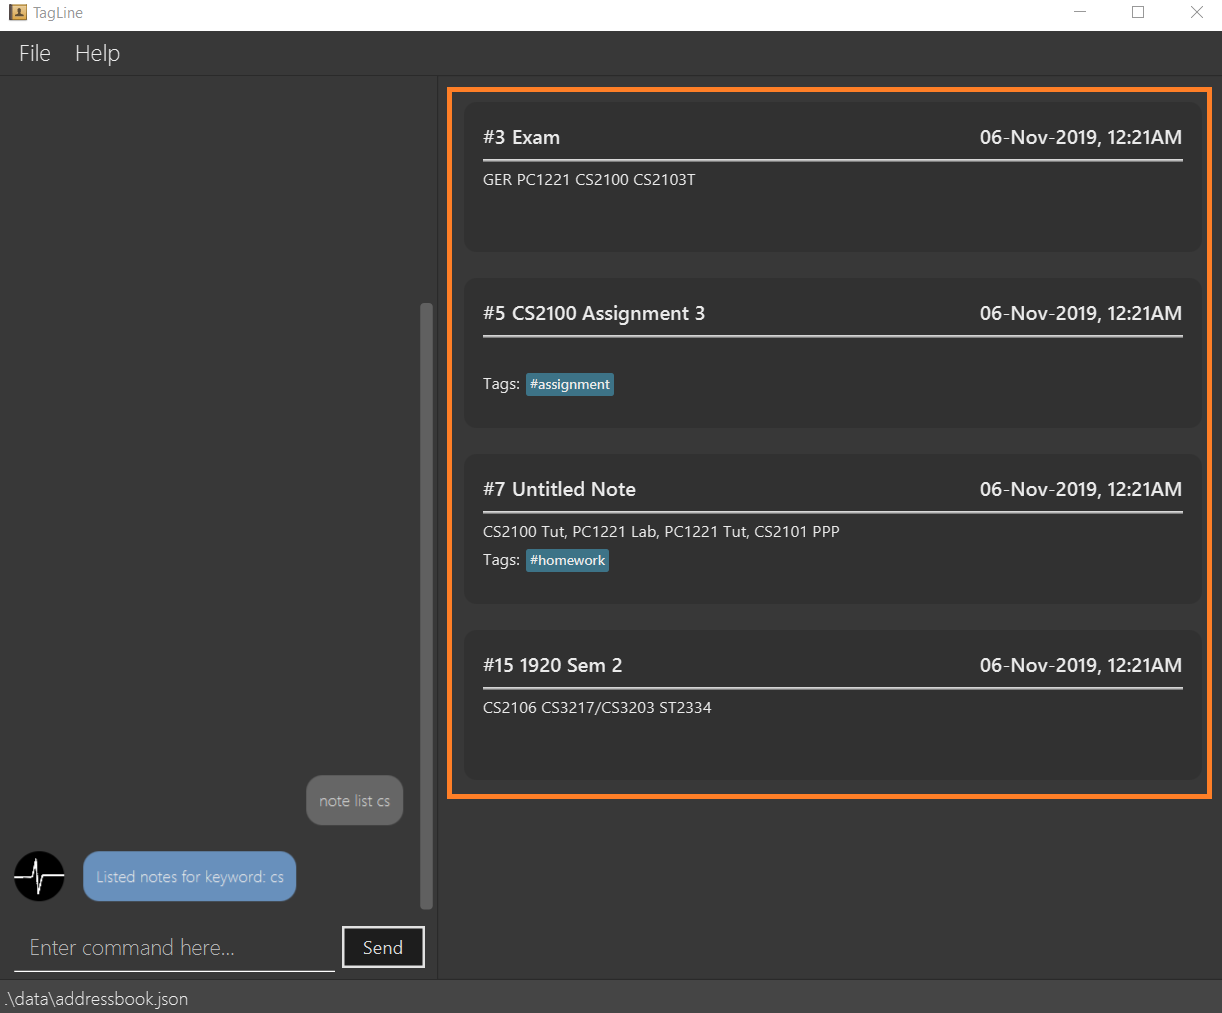 Figure 41. Notes containing keyword displayed
 -
When you would like to see the notes tagged with the hashtag "assignment", you can enter the command
note list #assignment.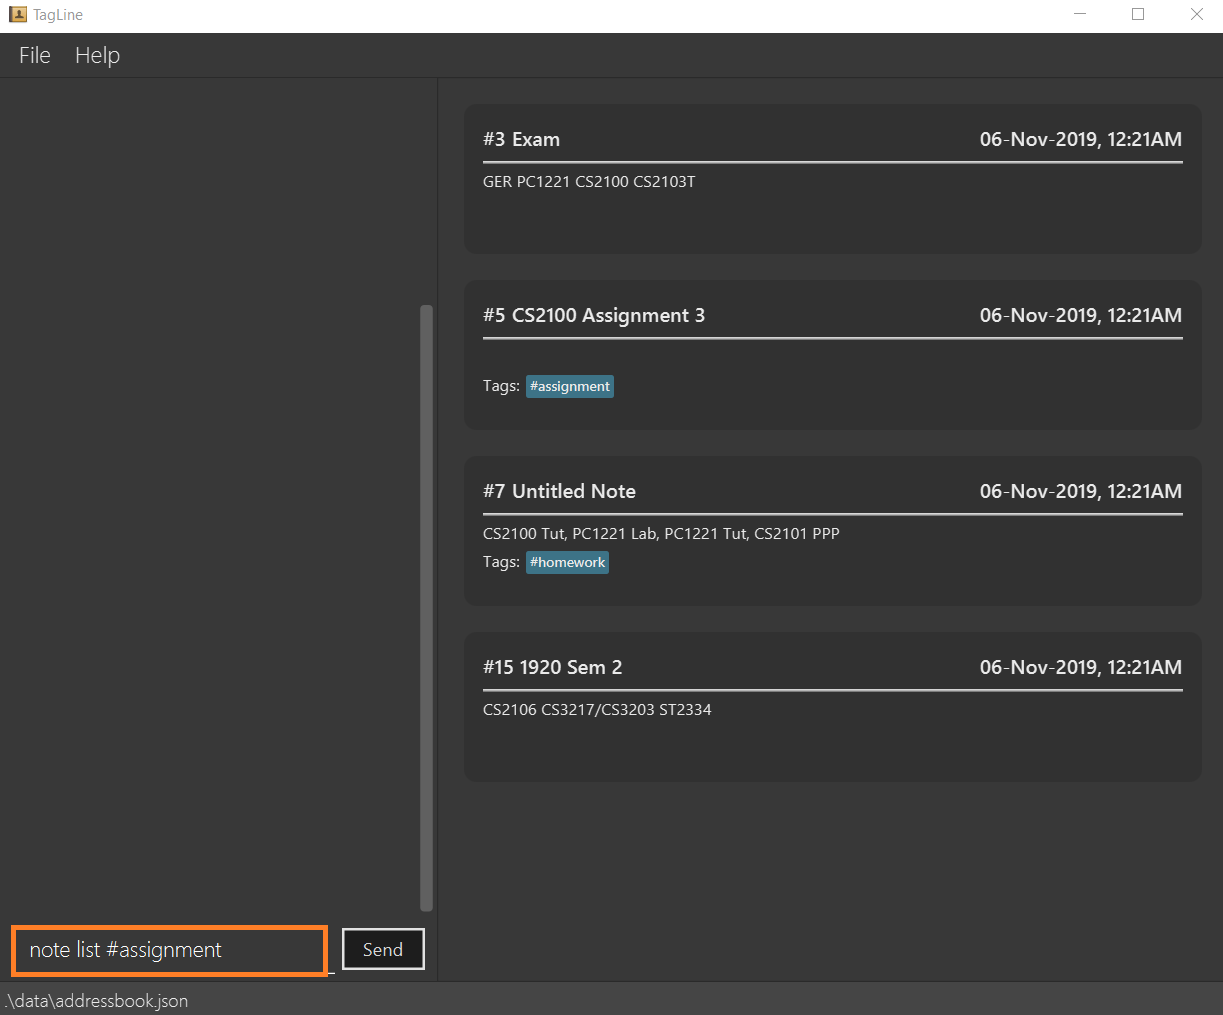 Figure 42. Entering
note listcommand with tag filter -
Notes tagged with "#assignment" are displayed.
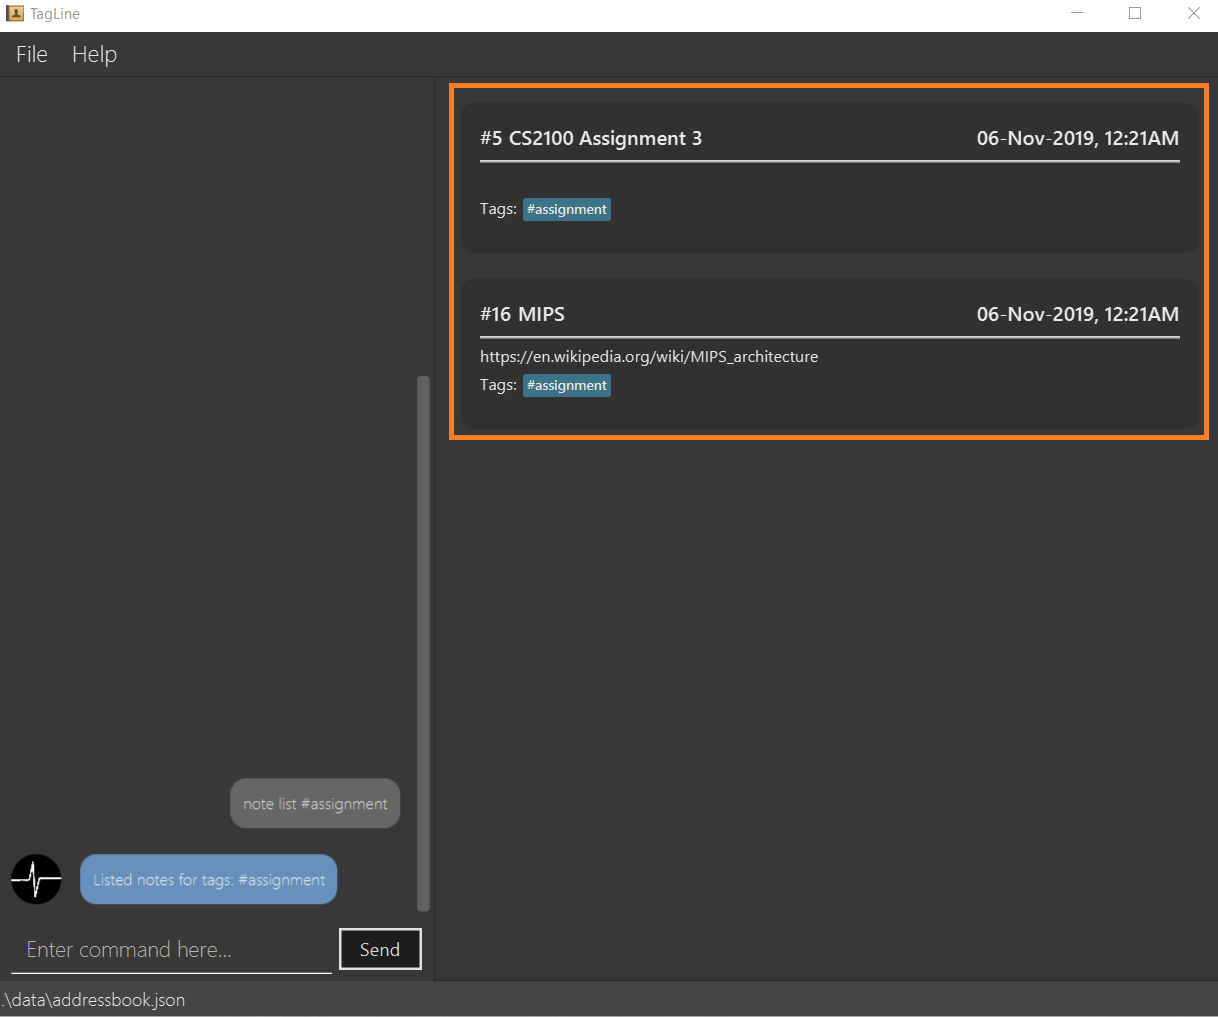 Figure 43. Filtered tagged notes displayed
 -
When you would like to filter by multiple tags, you can enter the command
note list @00001 %cs2103t.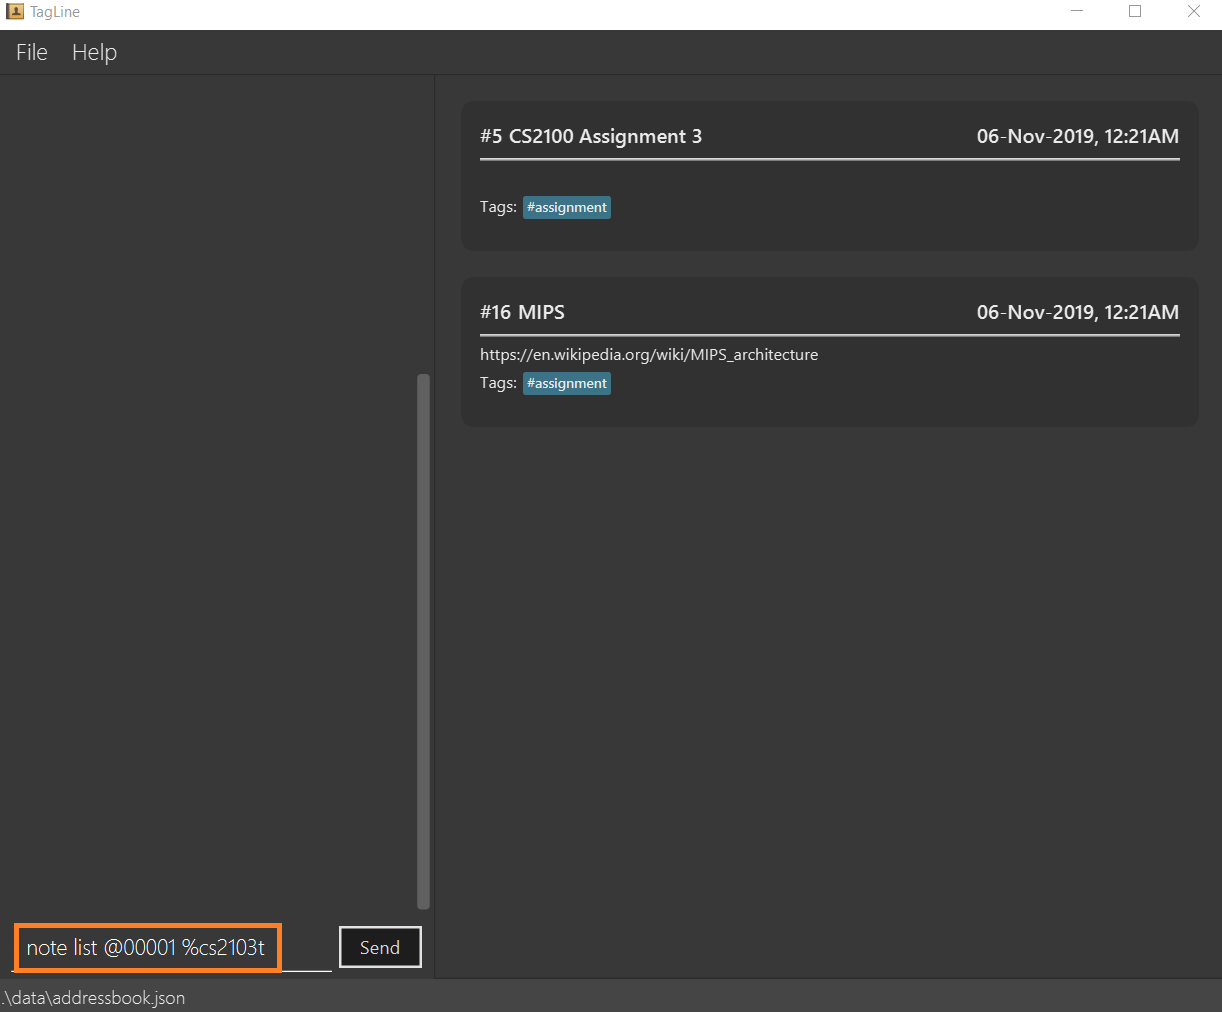 Figure 44. Entering
note listcommand with multiple tag filter -
Notes tagged with contact of contact id "1" or with group with group name "cs2103t" are displayed.
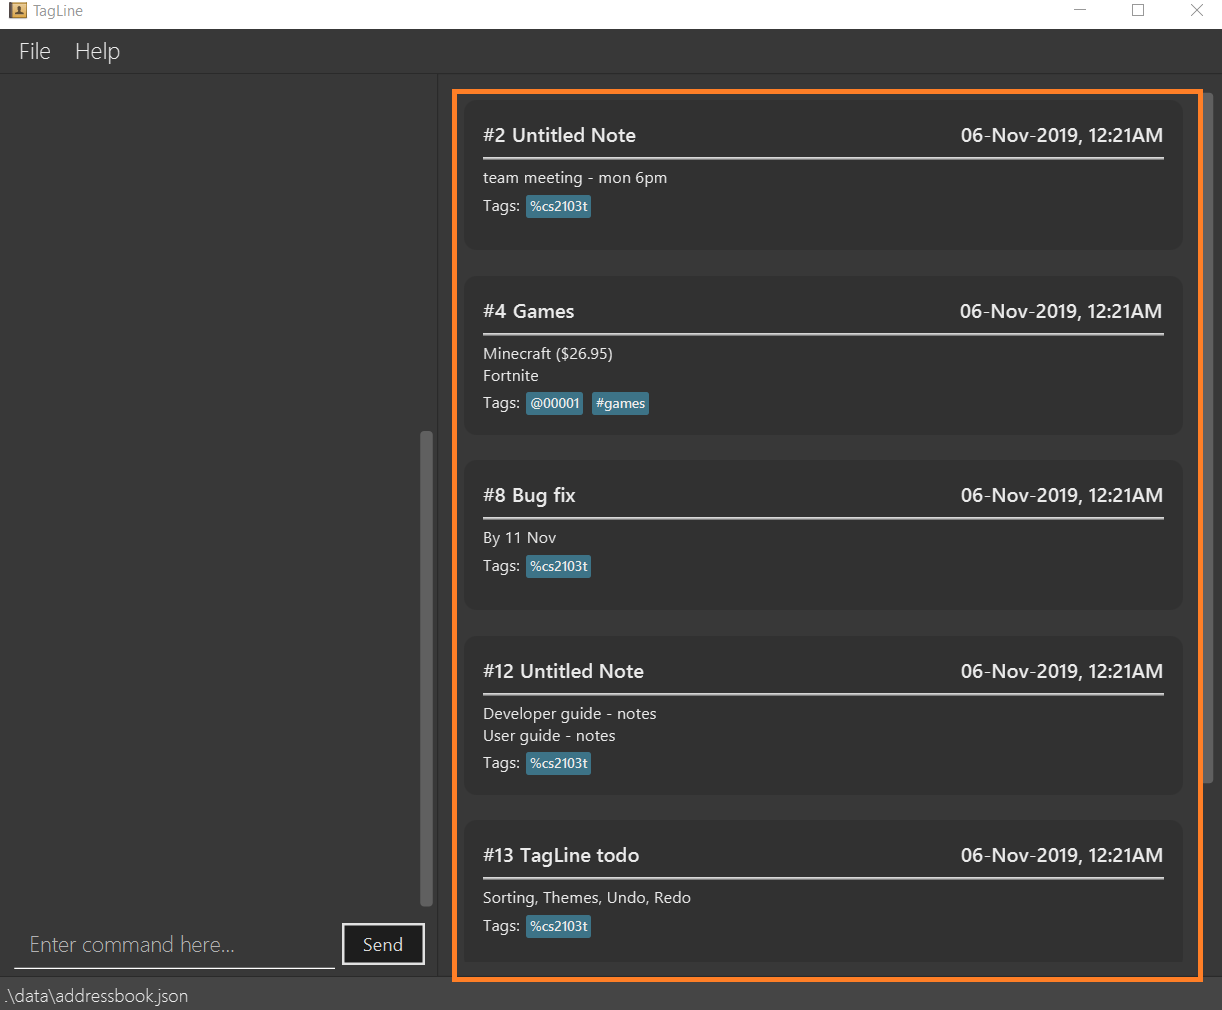 Figure 45. Filtered notes displayed
4.4.7. Clear all notes: clear
Clears all notes.
Format:
note clear
Executing this command will trigger a confirmation in the chatbot:
Please confirm some additional details for the command. Press the escape key to abort.
Are you sure you want to clear your contact list? Enter 'Y' to continue.
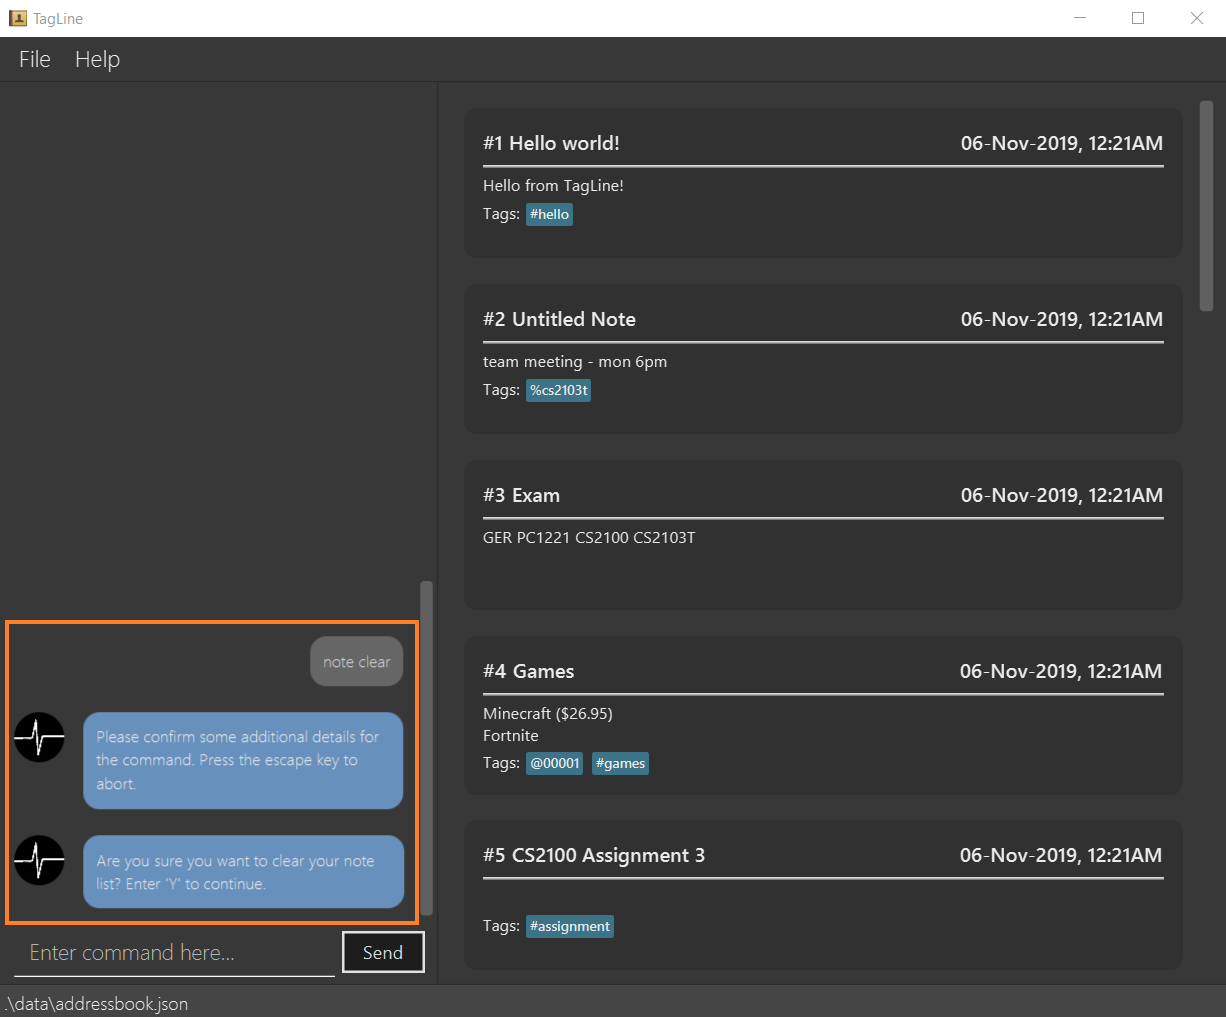
If you answer "Y", the chatbot will clear all data in your contact list.
If you press the ESC key, the command will be aborted.
4.4.8. Sort your notes: sort [coming in v2.0]
Sort notes in different orders (i.e last updated date, alphabetically).
4.5. Manage your tags: tag
4.5.1. List tags: list
Lists all valid tags that have ever been associated with your notes. A tag will appear in this list if it has been successfully used to tag a note previously. However, if a tag is no longer valid, it will be automatically removed from the list. Here are the conditions for a tag to be marked as invalid: - The tag is considered as a contact tag and the referenced contact is removed from Tagline. - The tag is considered as a group tag and the referenced group is removed from Tagline.
- NOTE
-
if you untag a note, it will still appear in this list. The tag list serves as a history to remind you of tags that you can use.
Format:
tag list
Example:
-
Suppose you want to know tags that you have used previously and still valid.
You can just use the following command:tag list.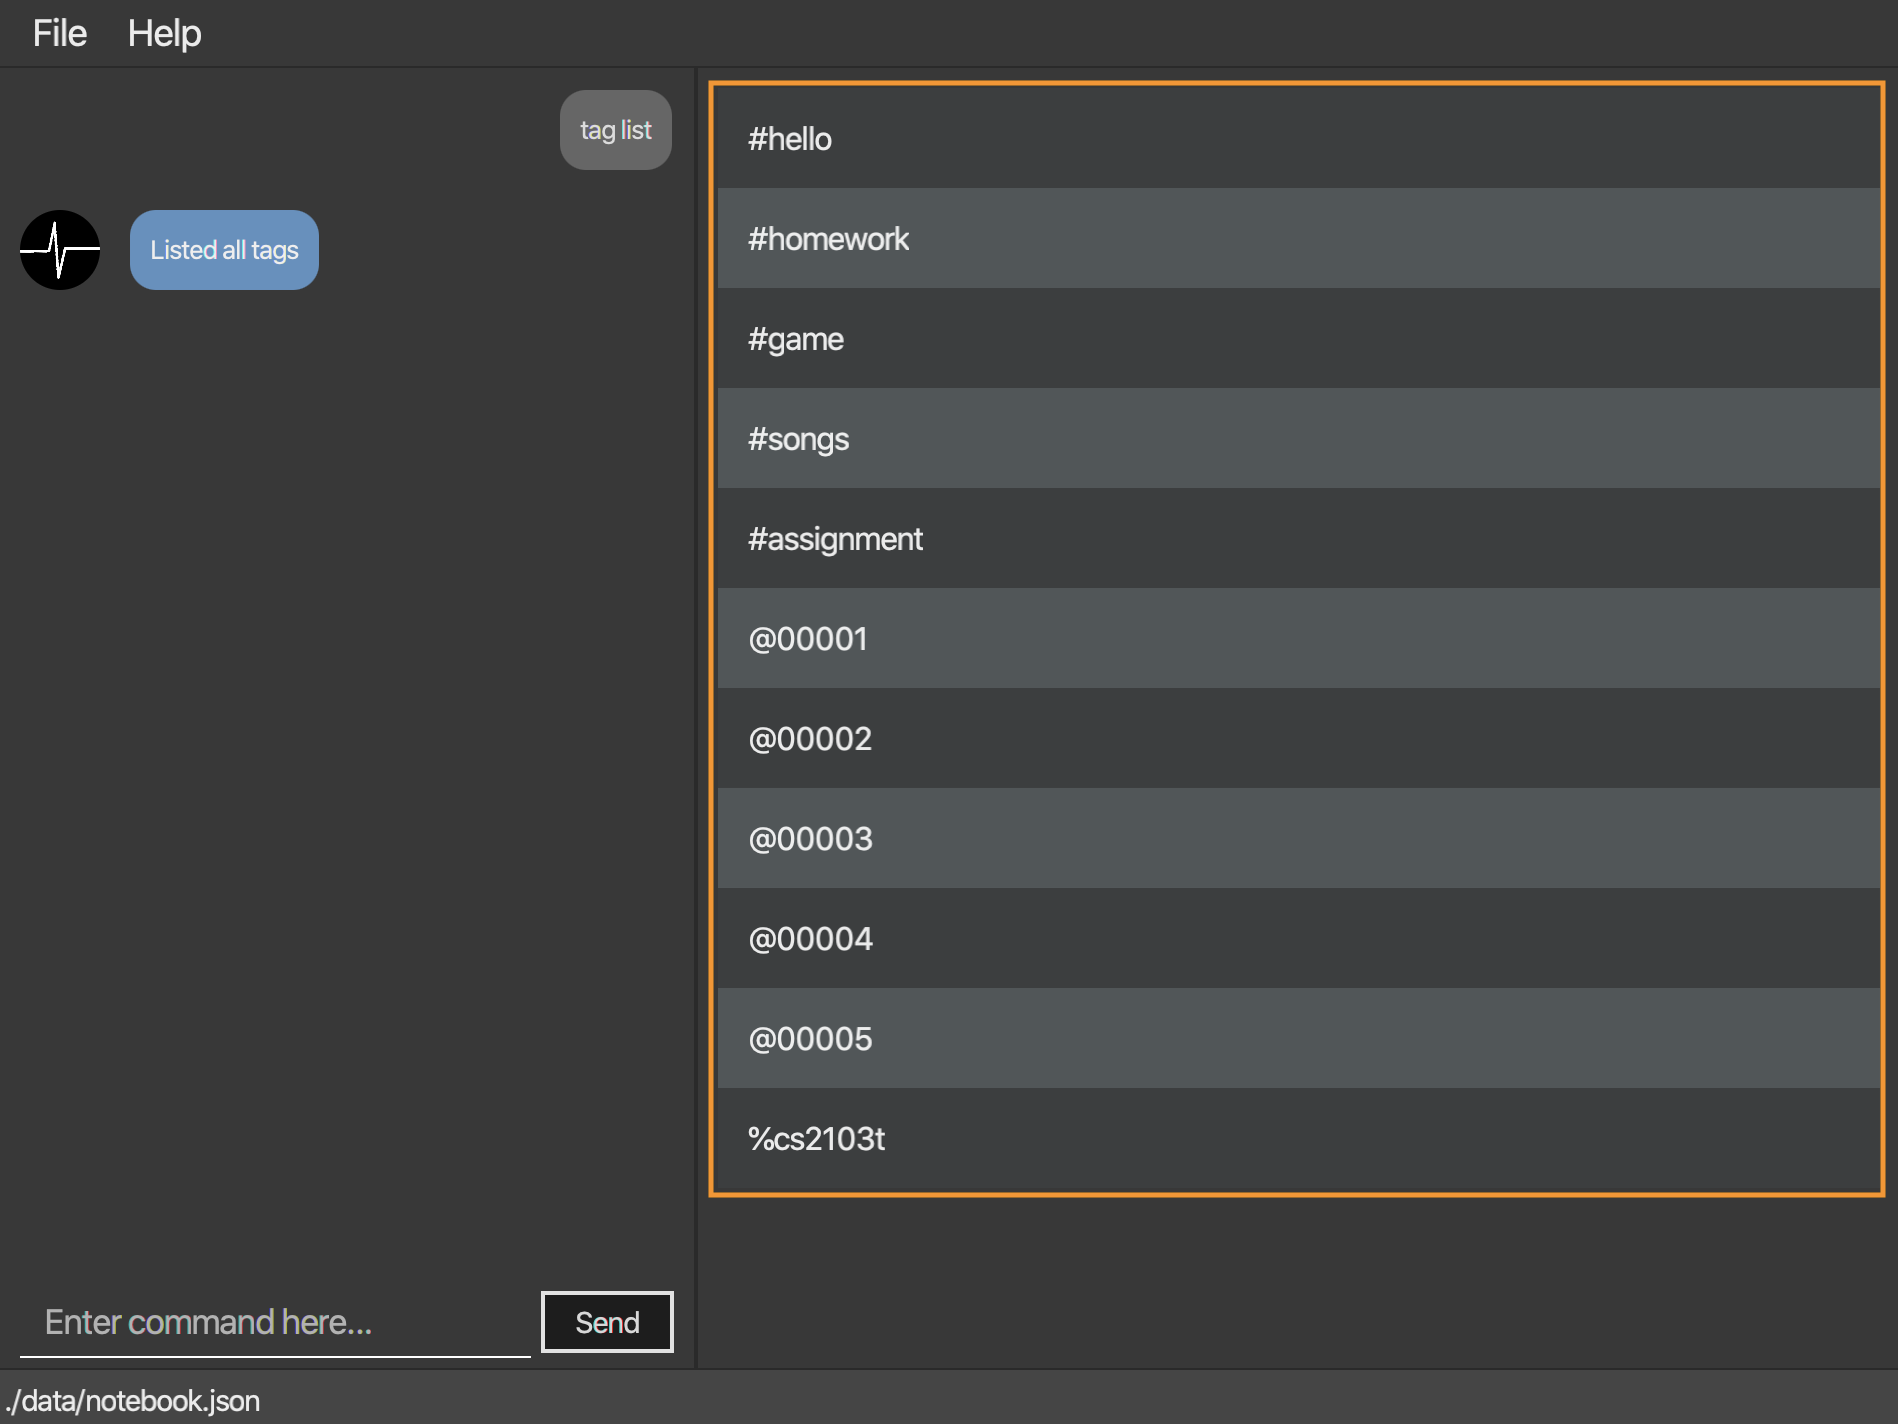 Figure 47. Command executed, list of tags displayed
5. Command summary
Contact
-
Create a contact:
contact create --n NAME [--p PHONE_NUMBER] [--e EMAIL] [--a ADDRESS] [--d DESCRIPTION] -
List all contacts:
contact list -
Display profile of a contact:
contact show CONTACT_ID -
Edit a contact:
contact edit CONTACT_ID [--n NAME] [--p PHONE_NUMBER] [--e EMAIL] [--a ADDRESS] [--d DESCRIPTION] -
Delete a contact:
contact delete CONTACTID -
Find contact by keyword:
contact find KEYWORD -
Clear all contacts:
contact clear
Group
-
Create a group:
group create GROUP_NAME [--i CONTACT_ID]* -
Remove a member from group:
group remove GROUP_NAME [--i CONTACT_ID]+ -
Add a member to group:
group add GROUP_NAME [--i CONTACT_ID]+ -
List all groups:
group list -
Find a group:
group find GROUP_NAME -
Delete a group:
group delete GROUP_NAME
Note
-
Create a note:
note create [--T TITLE] [--c CONTENT] [--t TAG]* -
Delete a note:
note delete NOTE_ID -
Edit a note:
note edit NOTE_ID [--T NEW_TITLE] [--c NEW_CONTENT] -
Tag a note:
note tag NOTE_ID [--t TAG]+ -
Untag a note:
note untag NOTE_ID [--t TAG]+ -
List all notes:
note list -
Filter notes by keyword:
note list [KEYWORD]+ -
Filter notes by tag:
note list [TAG]+ -
Clear all notes:
note clear
Tag
-
List all tags:
tag list